


Removing the Front Fascia from a GEN II
Parts:
- Blue painters tape
- Protective pad/blanket
- New fascia panel retainers (Chrysler # 6501067, tree fasteners)
http://www.amazon.com/Facia-Panel-Re.../dp/B0040CZ4EQ
http://www.clipsandfasteners.com/Fac...pas5632-50.htm
Tools:
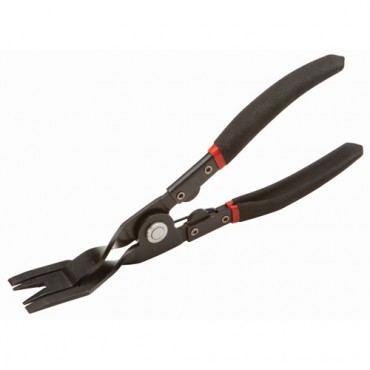
- Panel clip pliers (for fascia panel retainer removal)
Harbor Freight
http://www.harborfreight.com/panel-c...ers-67399.html
Amazon.com
http://ecx.images-amazon.com/images/I/41VAMPmGJ6L.jpg
http://www.amazon.com/KD-Tools-3705-.../dp/B000NP2SBG- 7/16” socket (under fascia hex body bolts behind the bottom chin spoiler, 11 total)
- 5/16” socket or wrench (wheel well hex screws, 5 on each side)
- 3” or 4” drive socket extension (under fascia hex body bolts behind the bottom chin spoiler)
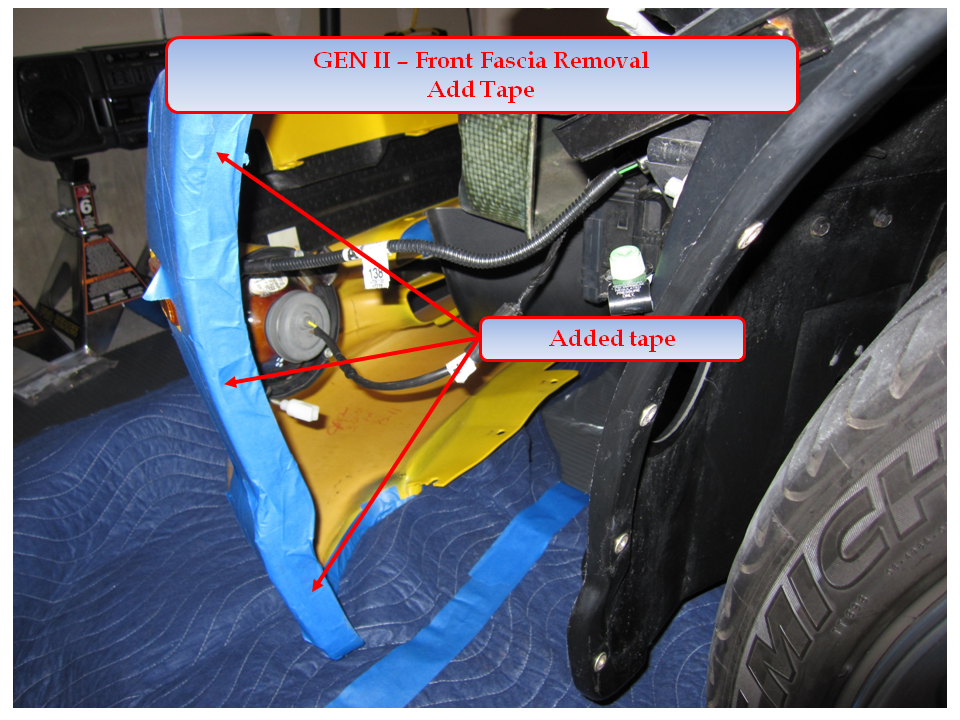
Tape off the areas of the front fascia that will be susceptible to scratching…
- the areas around the outer ends of the fascia and inside the wheel wells from the headlight to the very bottom
- the areas in the crosshairs just below the 4 fascia panel retainers
- the areas in the crosshairs surrounding the 4 fascia panel retainers
Put a protective pad/blanket down on the floor just below the front fascia so that when you are pulling it off the viper, it can be set down to unplug the wiring harnesses.
Remove all of the front fascia fasteners (5 hex screws at each wheel well opening, 4 fascia panel retainers inside the crosshairs, 11 hex bolts under the fascia and 7 fascia panel retainers on top of the fascia) before attempting to remove the fascia. Be looking for shims to fall out of the fascia/wheel well area. I didn’t have any, but I’ve heard that they may be there. I did have a stack of 3 shims on the middle fascia panel retainer on the top of the fascia.

I also had a very unusual looking shim on the driver side fascia panel retainer located just below the headlamp.

Don’t worry about mangling or breaking the fascia panel retainers. They are designed as a single-use product. They should be replaced with new ones (Chrysler # 6501067, fascia panel retainers).
Remove the 5 hex screws at each wheel well opening using a 5/16” socket or wrench
If this is the first time that you’re removing the front fascia, I would recommend that you add more painters tape over the entire area where these screws were removed before you actually start removing the fascia.
There will be binding in the area between the fascia and the wheel well once you start pulling the end of the fascia out away from/around the wheel well (which comes later). The ends of the fascia can be scratched by the outside end of the wheel wells.
Remove the 4 fascia panel retainers located inside the crosshairs using the panel clip pliers.
Be very careful not to scratch the paint around and below the retainers as they will not come out easily.
Remove the 11 hex bolts located under the front fascia just behind the bottom chin spoiler using a 7/16” socket (a small drive socket extension is very handy here). There are small fascia outboard close out panels at each end of the fascia that can be easily removed once the 2 closest to the outside hex bolts have been removed from each end of the fascia.
Open the hood (it does not need to be removed).
Remove the 7 fascia panel retainers located on the top of the fascia just inside the hood using the panel clip pliers.
- The 3 in the very middle are the easiest. Leave the center one in place until all others have been removed so that the fascia will remain in place until final removal.
- The next one out on the passenger side may require that you loosen the Hood Ajar Switch located near the passenger side hood latch and headlamp. Pull up while rocking the switch out of the switch mounting bracket.
- The next one out on the driver side may require that you remove the Hood Slam Bumper located near the driver side hood latch and headlamp. Mark the threads of the slam bumper to determine the replacement height. Rotate the slam bumper counterclockwise and remove it from the hood latch.
- The 2 outermost fascia panel retainers are a BIATCH to remove. There is one located just below each headlamp. This is a picture of the outermost driver side retainer.
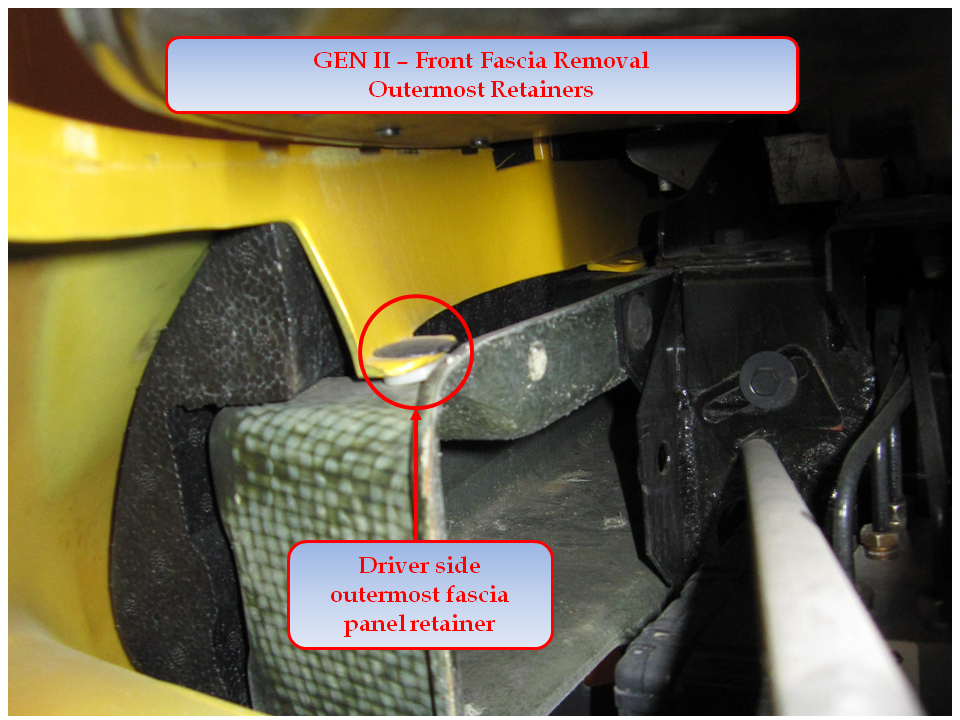
- The outermost retainers can be accessed by pulling the end of the fascia away from the wheel well.

- The panel clip pliers can be maneuvered into the opening. You have to balance how much you feel comfortable pulling on the fascia (as it will be binding) with how much space you need to get the retainer removed. You only need to get the head of the retainer removed/broken off. The fascia can be lifted over any remaining retainer stump. You can use any tool of your choosing to get these out. A sharp tool may be used to cut the tops off the retainers.
Pull the outermost ends of the fascia away from the wheel wells (if you haven’t already done this). Let the ends of the fascia sit against the outside edge of the wheel well (hopefully this area has been taped off for protection against scratching). The fascia can be pulled away from the reinforcement bar. You may have to pull up and then out if you weren’t successful in fully removing those two outermost fascia panel retainers. Set it down on the protective pad/blanket.
Disconnect the side marker lamp and fog lamp wiring harnesses. You may want to mark each harness so that they don’t get crossed during the installation (although this can be checked/tested by turning on the lights during the installation process). Disconnecting these harnesses can be completed at the very beginning by accessing the wiring harnesses through the wheel well rubber plugs (4” in diameter) located on the front most side of each front wheel well.

There will probably be some debris that falls out and is caught in and around all of the close out panels.
Results 1 to 20 of 20
Thread: Front Fascia Removal - GEN II
Hybrid View
-
10-24-2013 #1Enthusiast


- Join Date
- Oct 2013
- Location
- Viper Drive, AZ
- Posts
- 793
Front Fascia Removal - GEN II
-
03-10-2014 #2Enthusiast
- Join Date
- Jan 2014
- Location
- US
- Posts
- 383
Greatest how-to ever
-
03-16-2014 #3Enthusiast
- Join Date
- Nov 2013
- Posts
- 1,711
Or close, nice how to! Originally Posted by GhostStalker27

-
03-11-2014 #4Enthusiast
- Join Date
- Oct 2013
- Location
- South of London, Surrey
- Posts
- 7,577
Just love your How to Guides, 5 Stars Ken

-
03-11-2014 #5Enthusiast
- Join Date
- Jan 2014
- Location
- Southwest FL
- Posts
- 665
Like others I really love your detailed how to posts. I really want to get the hood gap problem fixed on my 2002. Where is the best place to get shims if I need them?
-
03-11-2014 #6Enthusiast
- Join Date
- Feb 2014
- Posts
- 408
I second this. Is there anywhere to buy shims today?
-
01-03-2016 #7Enthusiast
- Join Date
- Apr 2015
- Location
- Valley of the Sun
- Posts
- 736
Found this great old thread about Gen II fascia removal (a very belated thanks, Ken!) Originally Posted by TitleMine
I didn't see any follow up responses regarding the availability of shims. My front hood/fascia area has some gaps and alignment issues, so will probably give this DIY a go sometime soon. Are these shims available anywhere?
Thanks, Drew
-
01-04-2016 #8Enthusiast
- Join Date
- Oct 2013
- Location
- Tampa / Kuwait
- Posts
- 836
Don't know about the fascia shims but I looked up the ones for the hinge covers a few weeks ago at around $5 each. SS washers are around $0.14 each. If you need the open sided shim to work around tight areas you can always cut a slit into a washer with a grinder as a cheaper alternative. Originally Posted by drewsss
-
01-04-2016 #9Enthusiast
- Join Date
- Oct 2013
- Location
- Viper Drive, AZ
- Posts
- 793
I don't know where to get any shims. Getting the front fascia off is a step in the hood realignment process. There have been multiple threads across the viper forums on alignment with varying degrees of success. Good luck. Originally Posted by drewsss
-
04-08-2014 #10Enthusiast
- Join Date
- Apr 2014
- Location
- Texas
- Posts
- 197
great how-to. im having my brother install hid lights/fogs on the car and this will help a lot! thanks
-
01-04-2016 #11Enthusiast
- Join Date
- Apr 2015
- Location
- Valley of the Sun
- Posts
- 736
Thanks, guys. What's a reasonable amount of time to set aside for fascia removal? Is this an all-day event, or can I possibly do it in a few hours?
I know that we used to have DIY sessions when Eddie worked over at Bill Luke Dodge. May bounce off the idea of having a "fascia removal" class sometime soon for club members.
-
01-04-2016 #12Enthusiast
- Join Date
- Oct 2013
- Location
- Viper Drive, AZ
- Posts
- 793
Now that I've done it a few times, it only takes me less than an hour.
-
01-04-2016 #13Enthusiast
- Join Date
- Apr 2015
- Location
- Valley of the Sun
- Posts
- 736
Thanks, Ken. I will attempt it myself, and if unsuccessful, you may see a frustrated Viper owner in your driveway, equipped with multiple six-packs whilst whimpering for help.

-
01-04-2016 #14Enthusiast
- Join Date
- Oct 2013
- Location
- Viper Drive, AZ
- Posts
- 793
I'm more than willing to help. Just let me know the time and place. I'm in a rental house right now and my tools are mostly packed away though.
-
01-04-2016 #15Enthusiast
- Join Date
- Apr 2015
- Location
- Valley of the Sun
- Posts
- 736
Hi Ken - sounds great. Just sent you a PM.
Thanks.
-
01-05-2016 #16Enthusiast
- Join Date
- Oct 2013
- Location
- Just visting this planet.
- Posts
- 119
I found it much easier to leave the fascia attached to the fiberglass bumper and remove it as an assembly. Less shims to deal with and don't have to fool with the plastic retainers.
-
01-06-2016 #17Enthusiast
- Join Date
- Apr 2015
- Location
- Valley of the Sun
- Posts
- 736
Thanks for the info! Originally Posted by Mad Max
-
01-06-2016 #18Enthusiast
- Join Date
- Oct 2013
- Location
- Viper Drive, AZ
- Posts
- 793
I don't completely understand. Can you elaborate on which shims wouldn't come into play and maybe some pictures. Originally Posted by Mad Max
-
01-06-2016 #19Enthusiast
- Join Date
- Oct 2013
- Location
- Just visting this planet.
- Posts
- 119
There are shims shown in your pictures that are between the fascia and the fiberglass bumper. By leaving all of the plastic push fasteners in place and unbolting the bumper from the front frame mounts the fascia can be removed with the bumper still attached and therefore the shims that are in between the fascia and bumper are not disturbed and cannot fall out.
-
01-06-2016 #20Enthusiast
- Join Date
- Oct 2014
- Location
- CANADA
- Posts
- 389
Great DIY again...the best for noobie like me.
Thanks
Ben
1997, winterized Red R/T 10


 Reply With Quote
Bookmarks