The window switches in my 2001 RT/10 have green LEDs that aren't powered. The prevailing theory is they were taken from another Dodge vehicle and weren't wired with power since the green didn't match the other amber interior lights.
Here is how I changed the green LEDs to amber and added the wiring necessary to get power to the LEDs.
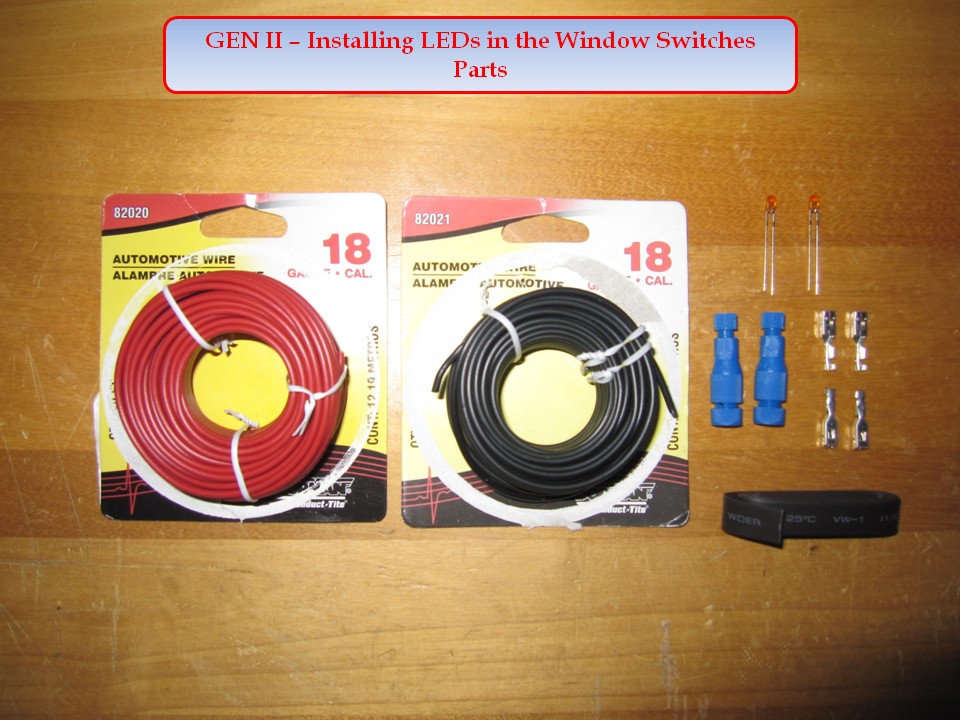
Parts:
wire, 18 gauge, red, 2 ft
wire, 18 gauge, black, 2 ft
LEDs, T1-4302F3-12V amber, (2)
posi-taps, 18 gauge, (2)
wire terminals, 18 gauge, (4)
small diameter heat wrap, 16" length
I purchased the amber LEDs from Mouser Electronics (Mouser Part #: 606-4302F3-12V, $.58 each).
I had the wire left over from my stereo system replacement.
I purchased the wire connector terminals form Viper Specialty Performance (C104 Connector Female Terminal, Tin, 18-20 AWG, $2.49 each).
I purchased the posi-taps from Posi-Lock (EX-150B, ZRTL-605-6 (posi-tap 6 pc, EX-150B) $8.95).
Tools:
pry tool
phillips head screwdriver
small flat head screwdriver
wiring multi-tool
soldering tool
solder
Remove the Center Bezel.
Remove the ash/coin tray.
Remove the lighter plug.
Remove the center bezel using the pry tool.
Disconnect the electrical connectors from the rear of the two window switches.
Disconnect the electrical connector from the window defogger (GTS only).
Disconnect the two electrical connectors from the lighter/accessory charger.
Use the phillips head screwdriver to remove the 2 window switches from the radio bezel.
Changing the green LEDs to amber LEDs.
Remove the black top of the switch from the white base using the small flat head screwdriver.
There are 2 small pins that might fall out. Keep track of them for reassembly.
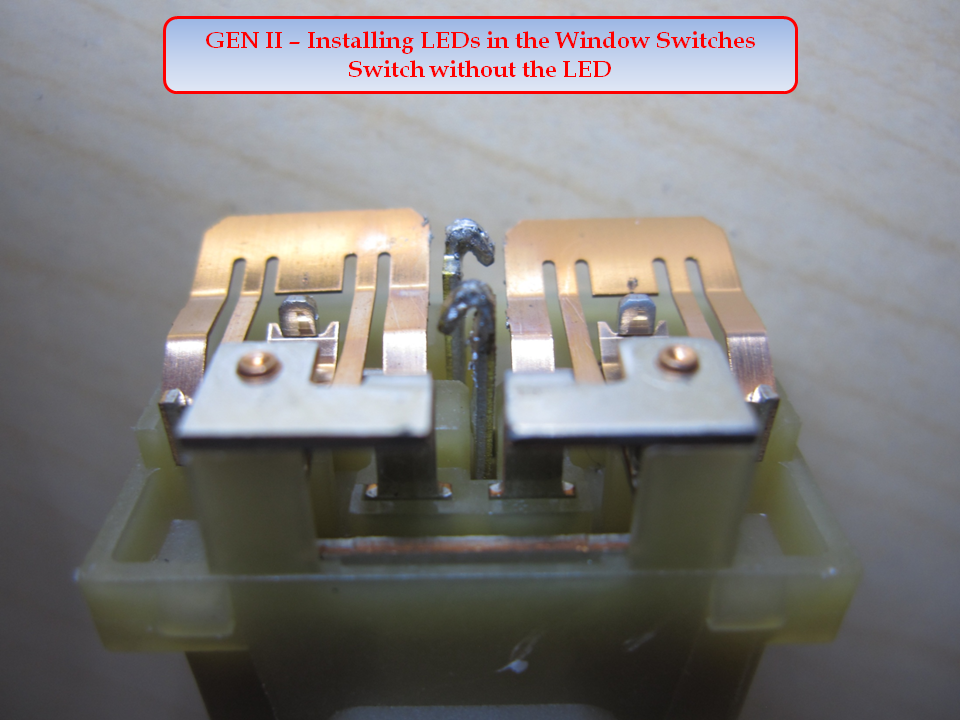
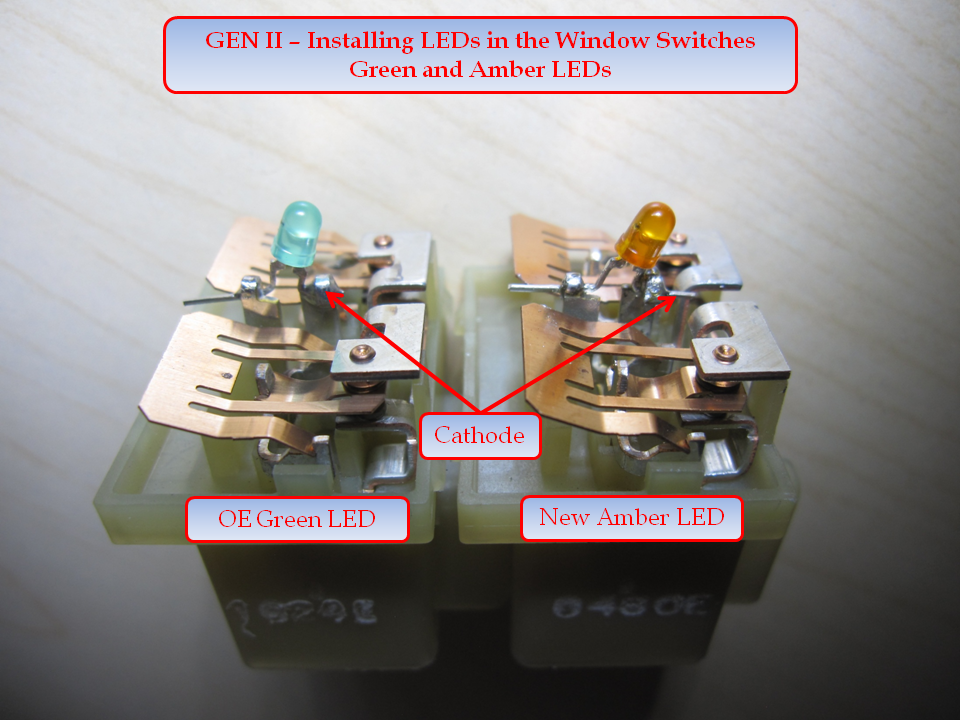
Take note of the positioning of the green LED.
Remove the green LEDs using a soldering tool.
Install the amber LEDs using a soldering tool and solder.
The longer leg of the LEDs is the anode.
The shorter leg of the LEDs is the cathode.
Shape the legs on the amber LED to match the green LED.
Trim the shorter leg of the amber LED to match the green LED.
Use the longer leg to maneuver the LED while soldering it onto the switch.
After the solder cools, trim the longer leg of the amber LED.
Repeat for the 2nd window switch.
Install the black top of the switch back onto the white base.
Take care that you reinstall the 2 small pins that might have fallen out during disassembly.
Use the phillips head screwdriver to install the 2 switches back onto the radio bezel.
Install the wiring necessary to power the LED in the window switches.
Cut 2 pieces of the 18 gauge red wire to 1 foot each.
Cut 2 pieces of the 18 gauge black wire to 1 foot each.
Use the wiring multi-tool to strip 1/4" of the insulation from one end of each wire.
Insert the bare end into the new connector terminal and crimp both the sheath and the barrel (bare wire).
Repeat for all 4 wires.
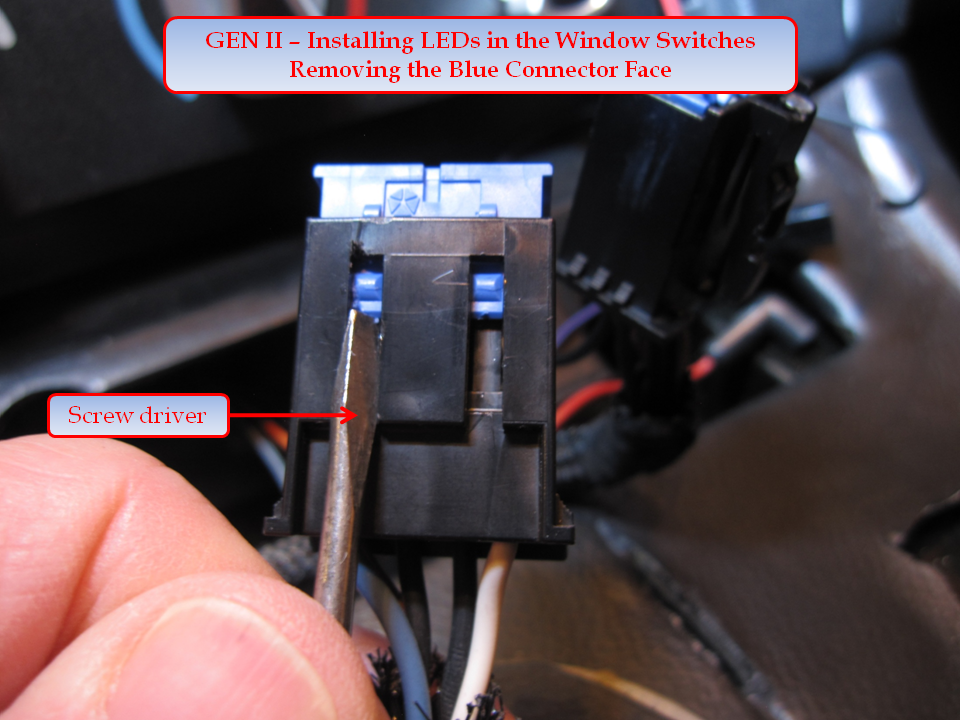
Remove the blue connector face from each window switch connector (2) using a small flat head screwdriver.
Insert a red/black pair of the new wiring through the face of the window switch and gently pull the wiring from behind.
The wires are positional in the window switches.
They need to match these diagrams…
Before…
After…
The connector terminals will pop into place. Use a small flat head screwdriver to apply pressure to the face of the terminals to push them into the connector.
Repeat for the 2nd window switch.
Insert the blue connector face back onto each window switch connector.
Connect the new wiring to the viper.
Use the wire taps to get access to the power and ground from the window defogger plug.
orange - power
black with violet - ground (there are 2 black with violet grounds, I used the one in the center of the plug)
Connect the tap end of a wire tap to each window defogger plug wire.
Cut two pieces of the heat wrap to 8".
Run each pair of wires (red/black) through a piece of heat wrap (I didn't shrink the wrap with heat, just used it to protect the wires from tangling).
Use the wiring multi-tool to strip 1/4" of the insulation off one end of each wire.
Wrap both red wire ends together and insert them into the lead end of the power wire tap (orange).
Tighten the lead end screw top of the wire tap.
Wrap both black wire ends together and insert them into the lead end of the ground wire tap (black with violet).
Tighten the lead end screw top of the wire tap.
Continued in next post...
Results 1 to 6 of 6
-
01-02-2015 #1Enthusiast


- Join Date
- Oct 2013
- Location
- Viper Drive, AZ
- Posts
- 793
Installing LEDs in the Window Switches - GEN II
Last edited by LifeIsGood; 01-02-2015 at 12:22 PM.
-
01-02-2015 #2Enthusiast


- Join Date
- Oct 2013
- Location
- Viper Drive, AZ
- Posts
- 793
...continued from previous post...

Install the Center Bezel.
Connect the electrical connectors to the rear of the two window switches.
Connect the electrical connector to the window defogger plug (GTS only).
Connect the two electrical connectors to the lighter/accessory charger.
Install the Center Bezel.

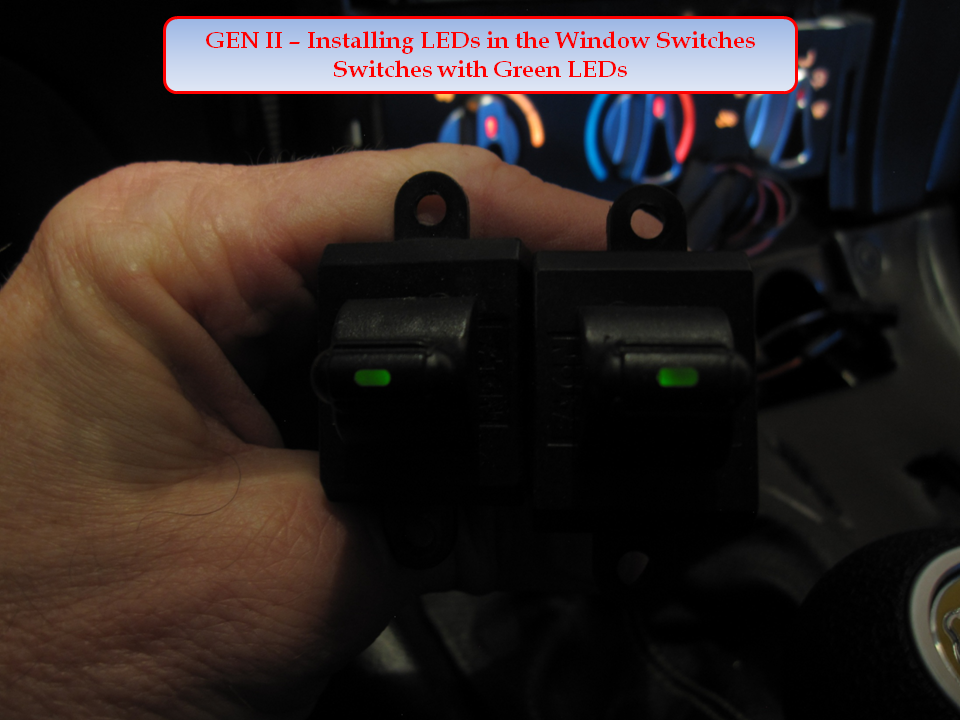
As info…this is what the green LEDs look like.Last edited by LifeIsGood; 01-02-2015 at 12:21 PM.
-
01-02-2015 #3Enthusiast


- Join Date
- Jan 2014
- Location
- Southwest FL
- Posts
- 665
You always do great write ups! Thanks for taking the time to do them.
-
01-02-2015 #4Enthusiast


- Join Date
- Oct 2013
- Location
- South of London, Surrey
- Posts
- 7,577
Brilliant, Thank you.
-
01-09-2015 #5Enthusiast


- Join Date
- Oct 2013
- Location
- Dayton, OH
- Posts
- 4,803
I don't own a Gen II, but damn...well done write-up. I'm actually looking to do something similar to the switches in my Gen 4 this winter, which already light up green (I want red).
-
01-09-2015 #6Enthusiast


- Join Date
- Oct 2013
- Location
- North Carolina
- Posts
- 1,235
Well done, sir! Excellent photos as usual and well documented. The photo of the switches with the new amber LEDs looks great. Never really gave it any thought that the switches weren't lit...I don't drive often at night. Thanks for sharing this info!









 Reply With Quote
Bookmarks