


Hey guys want to share a 2004 RT10 Paxton supercharged build we did starting from the beginning. Dave a Forum member here by the name NJDAVE brought us his car to be dyno'ed and see what kind of power his fully built viper with a Paxton kit produced. Now mind you this was the stock kit Paxton sells installed on a fully built motor. With a comp cam and light head work. Stock exhaust manifolds with Corsa race cats and exhaust.
[IMG][/IMG]
Here is a picture of it waiting its turn for the dyno under a Lamborghini we are working on. By the time it was done it became a real deal sleeper. Once on the dyno just as we thought it was way lean but made some decent power for the stock injectors run by the split second controller and dual fuel pump setup. [IMG][/IMG]
If you cant read the graph it made 605whp and 584wtq on our mustang dyno with an air fuel coming in at mid 15's dropping to a mid 13. at 6.8lbs of boost. Not good since it had been this way for a short while and Dave is not shy about driving it hard. After a look over and finding some obvious problems me and Dave decide to pull it apart and fix what needs to be and lose the split second controller and go with an SCT Tune.
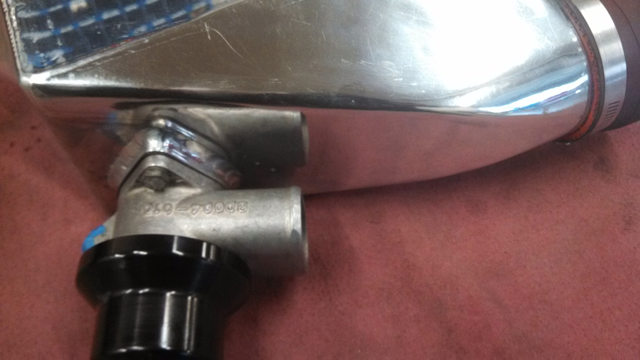
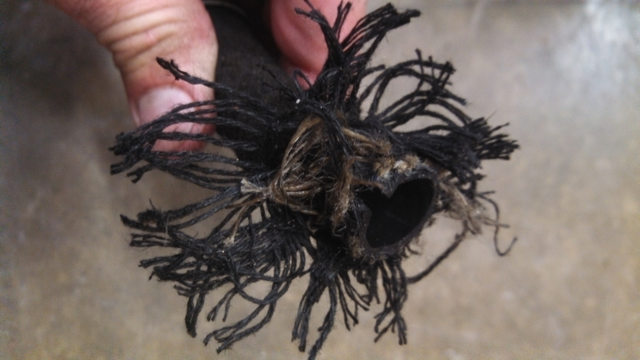
While taking it apart we find a badly frayed oil return line.
[IMG][/IMG]
Also a kinked oil return
[IMG][/IMG]
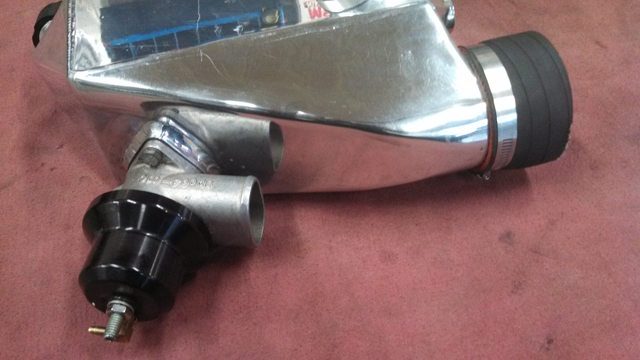
Along with an intercooler that has been rubbing on the cross brace for awhile and was about to go through the tank. And couldn't look at the the oily crud in there anymore!
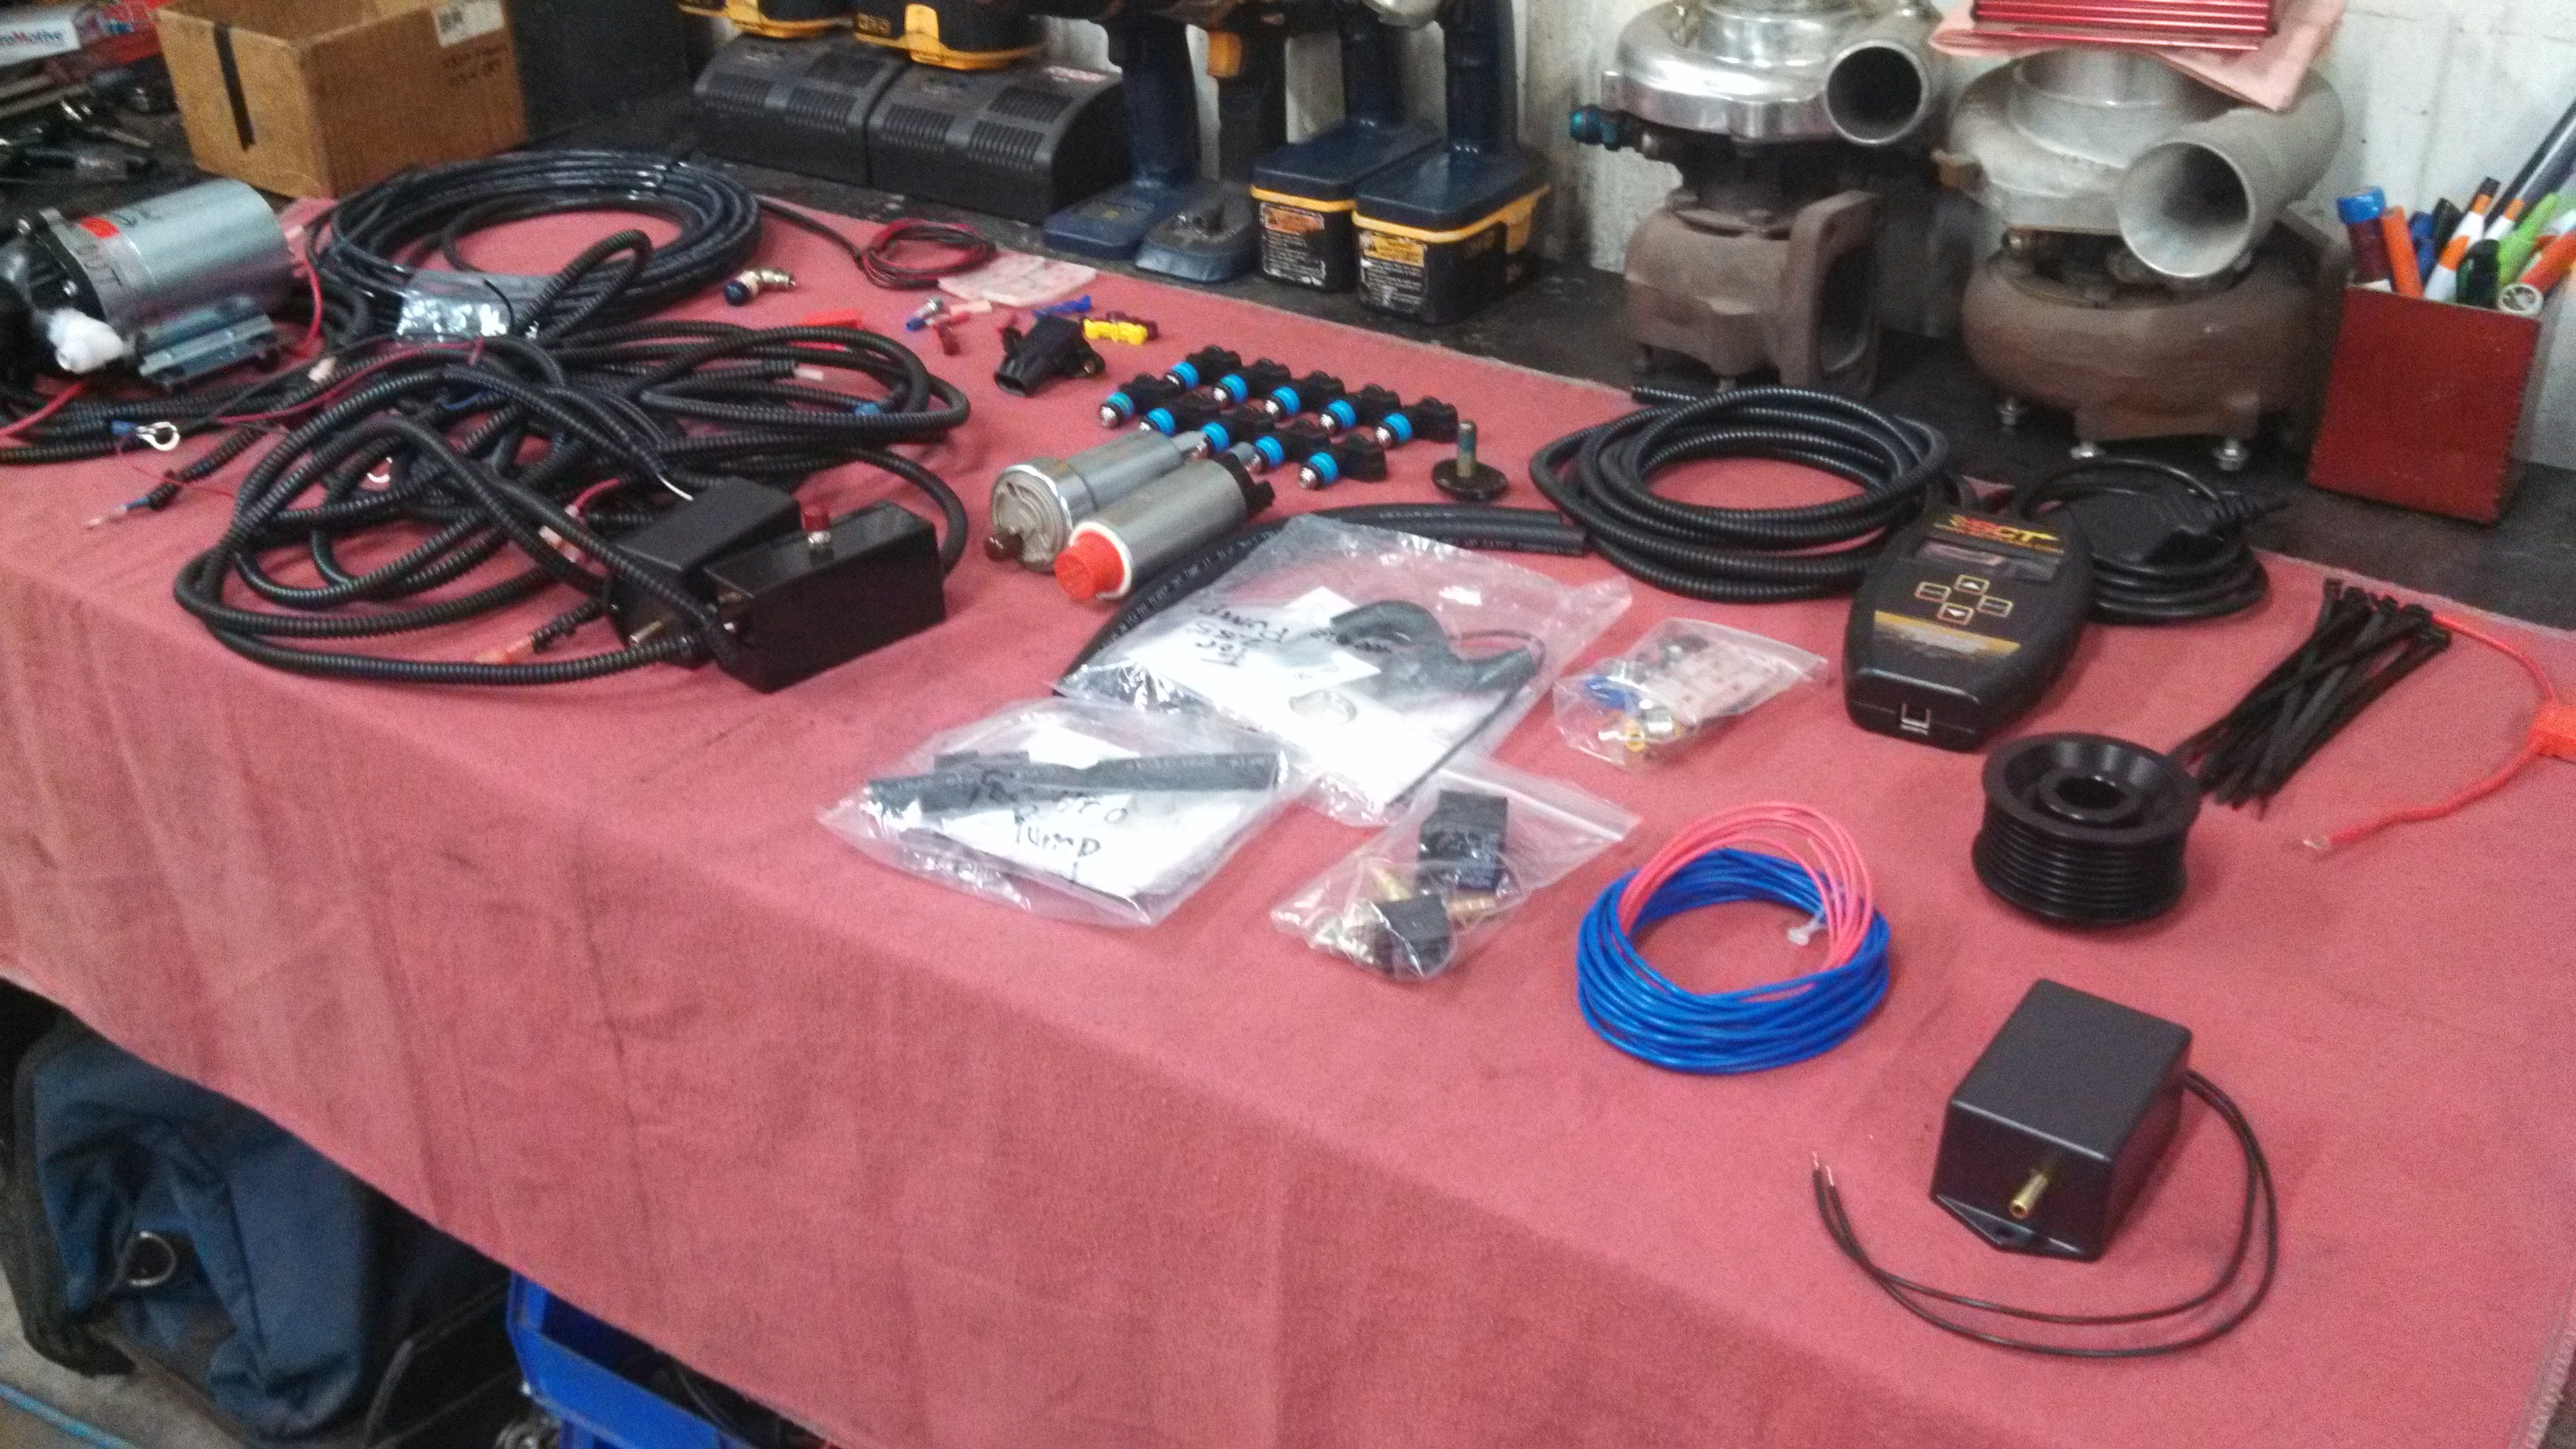
This got pulled out too as we planned on going with a much smaller pulley. Larger injectors. Twin in tank fuel pump. Along with a boost activated water meth system. So the plan was fix the problems we have now and order up what we needed to make the serious power Dave wanted for the car all along.
[IMG][/IMG]
A picture before we took it all apart. Dave can chime in with any thoughts or comments on the build. As he was very excited seeing how poorly it looked on the graph and what we found wrong with it and knowing how much better it would be in the end!
Results 1 to 7 of 7
Thread: 2004 Paxton Viper Build
Hybrid View
-
09-08-2014 #1Enthusiast


- Join Date
- Nov 2013
- Location
- Poughkeepsie NY
- Posts
- 40
2004 Paxton Viper Build
-
09-08-2014 #2Moderator

- Join Date
- Oct 2013
- Location
- ALL OVER
- Posts
- 3,011
who did the initial build ? good move on ditching the junk FMU
THE IGNORE FEATURE WORKS, TRY IT...
-
09-08-2014 #3Enthusiast
- Join Date
- Nov 2013
- Location
- Poughkeepsie NY
- Posts
- 40
For the life of me I don't understand why anyone would use an fmu in a modern age with the technology we now have PlumCrazy! I understand cost effectiveness but with cars like these and the love the owners have for their cars a better slightly more expensive route would be better. The Paxton kit was originally installed by RSI and at the time I believe the engine was still stock. Then J&B race engines whom happen to be 3 time NHRA pro stock champion engine builders did the motor. They also build all of mine and Tators engines.
-
09-12-2014 #4Enthusiast
- Join Date
- Nov 2013
- Location
- Poughkeepsie NY
- Posts
- 40

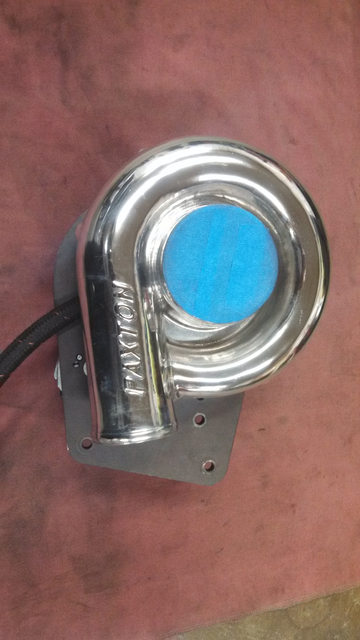
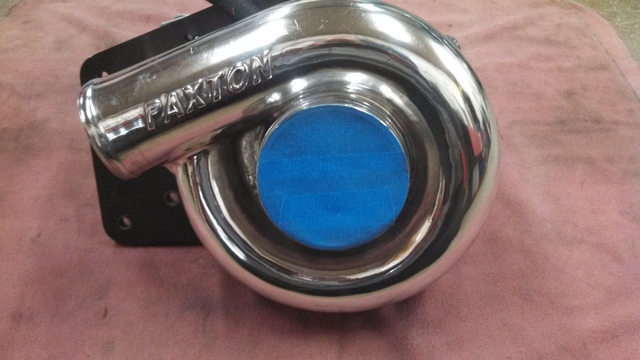
Here are a couple of pictures of the intercooler after tig welding and sanding it sooth then polishing it nice the way it should be.
We also polished the blower while it was out. We cant help ourselves with this kind of stuff. Also new oil return line obviously
Talking with Dave we decided to get a twin in tank fuel pump setup with a boost activated secondary pump action. 69lb injectors on the stock rails and non return fuel system. A 2 bar map sensor. Boost activated water meth system. And a pulley from Paxton which is not made for the viper supercharger setup and would need to be modified to fit. With crank pulley size to blower pulley size and target rpm we figured it would make roughly 15lbs of boost. The power I figured we would be making I didn't think the stock fuel lines and rails would be up to the task. Dave still wanted to go with it. Sorry Dave. So onward with the build and hope it has enough fueling

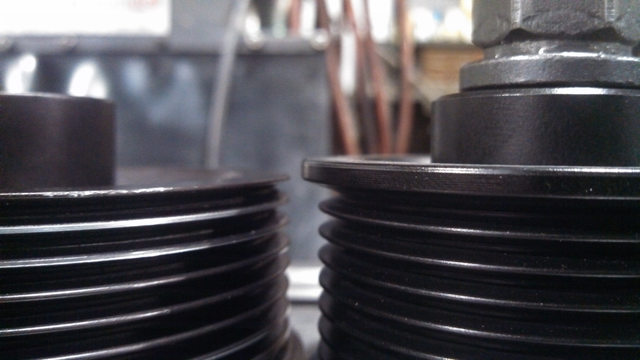
Here are a few pictures of the pulley size difference and how much we would be needing to remove to fit and not rub. Pretty big difference!


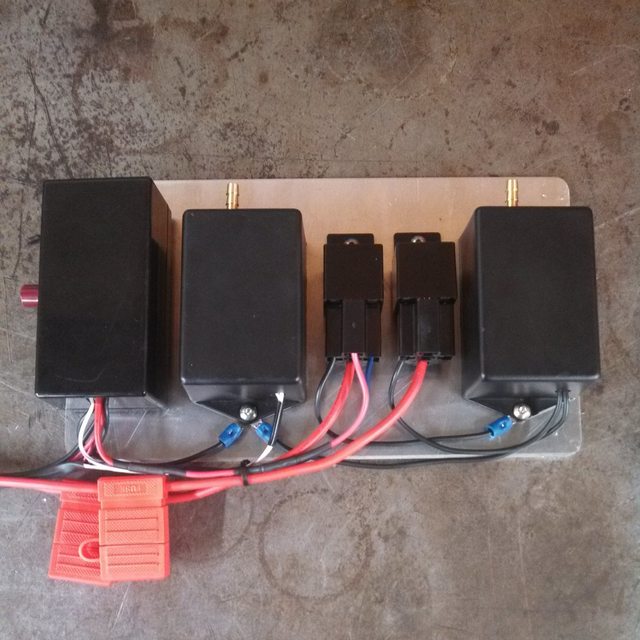
To keeps things neat and tidy and for ease of testing/diagnostics we built a bracket to hold both the boost activated switches
-
09-12-2014 #5Enthusiast
- Join Date
- Nov 2013
- Location
- Poughkeepsie NY
- Posts
- 40
To keeps things neat and tidy and for ease of testing/diagnostics we built a bracket to hold both of the boost activated switches
-
09-24-2014 #6Enthusiast
- Join Date
- Nov 2013
- Location
- Poughkeepsie NY
- Posts
- 40
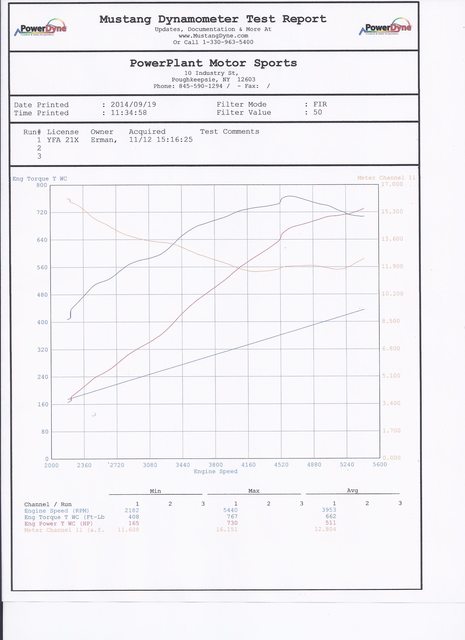
Sorry for the lack of updates guys. Shop is super busy and not much time. I will get more pics and the next steps up soon but here is the dyno sheet as we attempted to tune but it ran out of fuel. We back off as afr's start heading north of 12 real quick. At this point it had maxed out the injector duty cycle and was time for a new bigger fuel system

- - - Updated - - -
Sorry for the lack of updates guys. Shop is super busy and not much time. I will get more pics and the next steps up soon but here is the dyno sheet as we attempted to tune but it ran out of fuel. We back off as afr's start heading north of 12 real quick. At this point it had maxed out the injector duty cycle and was time for a new bigger fuel system
Last edited by Powerplant Motorsports; 09-24-2014 at 11:00 PM. Reason: double post
-
10-05-2014 #7Enthusiast
- Join Date
- Nov 2013
- Location
- Poughkeepsie NY
- Posts
- 40
Once we got Dave's car on the dyno its was obvious it maxed out the the fuel systems capabilites and had to look in another direction. We let off as the afr's started climbing fast north of 12 with over 1000rpm left to go.
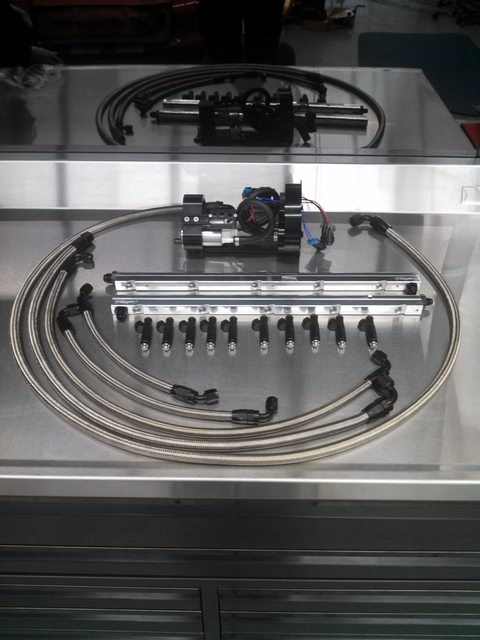
After some discussion with fuel system manufactures we decided to go with the full return fuel system from RSI. Billet twin pump hangar. Fuel lab regulator. 90lb fuel injectors and billet polished fuel rails. Once we looked at the kit out we noticed it was missing the return line to the fuel tank and no pressure gauge for the rail. Also no mount or specific location to mount the fuel pressure regulator. Otherwise very nice kit.
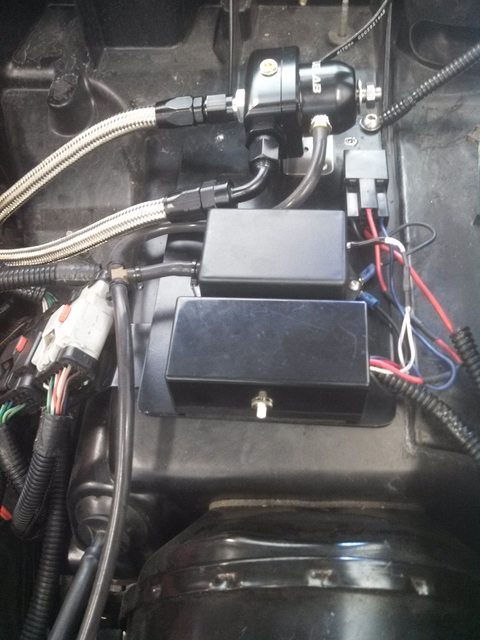
we decided to mount the regulator along with the water methanol control box/activation switch together


 Reply With Quote

Bookmarks