
Here’s a little job I did back in the Winter of 2008/9.
I got tired of oil leaks messing up my garage floor so decided to replace the rear crankshaft oil seal this winter and wanted to share my experience.
Before I get into too much detail though I’d firstly like to say a big thanks to Chuck, Baz UK, Phil E UK and Dave6666 for their technical support/help, without which this job would have turned into a huge pile of ……!!!
BEFORE
DURING
AFTER
I hope you find this helpful but please remember this is my own opinion of the job and how I did it – you may have your own ideas. For instance, you might want to try this job without removing the gearbox but by slide it back in the transmission tunnel instead OR not removing so many of the gearbox instruments – your choice. Whatever you do good luck and stay safe.
Summary details of this job can be found in the Chrysler Corp service manual, SR29 for the 1996 Coupe. I’ve also taken many torque settings directly from this service manual.
General
• No need to remove engine oil pan
• No need to drain gearbox oil
• No need to remove center console trim from inside the car or damage gear shifter boots
• All threaded fasteners are right handed threads - no left handed surprises
• I’ve used US Socket/wrench sizes but you may wish to use metric equivalents, especially for 19/32” i.e. 15mm.
Safety
• Exercise caution when working underneath vehicles
• Always use axle stands if the vehicle is jacked up – never work under a vehicle suspended only by jacks
• Exercise caution when manipulating the gearbox - remember its 70kg
• Wear Light Eye Protection (Safety Glasses) when appropriate
• Wear Gloves when appropriate
• Maintain cleanliness at all times during both disassembly AND reassembly
Tools
• Trolley jack
• Viper screw jack – to raise the engine
• Small scissor lift and set of casters - alternatively use your trolley jack
• Axle stands – sized to gain enough clearance to remove gearbox
• Wrenches
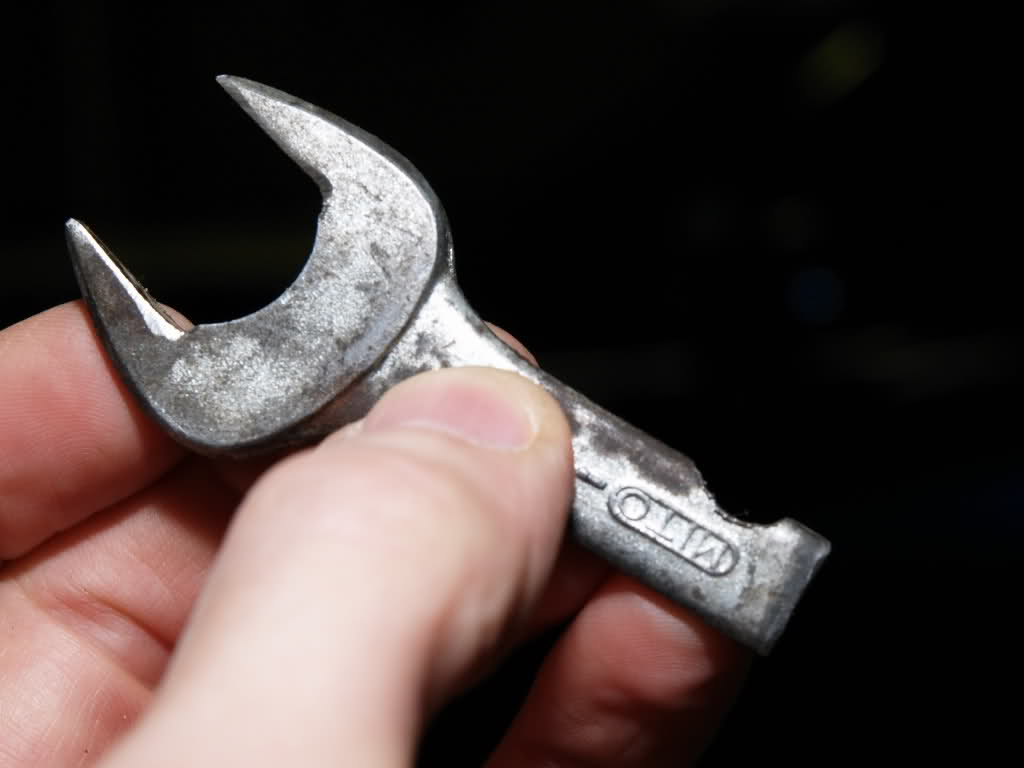
• ¾” crow foot wrench or short wrench (3” max) – to remove gear shifter isolator
• ½” socket set
• Extra ½” socket set extension bars - to reach up to 36” - aides gearbox removal especially those ‘difficult to reach’ top bolts
• Torque wrench(s)
• Universal clutch alignment tool
• Wire brush
• 18mm dia x 150mm long brass bar – to remove old pilot bearing
• Plastic milk carton (special tool) – for fitting new oil seal over rear crankshaft end
Materials
• New rear crankshaft oil seal
• New pilot bearing (input-shaft bearing)
• New rear seal retainer gasket
• PTFE tape – backup switch
• RTV
• Loctite 242 (UK equivalent 270)
• De-greasing fluid
• DOT 4
• Clean rags
• General purpose grease
• Emery cloth
• Clingfilm
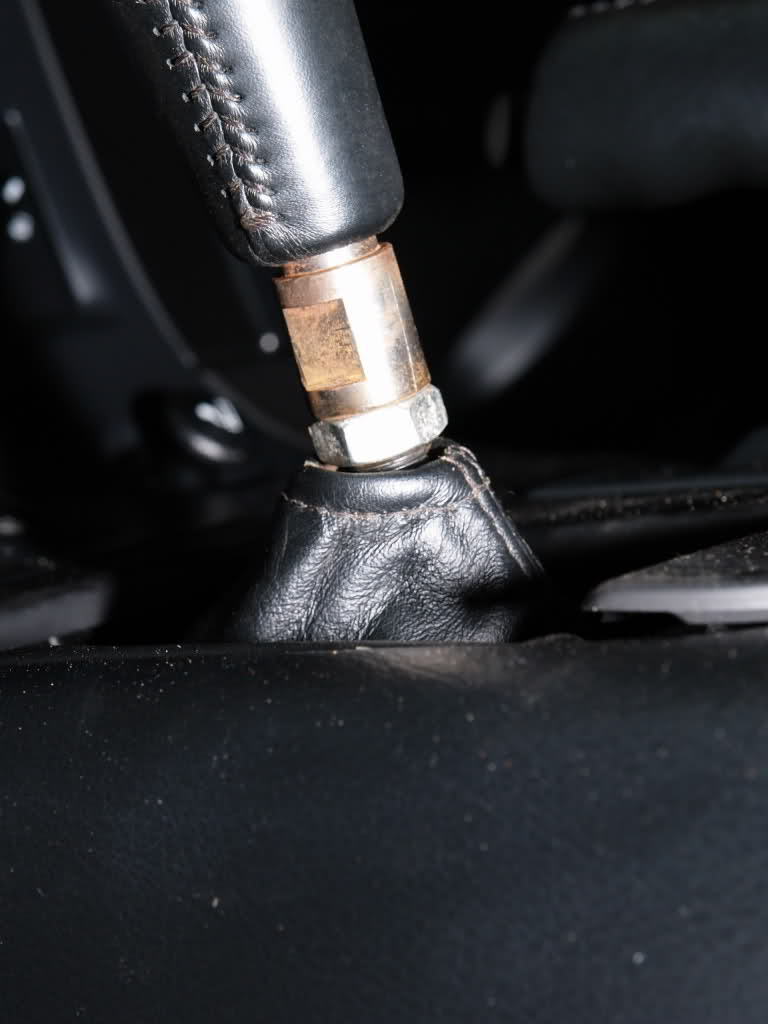
1. Remove gear shifter
o From drivers seat, ease the gear-shifter boot down to reveal locknut
o Release locknut and remove gear-shifter knob
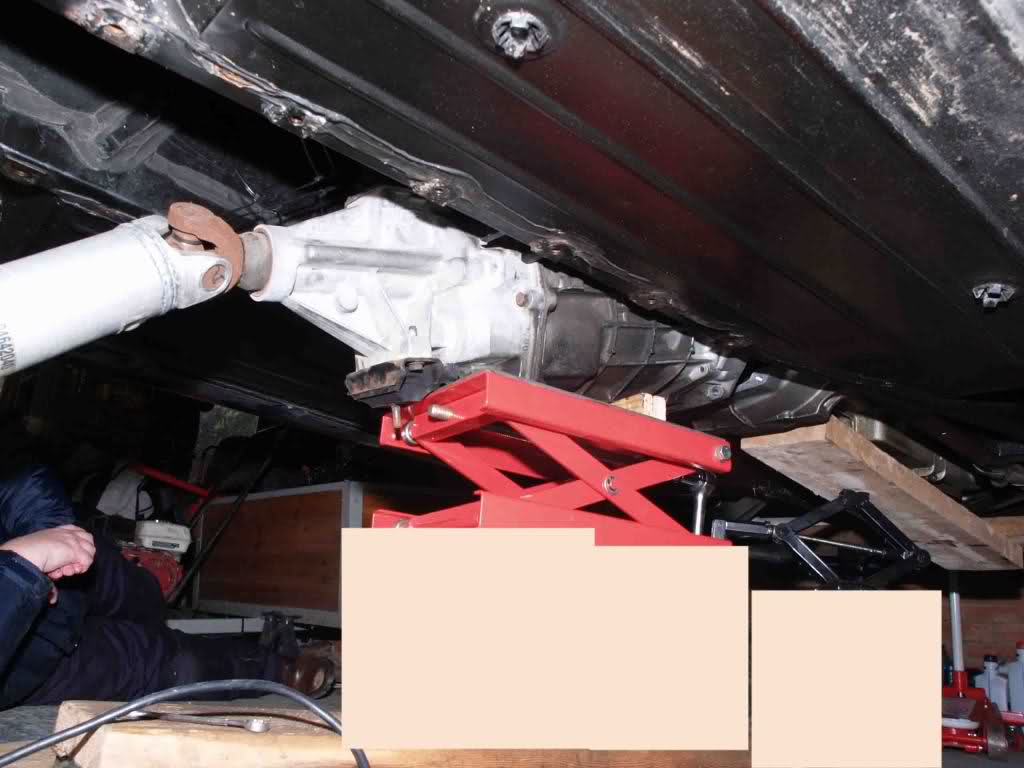
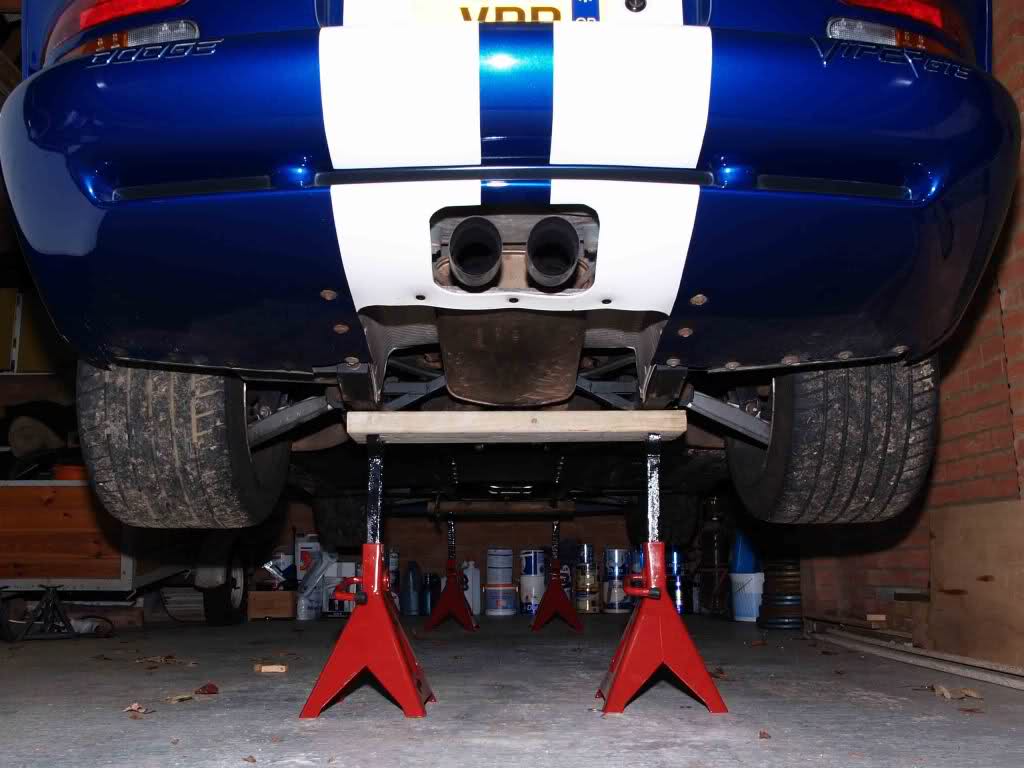
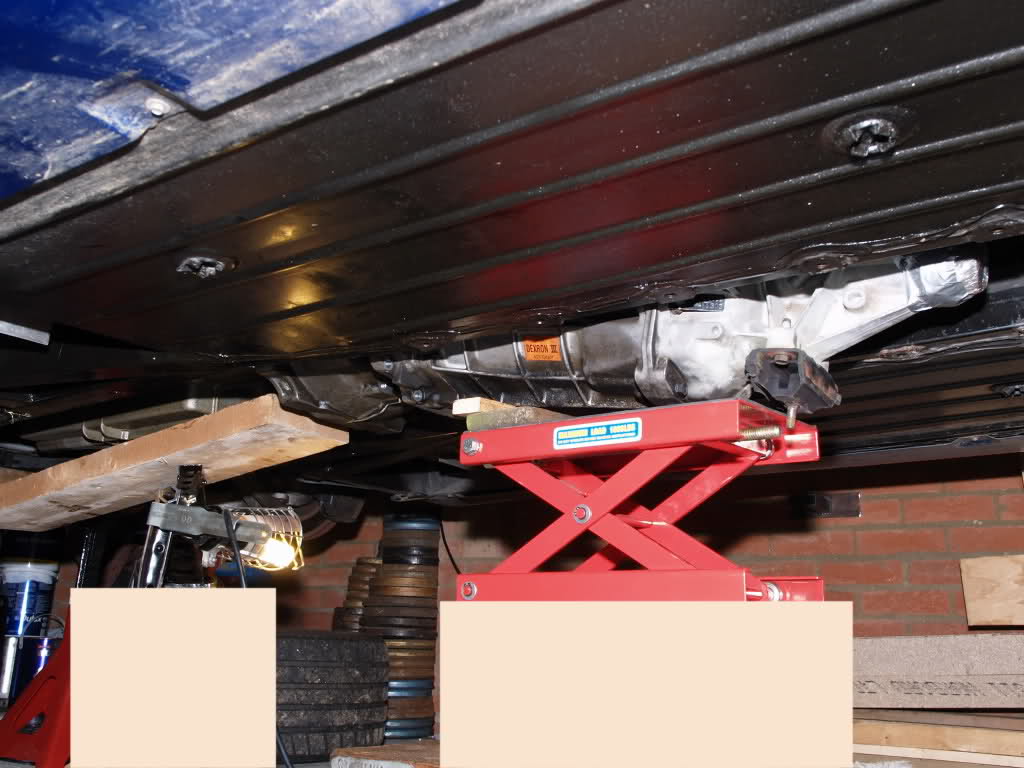
2. Lift/jack vehicle
o Lift high enough to give clearance to drop gearbox out and away – 24” should be fine
o Support vehicle on axle stands – NEVER work under a vehicle suspended only by jack(s)
3. Remove under body stone shield
o With 19/32” wrench/socket, unscrew and remove 12 hex bolts
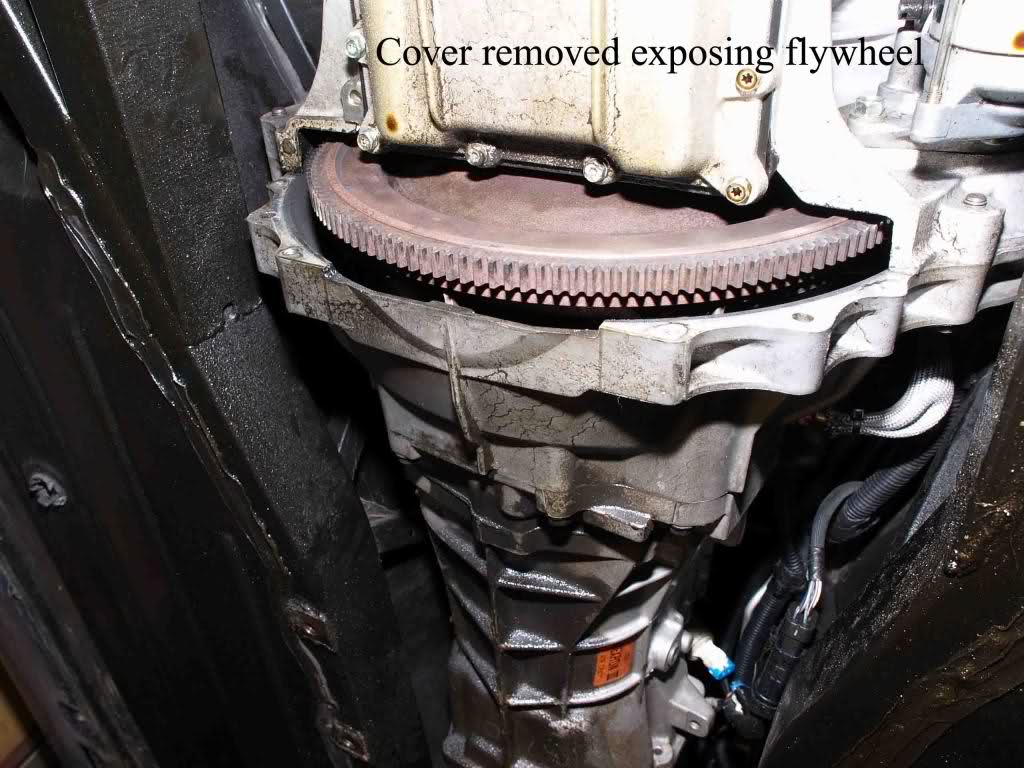
4. Remove clutch inspection cover
o With 7/16” wrench/socket, unscrew 4 hex bolts and remove cover to reveal flywheel
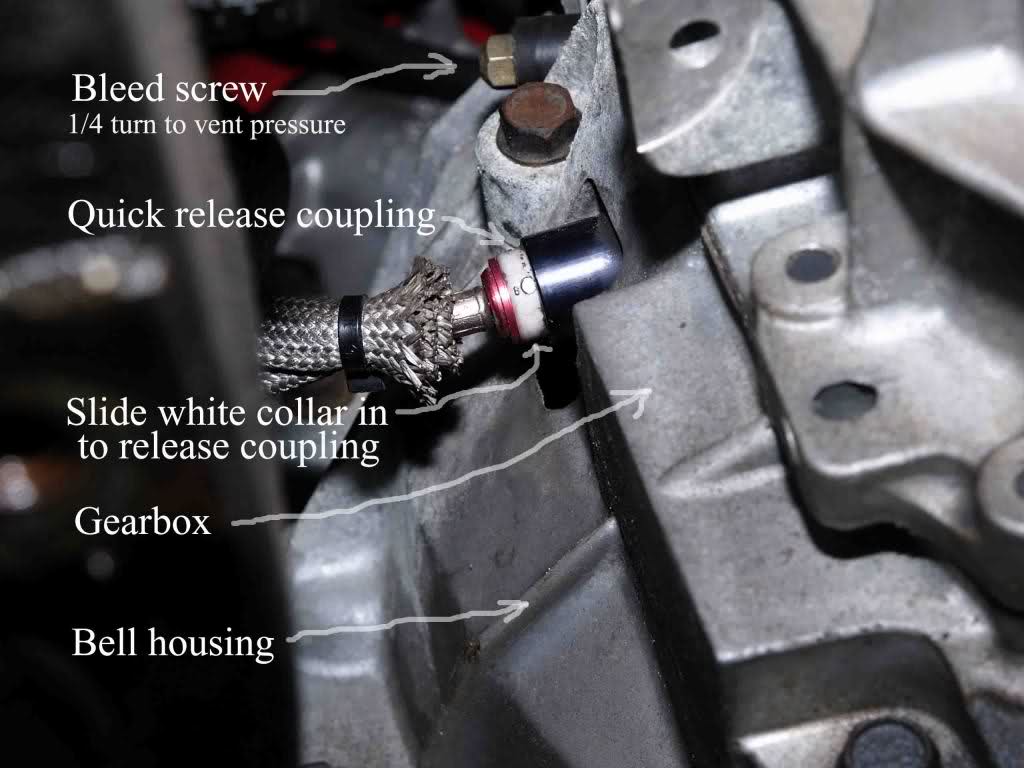
5. Vent pressure in clutch hydraulics
o With 7/16” wrench, unscrew the master cylinder bleed screw ¼” turn to vent any trapped pressure then re-tighten
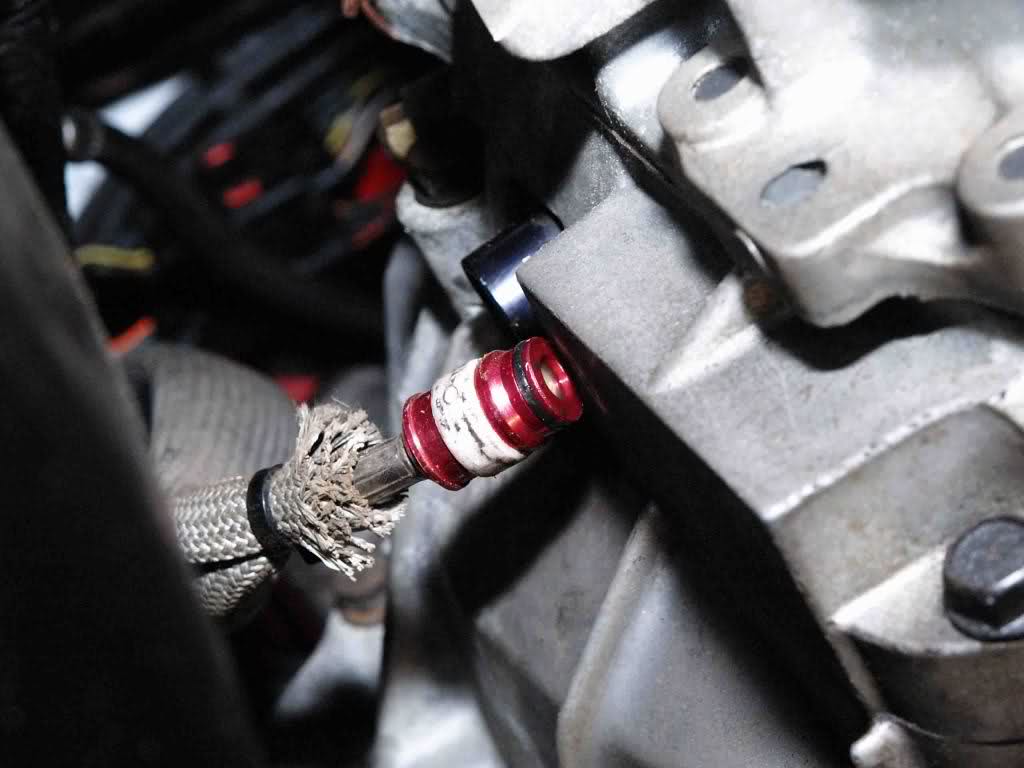
6. Disconnect clutch quick connector
o With 11/16” wrench, slide the quick connector white collar inwards
o Push it in flush with the black collar so the connector separates
o Alternatively use Dodge/Chrysler special tool 6638
o Secure coupling out of harms way
7. Remove drive shaft
o Mark orientation of universal joint before removing
o With 5/16” socket/wrench, remove 4 hex bolts
o Remove 2 straps
o Pry the universal joint apart – the drive shaft will slide forwards on the gearbox main shaft
o Remove drive shaft by sliding backwards off the main shaft
o Cover hole in gearbox to prevent dirt ingress
o Cover both ends of drive shaft to prevent contamination
o NOTE: The drive shaft will be refitted during gearbox removal to prevent oil leakage
8. Remove backup switch
o May be required to improve access and prevent damaging the switch
o Located on the passenger side of the gearbox
o Disconnect switch electrical connector
o With 7/8” ring wrench, remove switch – tight access means this job is ¼” turn at a time
o Cover hole as soon as possible to prevent dirt ingress
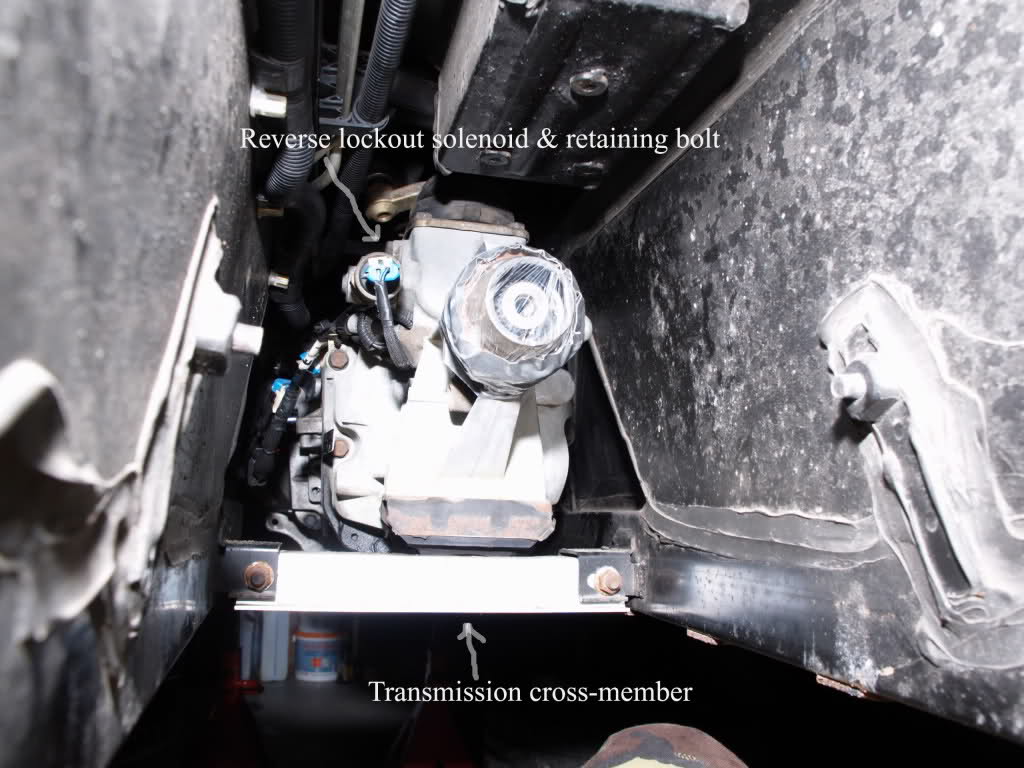
9. Remove reverse lockout solenoid
o Required to improve access and prevent damage
o Located on the back of the gearbox, drivers side
o Disconnect solenoid electrical connector
o With ½” socket/wrench, unscrew the solenoid retaining bolt and remove solenoid assembly
o Cover hole to prevent dirt ingress
10. Disconnect speed sensor and skip shift electrical connectors
o Located in front reverse lockout solenoid
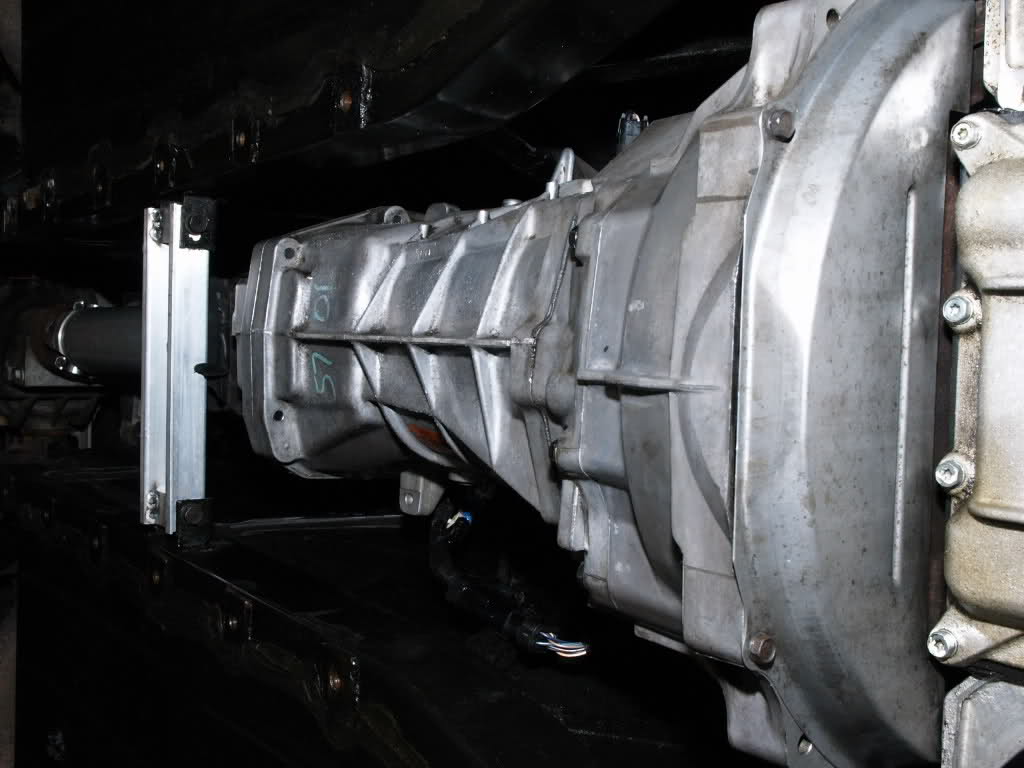
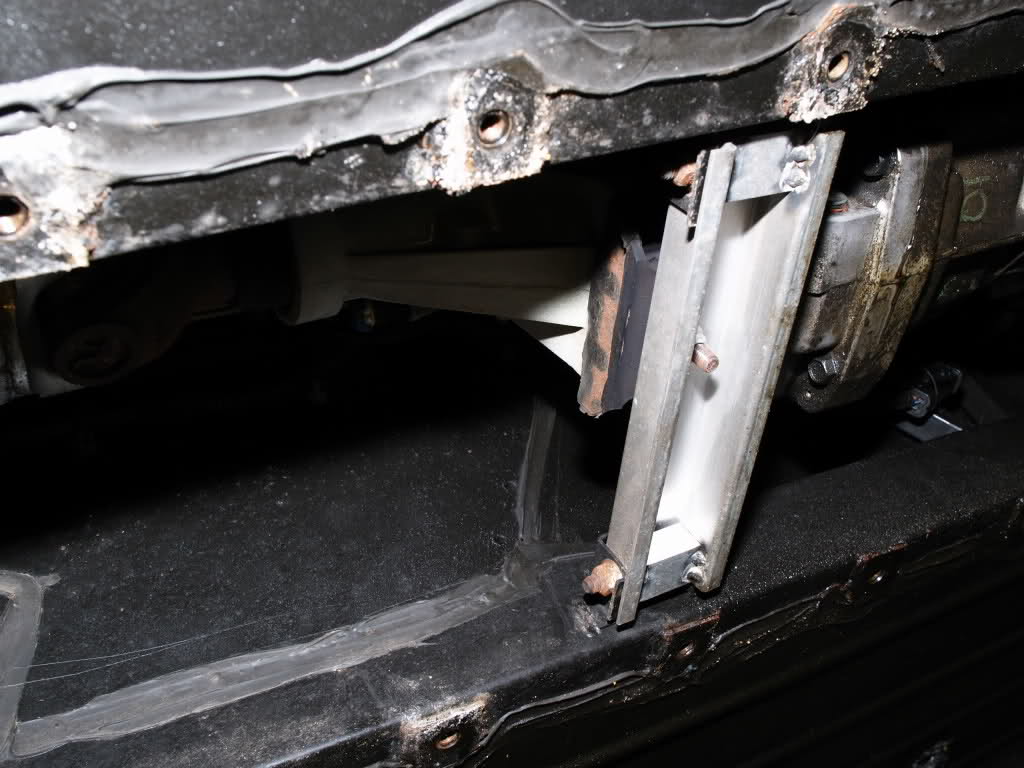
11. Remove transmission cross-member
o With 19/32” socket, remove the transmission cross-member centre nut
o Install Viper jack underneath the engine oil pan/sump and gently raise the engine just enough for the transmission to lift clear of the transmission cross-member
o Remove transmission cross-member with 19/32” wrench and socket
o Lower the engine/transmission enough to improve access on top the gearbox (approximately 2”) but do not allow engine/transmission to hang unsupported
o Ease the gear shift boot away from the isolator to prevent damage
12. Remove gear shifter isolator
o Doing this now will greatly simplify gearbox removal although it is not essential (the box can be removed with the isolate still fitted)
o If you are not removing the gearbox but sliding it back in the transmission tunnel, the isolator needs removing now
o With a short ¾” wrench (3”) or crows foot wrench remove gear shifter isolator
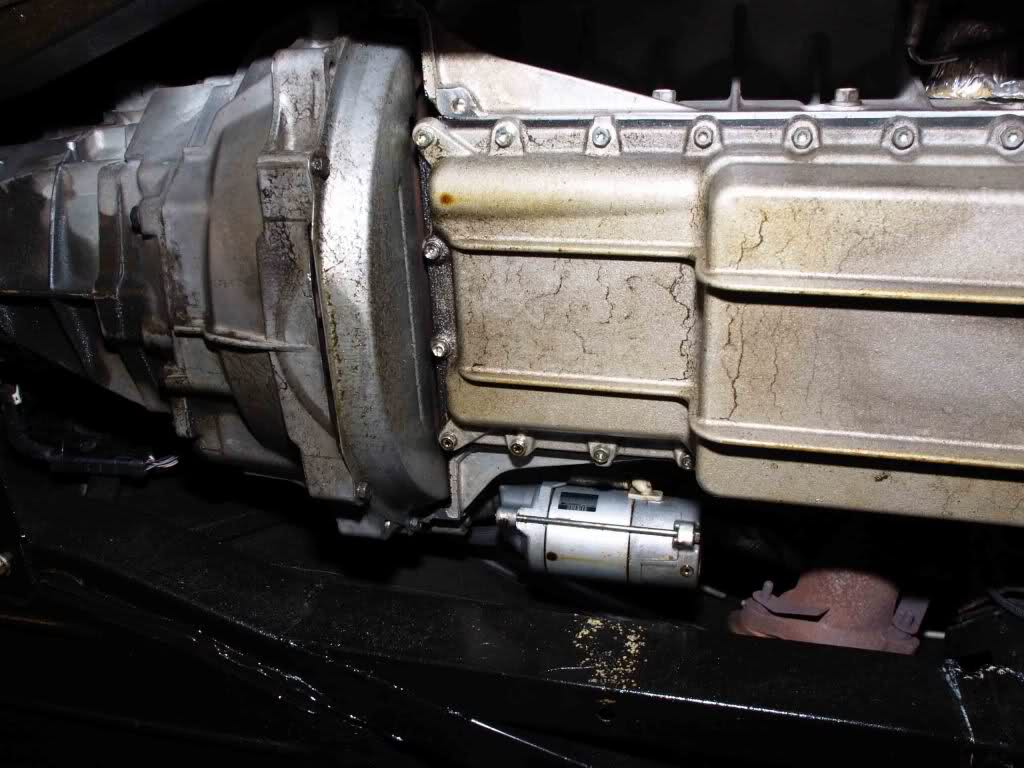
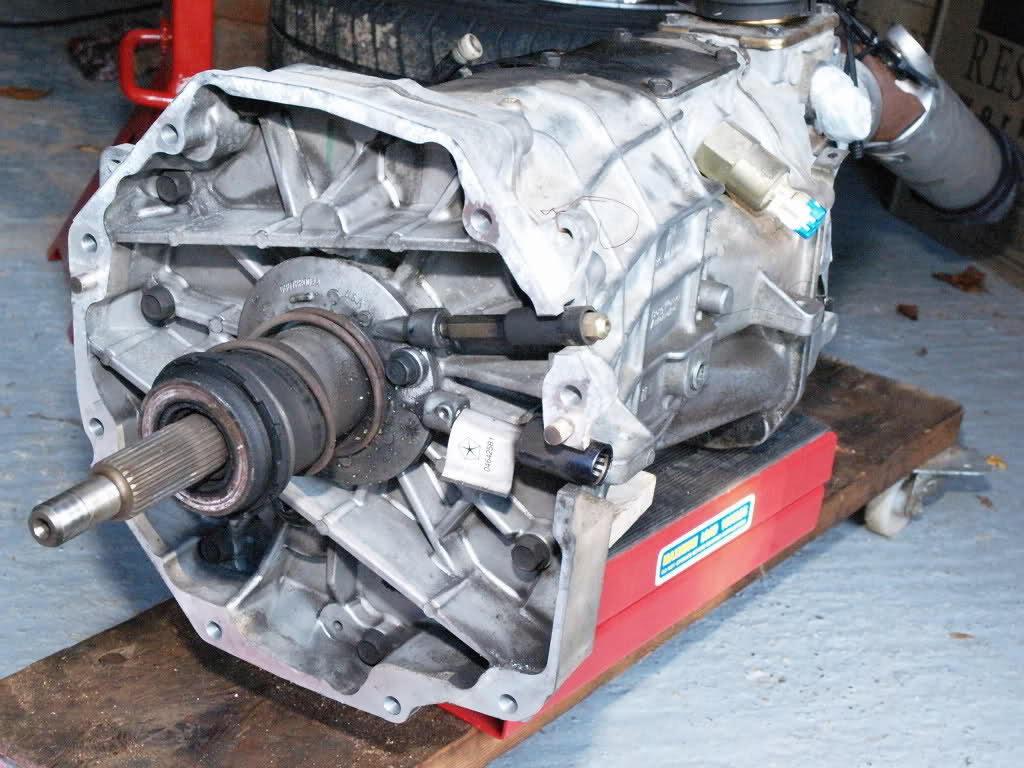
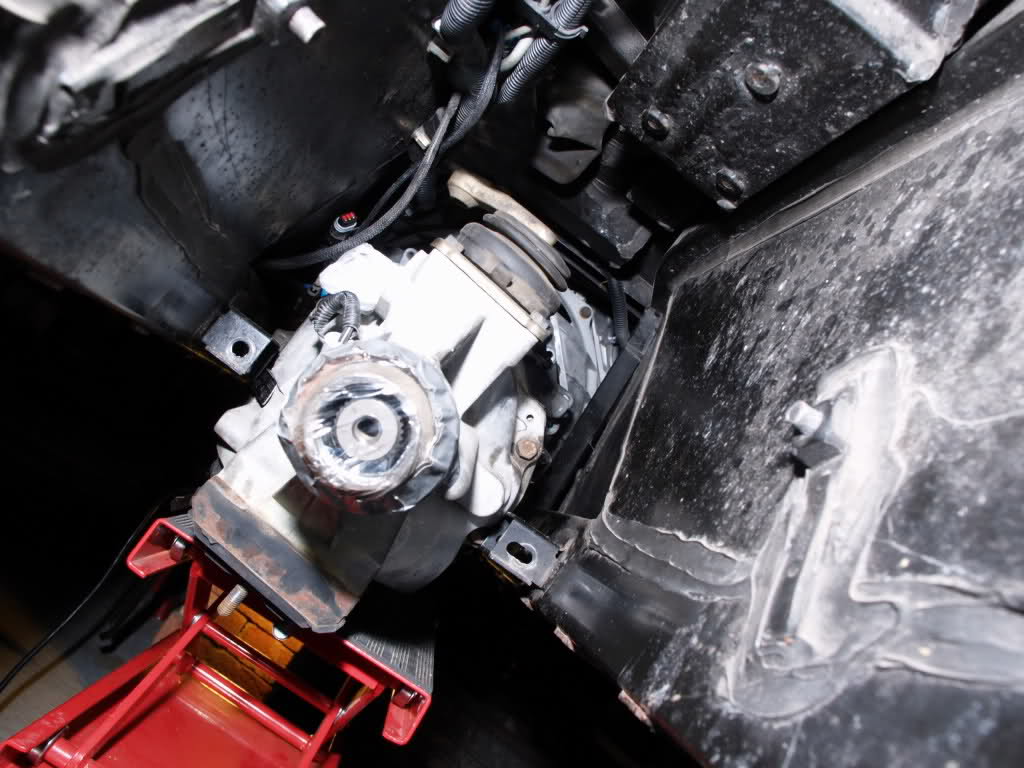
13. Remove gearbox – this cannot be done in one simple move – the gear box needs to be edged out slowly and the back tilted downwards
o This step (and step 25 to replace the gearbox) were the only steps I could not do on my own
o Support weight of gearbox with scissor lift or trolley jack
o With 19/32” socket, remove 8 gearbox to bell housing retaining bolts – some bolts need to be accessed from the drive shaft end of the gearbox using ½” extension bars joined together
o Ensure you are disconnecting the gearbox to bell housing bolts and not bell housing to engine bolts
o Pry gearbox from bell housing – there is a pry point on the driver side just above the clutch bleed screw
o Keeping the gearbox horizontal and pull backwards – confirm the weight is uniformly supported
o Check that the input shaft is free of the clutch plate - look between bell housing and gearbox - the gearbox should move backwards about 3” before it hits with the transmission cross-member brackets
o Refit the drive shaft to avoid spilling transmission oil – secure in place with cable ties or something to avoid it sliding out
o Complete gearbox removal by repetitively lowering gearbox and tipping the drive shaft end downwards, ensuring the input shaft remains clear of the clutch pressure plate
Results 1 to 5 of 5
-
11-02-2013 #1Enthusiast


- Join Date
- Oct 2013
- Posts
- 91
Gearbox removal & rear crank seal replacement including pilot bearing on a 96 GTS
-
11-02-2013 #2Enthusiast
- Join Date
- Oct 2013
- Posts
- 91
14. Remove bell housing
o With 9/16” and 5/8” sockets, remove 6 bell housing securing bolts
o Remove bell housing - some gentle persuasion may be required if dowels are tight (block of wood and hammer)
o Rotate bell housing through 90 degrees clockwise so it drops out of the transmission tunnel
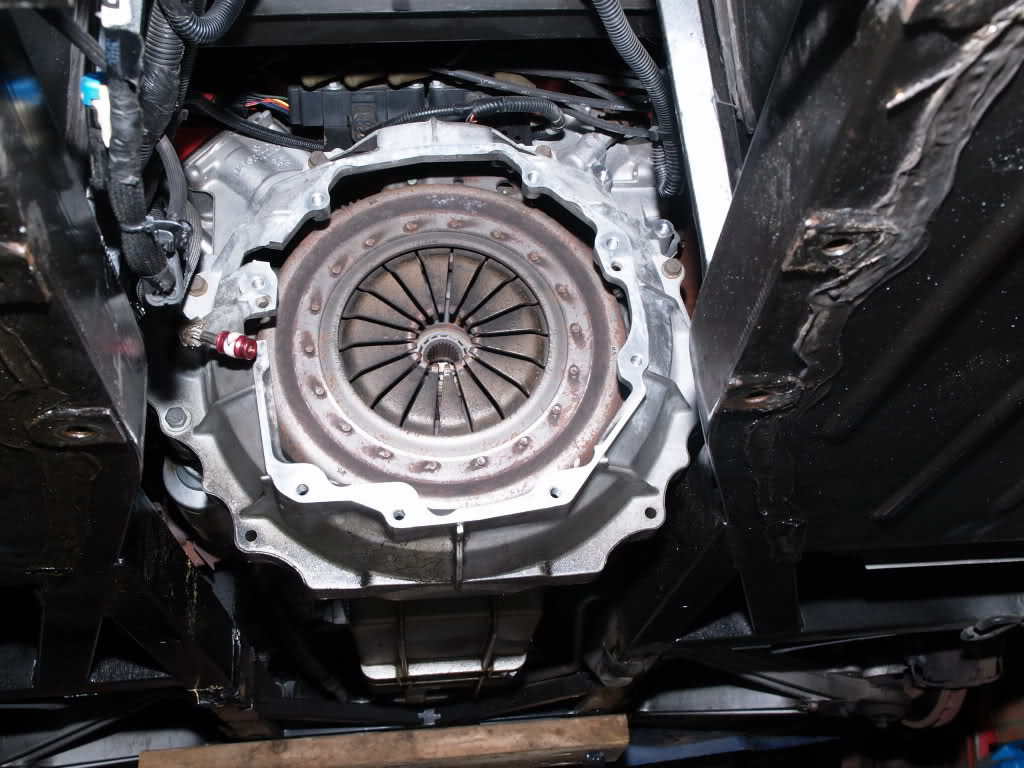
15. Remove clutch plate
o Mark clutch plate relative to fly wheel for alignment during re-installation
o Install universal clutch alignment tool
o With 3/8” socket loosen 8 clutch pressure plate retaining bolts ¼ turn at a time in a diagonal sequence
o Remove all bolts, pressure plate and disc
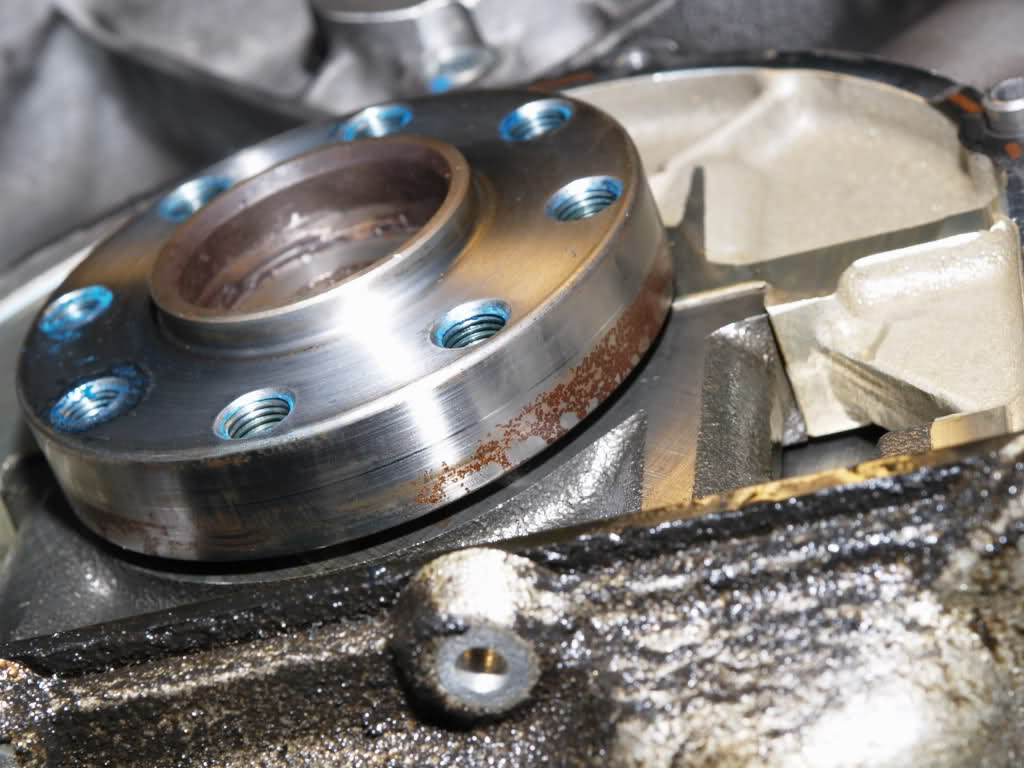
16. Remove flywheel
o Mark flywheel relative to crankshaft for alignment during re-installation
o With ¾” socket loosen 8 flywheel retaining bolts in a diagonal sequence ¼ turn at a time
o Remove flywheel
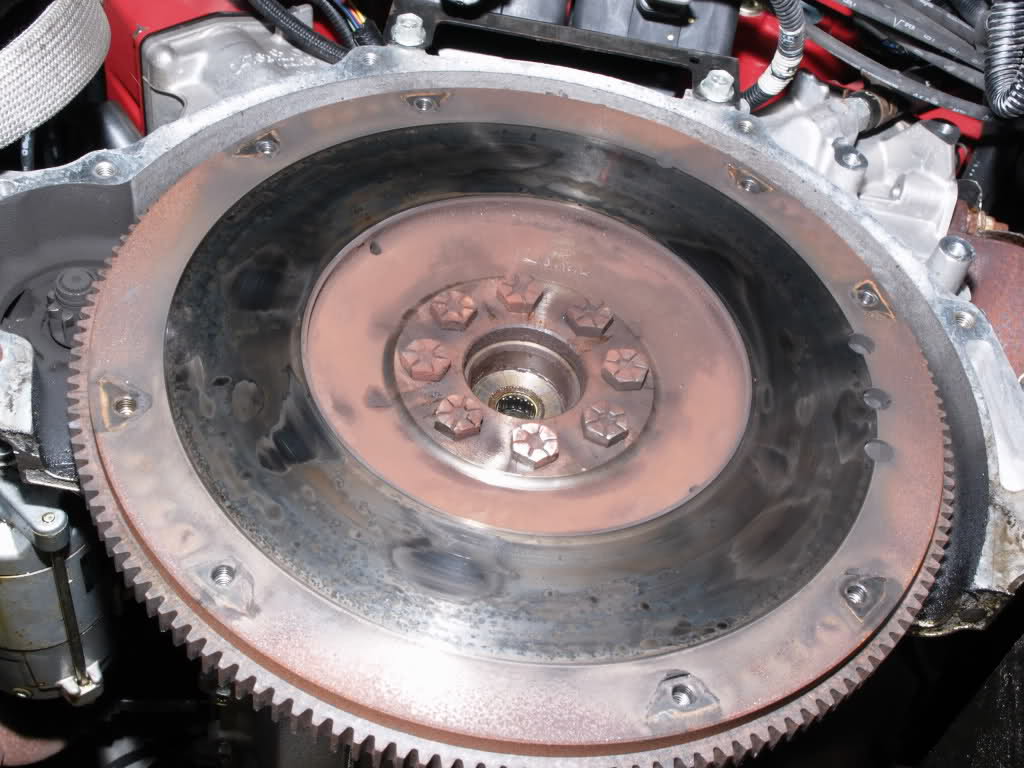
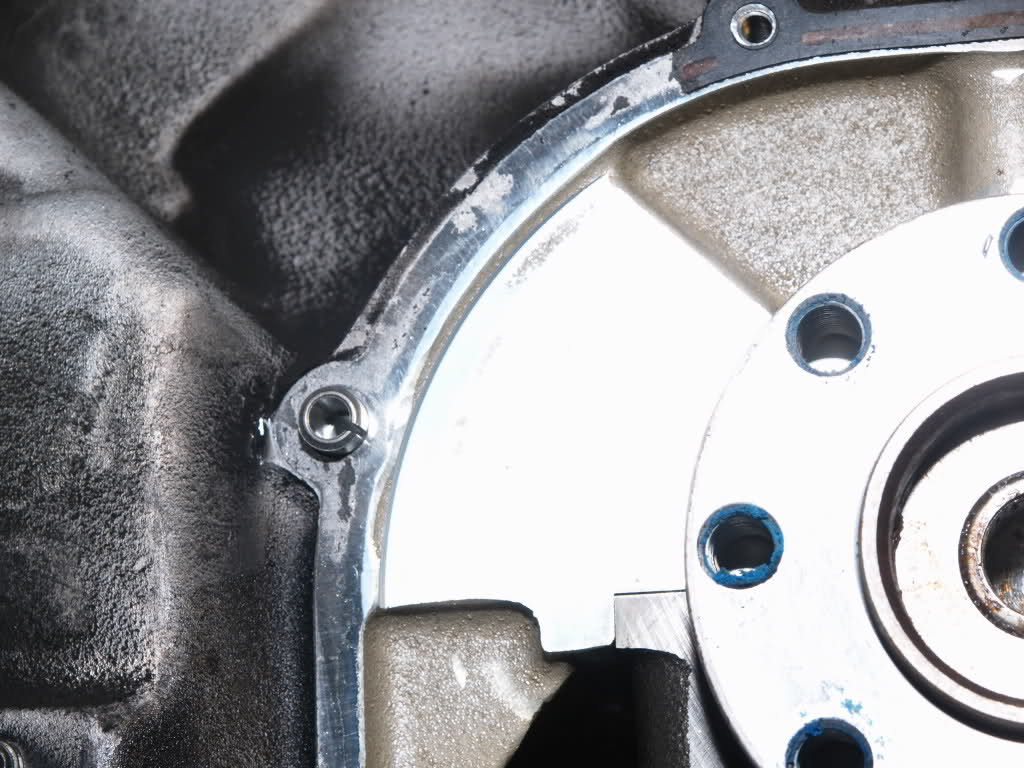
17. Remove crankshaft real oil seal retaining plate
o With 7/16” socket loosen and remove 4 oil pan and 6 seal retaining plate bolts
o Remove plate from rear engine face
o NOTE: The plate is also held in place with dowels
o Exercise caution not to damage the oil pan gasket/seal
o Cover openings to prevent dirt ingress

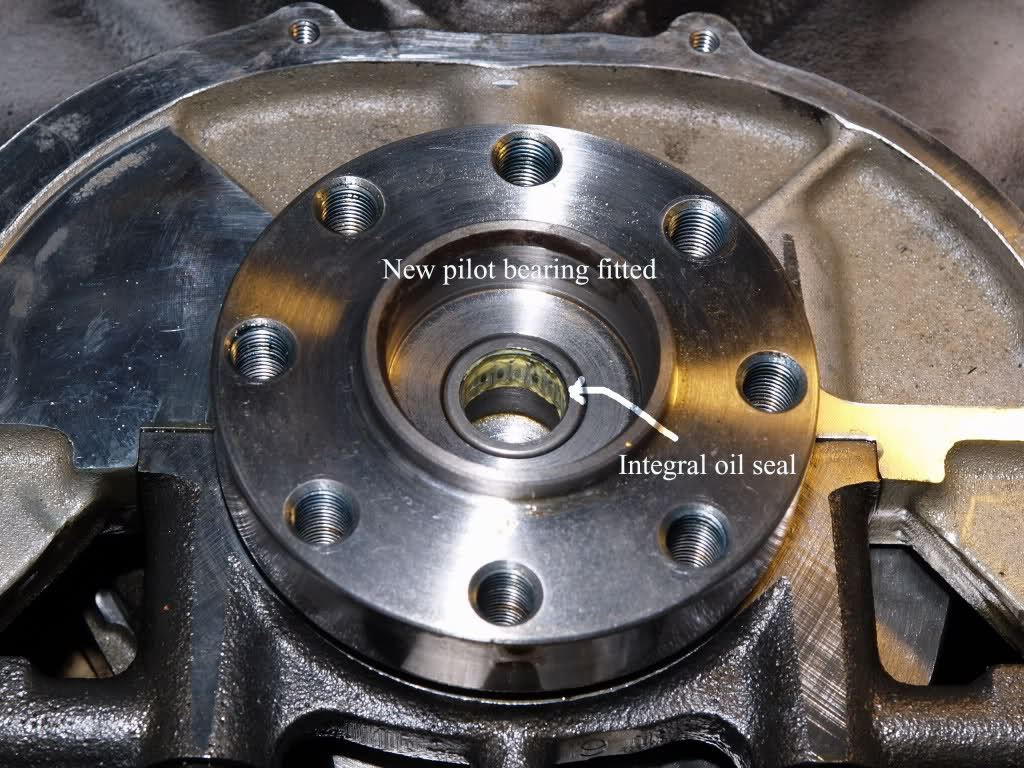
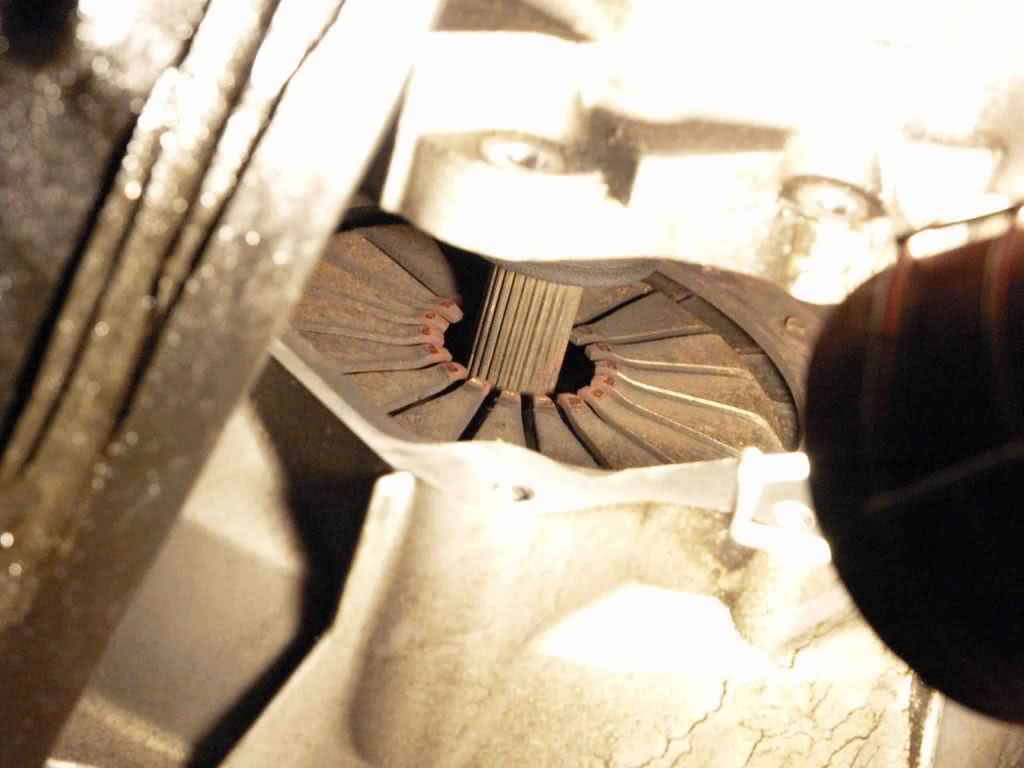
18. Replace pilot bearing with new
o Note old pilot bear condition and integral oil seal
o Squeeze general purpose grease into the pilot bearing cavity and insert an 18mm dia brass bar
o Hammer bar into bearing cavity and onto grease to force the pilot bearing out

o Avoid hammering bar into direct contact with the crankshaft
o Keep applying grease and hammering until pilot bearing is free
o With bearing removed, clean bearing housing
o NOTE: The pilot bearing has an integral oil seal – when refitting the bearing ensure the oil seal is on the outside

o Apply thin smear of fresh grease and press the new bearing into place
o Ensure the bearing is fitted squarely
o Avoid damaging the new bearing during installation
19. Preps for reinstalling oil seal and gearbox
o Remove old gasket materials and clean faces
o Inspect gasket seating faces for damage

o Inspect crankshaft radial sealing face for corrosion/damage and clean if required
o Inspect input shaft and splines for damage

o Inspect flywheel, clutch plate and disc – reference Chrysler manual section 6 for more details
o Clean faces between flywheel and crankshaft
o Degrease flywheel bolt holes

o Inspect and clean faces between gearbox, bell housing and engine
o Inspect gearbox externally for damage, degradation and leakage
o Wire brush and degrease all bolts
o Degrease bolt holes
o Degrease ALL seating faces
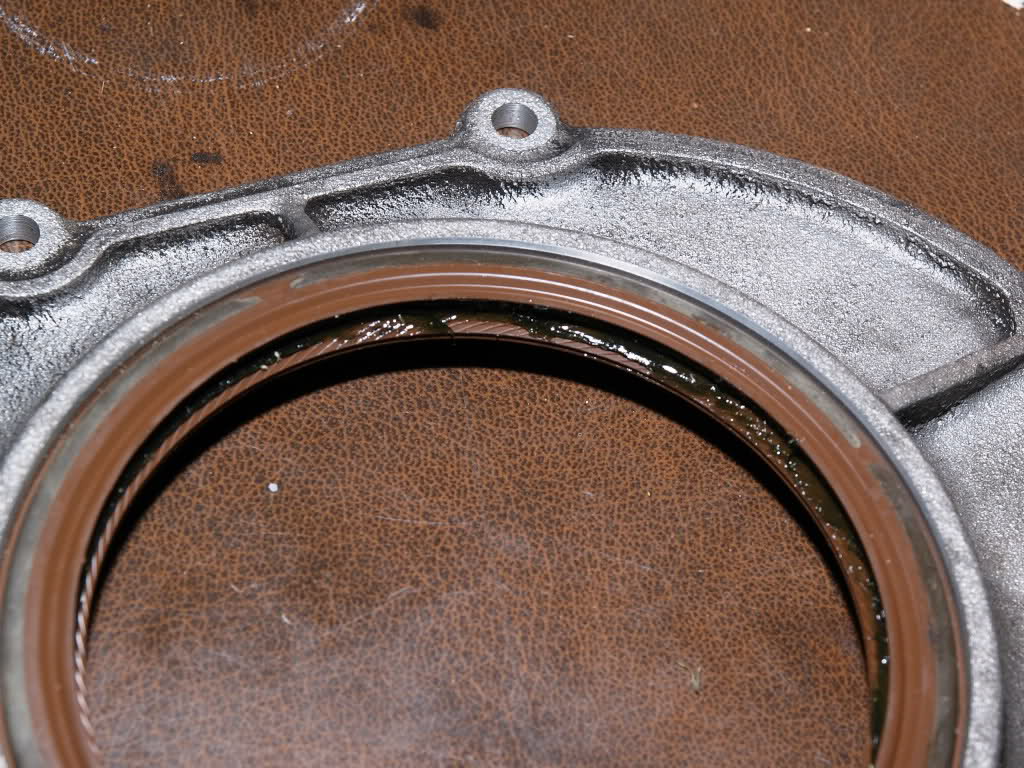
20. Replace oil seal with new

o Remove old oil seal from retainer plate – avoid damaging/deforming the old seal too much - it will be used for fitting the new seal
o It is a tight fit so be sure not to damage the retainer plate - if hammering/punching the old seal out, work from a solid surface
o Press the new seal into the retaining plate
o Ensure the seal is fitted squarely to avoid becoming damaged – if required, use the old seal to drive the new one in
o Fit new seal flush with the outer surface of the retainer plate
o Check alignment with a straight edge - adjust accordingly
21. Refit oil seal retainer plate
o Apply a thin smear of RTV to oil seal retainer plate and mating surfaces on the engine block
o Fit new retainer plate gasket
o Hold special tool (AKA Plastic milk carton) over the crankshaft
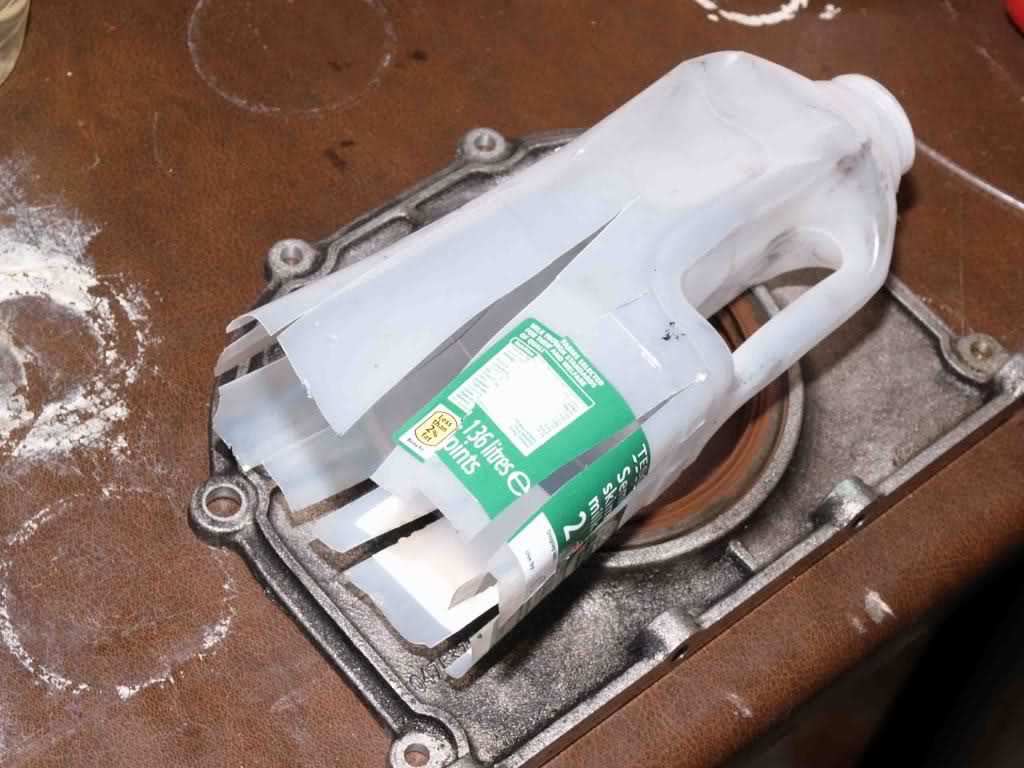
o Slide retainer plate over the tool and onto crankshaft
o Press plate into position and hold in place using 2 oil pan bolts
o Remove special tool
o With 7/16” socket refit 6 seal retainer plate bolts with Loctite
o Torque in sequence to 11Nm
o Fit last 2 oil pan bolts and torque all 4 to 11Nm with Loctite
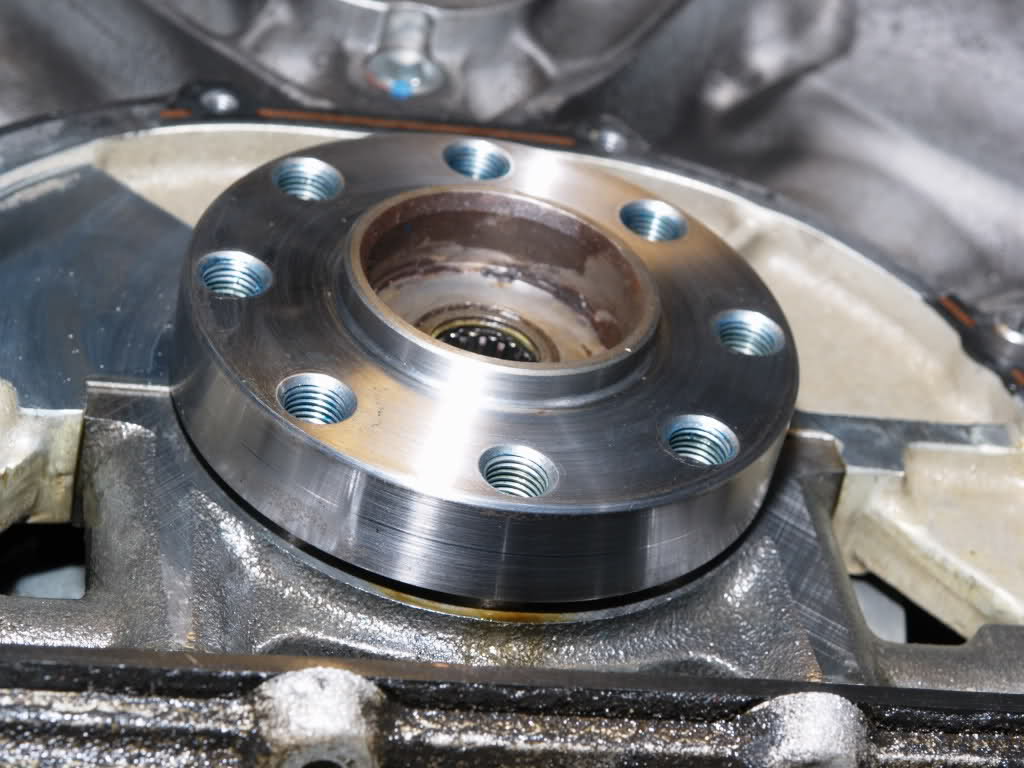
22. Refit flywheel to crankshaft
o Fit flywheel to alignment marks holding in place with 1 bolt
o With ¾” socket refit 8 flywheel retaining bolts in a criss-cross pattern with Loctite
o Torque in sequence to 68Nm
23. Refit clutch assembly
o Fit universal clutch alignment tool and clutch disc
o Fit clutch plate to alignment marks holding in place with 2 bolts
o Check correct alignment
o With 3/8” socket refit 8 clutch plate retaining bolts ¼ turn at a time in a criss-cross pattern
o Torque in sequence to 20Nm
24. Refit bell housing
o Toque in criss-cross sequence
o With 9/16” socket refit 4 securing bolts
o Toque to 30ft lb
o With 5/8” socket refit 2 securing bolts
o Toque to 50ft lb
25. Refit gearbox - two man (person) job - try it on your own first, of course, but it's frustrating and very time consuming
o Reverse installation process see step 13 above edging the gearbox into the transmission tunnel carefully avoiding damage to the clutch assembly
o As the gearbox aligns with the bell housing the input shaft will slide forward over the clutch assembly
o With 19/32” socket refit 8 securing bolts
o Toque to 45ft lb in criss-cross sequence
-
11-02-2013 #3Enthusiast
- Join Date
- Oct 2013
- Posts
- 91
26. Replace gear shifter isolator
o With a short ¾” wrench (3”) or crows foot wrench, refit gear shifter isolator before lifting the gearbox up into the transmission tunnel
27. Reconnect clutch quick connector
o Check quick connector is clean, undamaged and the white collar is fitted, see step 6 above
o Press quick connector into clutch quick connector socket – it should snap in place with a ‘click’
o Check for proper clutch pedal operation
28. Refit transmission cross-member
o Fix cross member onto gearbox tail housing centre bolt with single nut
o Raise gearbox ensuring cross member feeds into chassis brackets
o With 19/32” wrench and socket, refit cross member support bolts
o Torque cross member bolts to 81Nm
o Torque center nut to 50Nm
29. Reconnect speed sensor and skip shift electrical connectors
30. Refit reverse lockout solenoid
o Clean and check ‘o’ ring condition before refitting
o Fit solenoid into gearbox tail-housing ensuring it fits square
o With a ½” socket, tighten bracket bolt ensuring solenoid pulls in square
o Torque bracket bolt to 18 Nm
31. Refit backup switch
o Apply new PTFE tape
32. Refit drive shaft
o Do not reuse old straps/bolts
o Clean joining faces of UJ and diff
o With 5/16” socket/wrench, refit 2 straps and 4 hex bolts with Loctite
o Torque to 19Nm
33. Vent air in clutch hydraulics – if required
o With 7/16” wrench, unscrew the master cylinder bleed screw ¼” turn and immediately cover with a rag to absorb fluid
o Get an assistant to 'very gently' depress clutch pedal - catch vented fluid in rag
o Close bleed screw before assistant releases pedal – pedal can be released when bleed screw is closed
o Torque bleed screw to 18Nm, if you are physically able to get a torque wrench on it!
o Repeat these steps if air is heard passing - ensure clutch fluid level remains healthy – top up with DOT 4 accordingly
34. Refit clutch inspection cover
o With 7/16” wrench/socket, refit 4 hex bolts
o Toque to 20Nm
35. Refit under body stone shield
36. Refit gear shifter
37. Job done and well done!
-
11-02-2013 #4Enthusiast
- Join Date
- Oct 2013
- Location
- The True North Strong and Free Ontario, Canada
- Posts
- 1,635
Holly Crap batman, what an excellent write up. Even I could do it with this step by step process.
Thanks a bunch !
-
11-02-2013 #5Enthusiast
- Join Date
- Oct 2013
- Location
- The land of two incarcerated governors
- Posts
- 623
Great write up. My galley plug is leaking and your write up is the first time I have actually ever seen where it is. It looks like its going to be a good time to replace the clutch and transmission mount. The " might as well while I'm in here" things are what's going to kill me financially.


 Reply With Quote
Bookmarks