


Upgrading the lights on the interior of a Gen III/IV cars is very rewarding. Its cheap (<$70 shipped from SuperBrightLEDs), easy, and the results are so nice on something that you see every time you drive the car. When I sought to do the LED interior upgrade the information needed was scarce and I had to piece it together... So to help anyone who wants to do this in the future I figured this would be a great place to combine the information. This isn't meant to be a polished how-to, but instead just an aggregate of information.
The parts needed and the colors I chose:
10 instrument panel general bulbs, white, T1.5 type
3 HVAC bulbs, white, NE05 (5mm)
1 key ring bulb, red, NE04 (4mm)
6 Misc bulbs, white (footwells, the lights in the rear-view mirror, and the license plate at the exterior of the car), white, 194 type, 5 SMD LED
I was able to complete this with basic hand tools (allen wrenches, screw drivers, and pliers) in probably 6 total hours of work time, including the painting I did while everything was apart and goofing around testing the components to make sure the LEDs had the correct polarity. The led's need to be installed correctly, if they don't light up you need to remove them, rotate them 180 degrees, and re-install. It is not too tough of a job but its not for those who aren't confident working on interiors.
Huge politically-correct disclaimer: I did not disconnect the battery but it is irresponsible not to when working on your vehicle, especially electronics! First step should be to disconnect the battery or else you risk damage to the car, yourself, and possibly others.
This is the general procedure I followed:
Change footwell bulbs (this was so easy, not a single thing needs to be removed for access)
Remove the covers on the bulbs on the rear-view mirror (also very easy, they pry out)
You now have access to the rear view mirror bulbs, though they are held in strongly!
Remove ring around shifter
Remove shifter bezel (I actually left mine attached to the ebrake through the boot, was able to work around it)
Remove radio bezel (don't forget the hidden screw at the bottom middle)
Remove HVAC module from radio bezel (easier to test polarity of the LEDs)
You now have access to the HVAC bulbs.
Remove knee panel under steering wheel (two screws and some prying)
Drop the steering column by removing the two nuts that hold on the rearward most section
Remove the two screws holding the two pieces of the collar together (the plastic immediately behind the steering wheel, where the hazards switch is)
Remove the two pieces of the collar carefully
You now have access to the key ring bulb.
Remove (deep breath) the entire dash! This was actually pretty easy: remove the three screws that the knee panel was concealing and then it just pries off. Be careful around the radio/shifter area - you'll see that it is kind of difficult.
Remove the 4 gage cluster
You now have access to the 4 bulbs in the 4 gage cluster
Remove the 3 gage main cluster
You now have access to the 6 bulbs in the 3 gage main cluster
Remove old bulbs and install LEDs
Test all components for polarity of the LEDs. 50% chance on each one and I averaged worse than 50% on first try, go figure!
The re-assembly is exactly reversed from assembly, and almost easier!
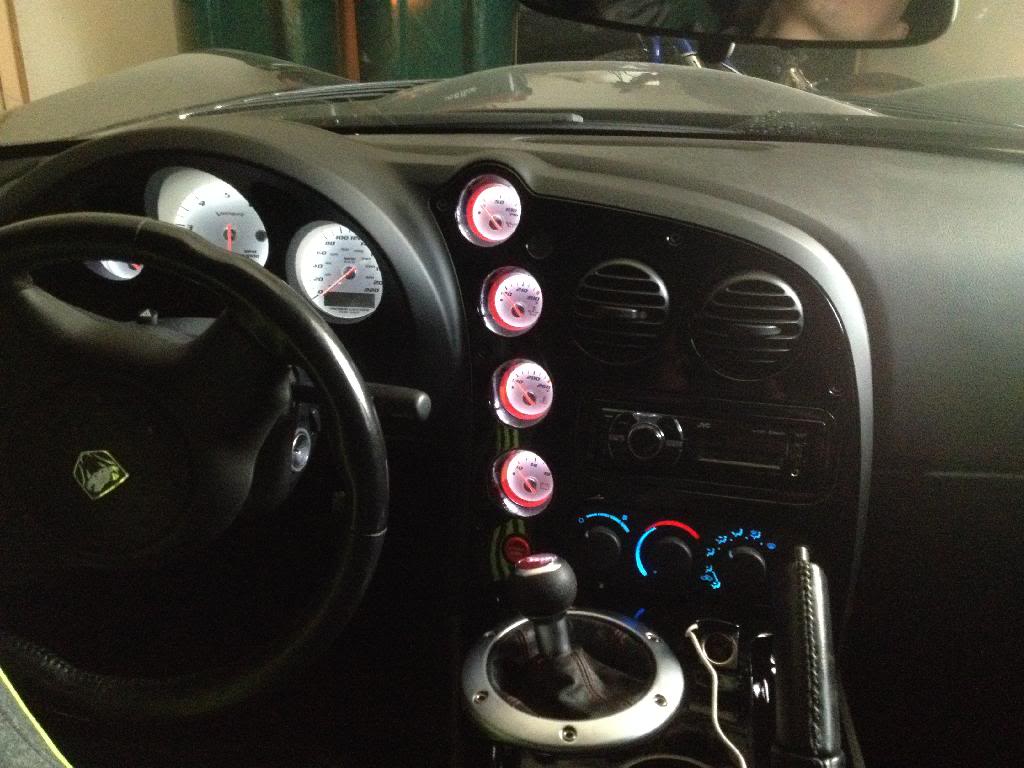
The end result
Notice the HVAC has a little blue to it, even though I used white bulbs. The film that allows light through in the correct places has a blue tint to it.
And here is another shot with the key ring all lit up.
As you might have noticed, I took the time to also paint the 4 gage cluster bezel piece to kind-of mimic the Final Edition 2010 Vipers. I used Rustoleum that was compatible with Plastic. I didn't even scuff these for paint adhesion, since the paint should bond chemically. Just two thick coats.
The interior looks so much nicer now. The yellowish glow of the stock bulbs made it feel dated and not as nice like these LEDs!
Results 1 to 25 of 245
Thread: Gen III/IV Interior LED upgrade
Threaded View
-
04-13-2014 #1Enthusiast


- Join Date
- Nov 2013
- Location
- Sturtevant, Wisconsin
- Posts
- 579
Gen III/IV Interior LED upgrade
Last edited by The_Greg; 03-25-2015 at 02:23 PM.


 Reply With Quote
Bookmarks