
Mr. Acoustics - can you verify the Mishimoto cooler part number? is it just the universal trans/PS cooler?
Best thread i've seen in a while btw
Results 26 to 50 of 80
Thread: Prepping my GTS for the Track
-
06-12-2019 #26Enthusiast


- Join Date
- May 2017
- Posts
- 18
-
06-12-2019 #27Enthusiast
- Join Date
- Jul 2017
- Location
- Michigan
- Posts
- 71
Here is the link to one I used from summit racing - Mishimto MMTC-U. It has the right hose barb size and even comes with hose and clamps so you can replace all the return side hoses when you swap it out. Originally Posted by 3SPerkins

-
06-27-2019 #28Enthusiast
- Join Date
- Jul 2017
- Location
- Michigan
- Posts
- 71
Finished the final round of stuff before hitting the track.
Added the clip on brake ducts from the newer vipers, don't have any pictures but it was simple.
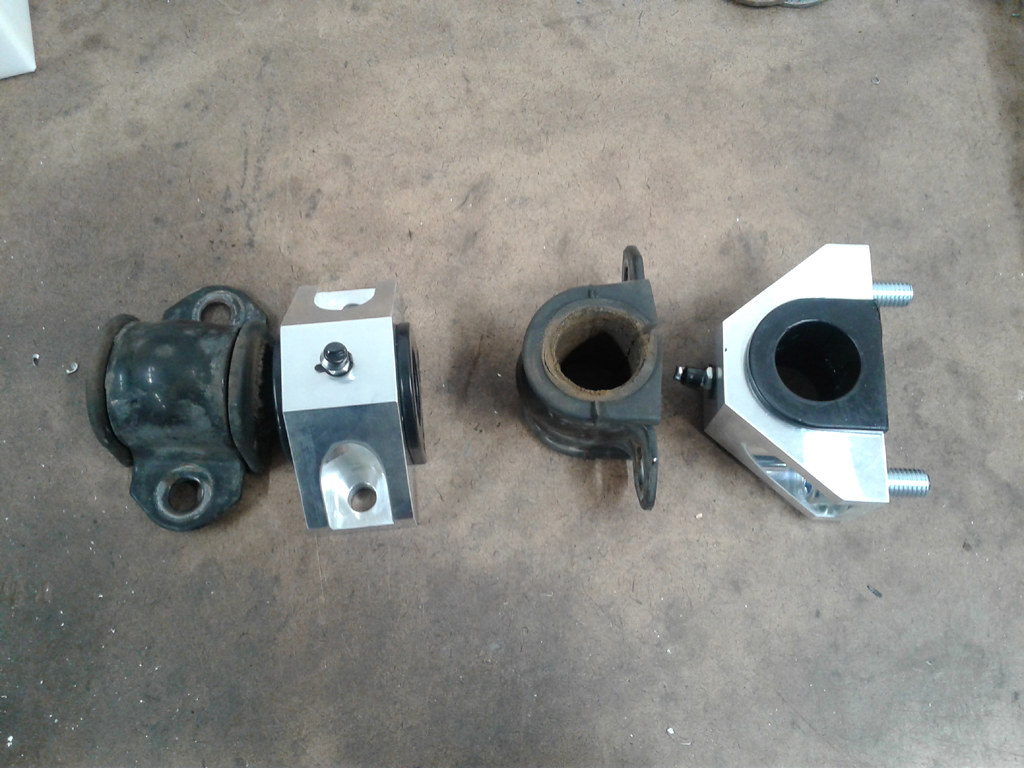
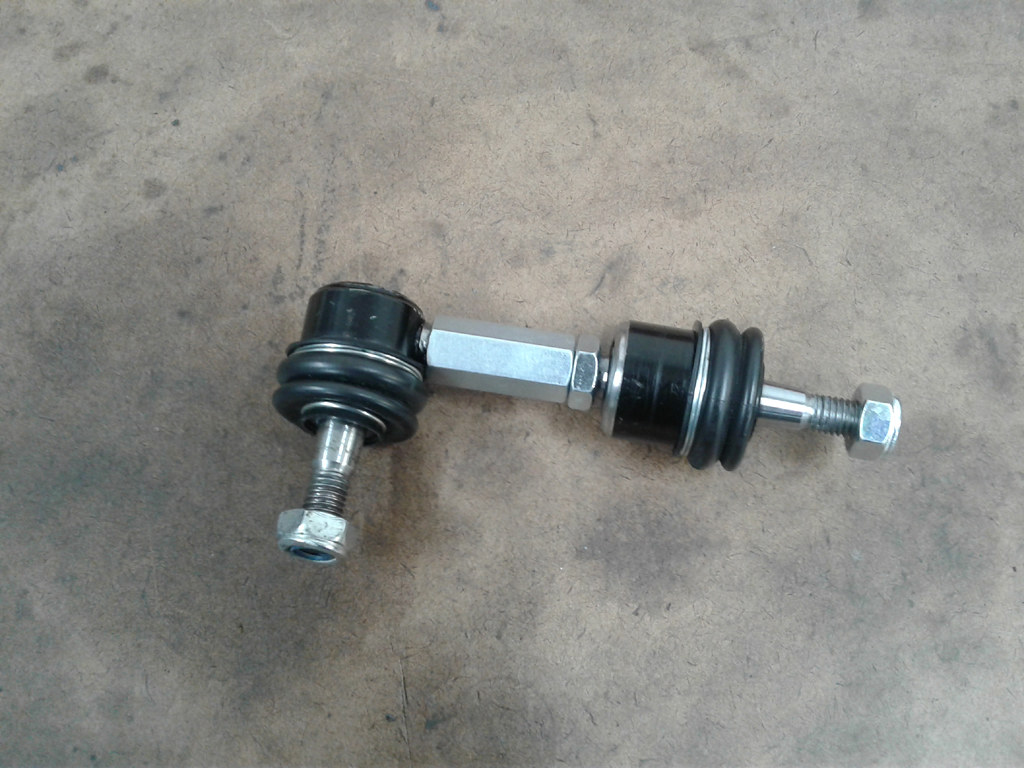
The sway bar bushings were looking a little tired so I used it as an opportunity to upgrade and went with the Ipsco Billet ones with poly bushings. As usual all the Ipsco stuff is top notch. Along with the bushings I installed adjustable end links. Now I refuse to cave into the ridiculous pricing of aftermarket adjustable links for the viper. Every other car I have put adjustable end links on were like half the price of the viper ones, so I made my own. Don't have pictures of the fronts, but basically I took a decent greasable endlink, cut 1" out of the center and then ran a die down it to add threads. McMaster-carr has a nice selection of high strength coupling nuts to join them back together. I didn't have the dies so even buying brand new links from Rockauto, thread cutting dies, and and nuts I was only into the links for about $50. Way better than the almost $250 being asked by multiple viper parts distributors, take that viper tax. The rears are basically the same. You can't take and inch out of the center otherwise you won't be left with much to thread with, but I think I removed about 1/2" and made threads.
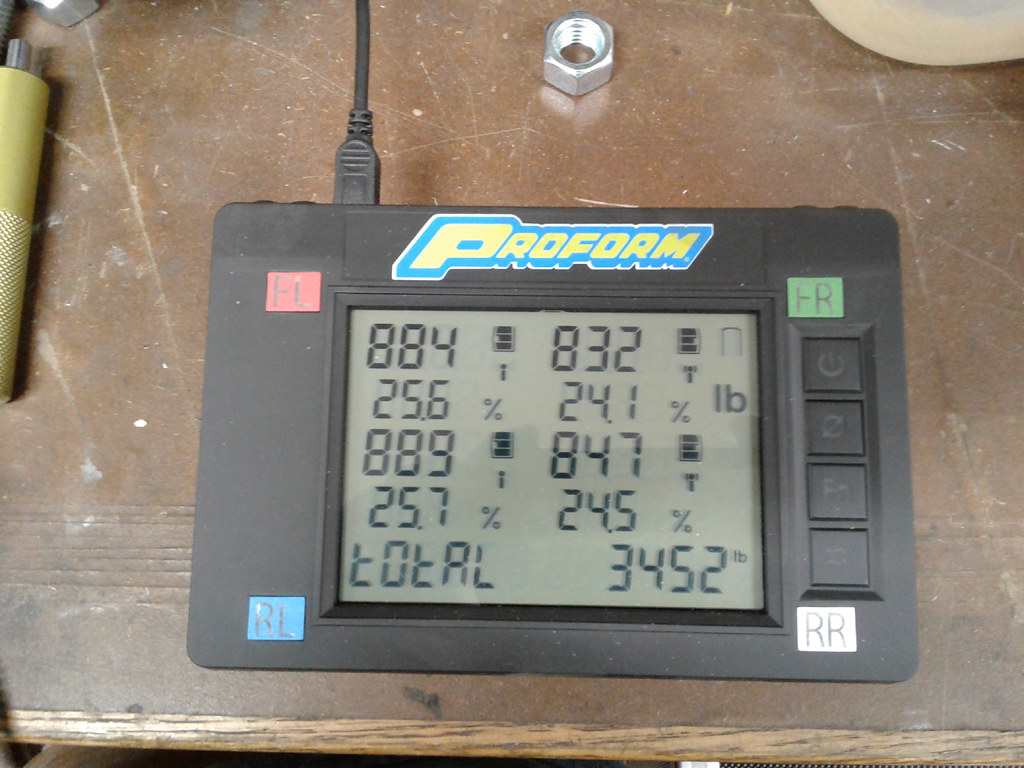
Finally it was up onto the scales for a corner balance and full alignment. I don't think the weight came out too bad since I have not removed anything from the car besides the spare tire and jack. The wheels, shocks, and driver seat are lighter than stock though. The measurements are with a full tank of gas and driver in the car. Also since I had scales I went a little crazy weighing things. A stock GTS driver seat is 30lbs, Gen 4 6 spoke wheels with R888r's are 50lbs front, and 60 lbs rear, and my Forgelines with 335 slicks are 46lbs.
Alignment specs I am starting with:
Front Camber 2.3 deg
Front Caster 6.3 deg (as much as I could get and be equal side to side)
Front Toe 1/8" total out
Rear Camber 1.2 deg
Rear Caster 1.0 deg
Rear Toe 3/16" Total In
After adjusting for bump steer I got the rear to essentially 0 over 4" of travel and the fronts I got to about 4/100" over 4" of travel of toe change. The initial measurements were pretty bad after lowering the car, so remember kids if you lower the car don't forget to adjust bump steer.
The specs are based on some suggestions from online and Dan at specialty performance. Some people called for more rear camber, but I wasn't sure that was really necessary. I have seen people argue both ways. I am certainly open to all the advice I can get on car setup.

-
06-27-2019 #29Enthusiast
- Join Date
- Oct 2013
- Location
- New Braunfels, TX
- Posts
- 1,836
Rear camber doesn't need to be extreme. After trying mid 2's at a couple of tracks, I decided mid-high 1's is plenty.
-
07-14-2019 #30Enthusiast
- Join Date
- Jul 2017
- Location
- Michigan
- Posts
- 71
So I went to the track a couple weeks ago, I have just been so busy I haven't had time to make a post about it.
So car performed flawlessly from a reliability standpoint. The brakes were great and never faded, even on one of my longer 30min sessions. It was about 90 degrees ambient outside and the car never overheated or got super hot with the water temp needle sitting right around or just barely above the 3rd middle line. I was the only one overheating even after drinking about a gallon of water over the afternoon, it was a sweat fest. The car is very predictable and communicates well. I knew exactly when over steer or understeer was about to happen and it was easy to catch and correct.
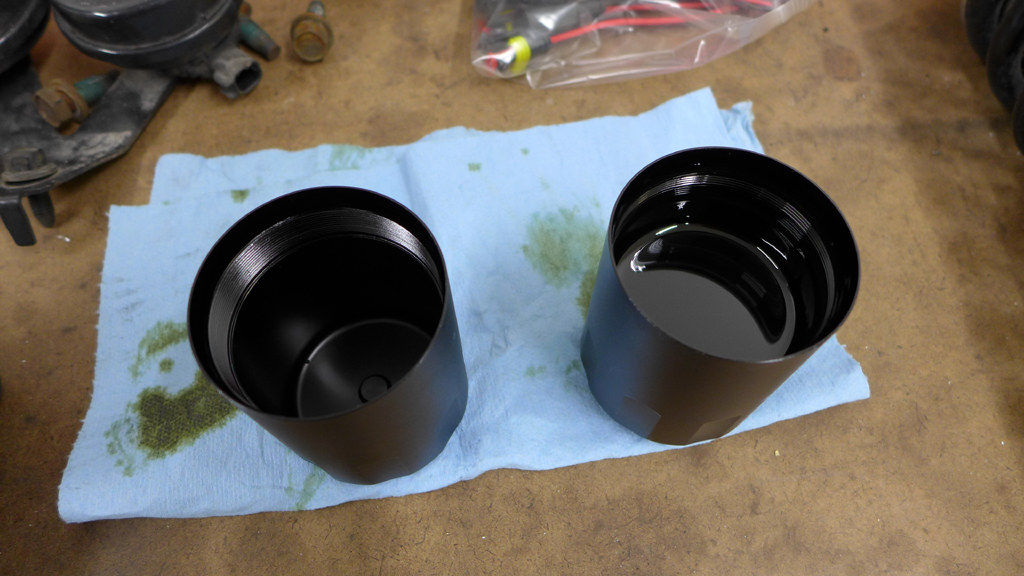
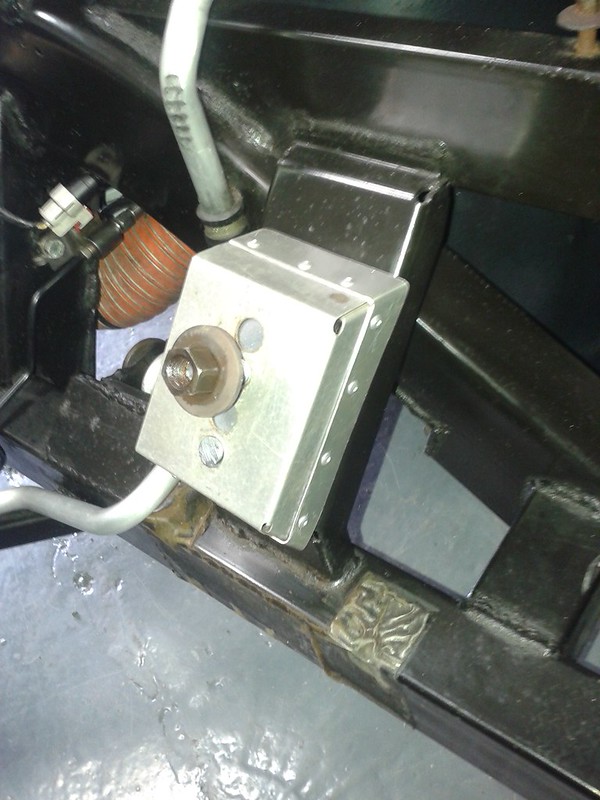
The catch can setup worked well, maybe to well. So over about 75 miles of track time I pushed about 16-18oz of oil into the catch can. It was all in the can connected to the crank vent on the top of the block. The catch can on the valve covers had literally nothing in it. I ended up filling the crank vent can twice in the time I was out there. I am glad I checked it after the first session. Not sure if that is a typical amount, so anyone with a catch can setup and tracks a lot I would like to hear your results. I currently am running mobil 0-40, but am switching to 15-50, and noticed during a couple hundred miles on the street I collected almost no oil. Only during the extended high rpm time on the track did I really push oil.
Left is Valve Covers, Right is Crank Vent (had already filled once and emptied before this picture)
Now I need some advice from the track junkies. So the car as far as balance into and out of turns was concerned was reasonably neutral. So the shocks were pretty close as far as turning knobs was concerned I believe. But after I would enter a turn and get the car set it just seemed to lack front grip. The transition from braking to turning and setting the car was smooth and easy as long as I didn't get too aggressive with trail braking. But once set the car just seemed like it didn't have the mid corner grip I expected. At these points I would just be doing maintenance throttle. Other cars on the track that I would follow (also on slicks, but much narrower) had no trouble staying ahead through some of the long sweepers. It was a kinda frustrating.
One observation is that the rear tires came up to temp much quicker and the pressure built much quicker because of that. I would have thought that with all the work the front does with braking and turning they would heat up faster. Eventually everything leveled off front to rear and tires pressures stayed consistent, but the rate at which that happened was interesting. The temps of the contact patches may hold the answer to my grip and probably alignment problem. At the rear across the section the temps were fair even, maybe 5f from inside to outside. Up front was a different story. There was at least a 20 degree spread and maybe more at some points on the tire. Interestingly it was the inside that was the hottest which would indicate there was possibly too much camber and I wasn't getting the contact patch flat. Does that even sound plausible since I am running 2.3 degrees negative up front? Do running 335's upfront require less front camber? I am running without the sport shims installed, I wouldn't think that would effect the kinematics of the suspension much? Any advice to get more grip is always appreciated.
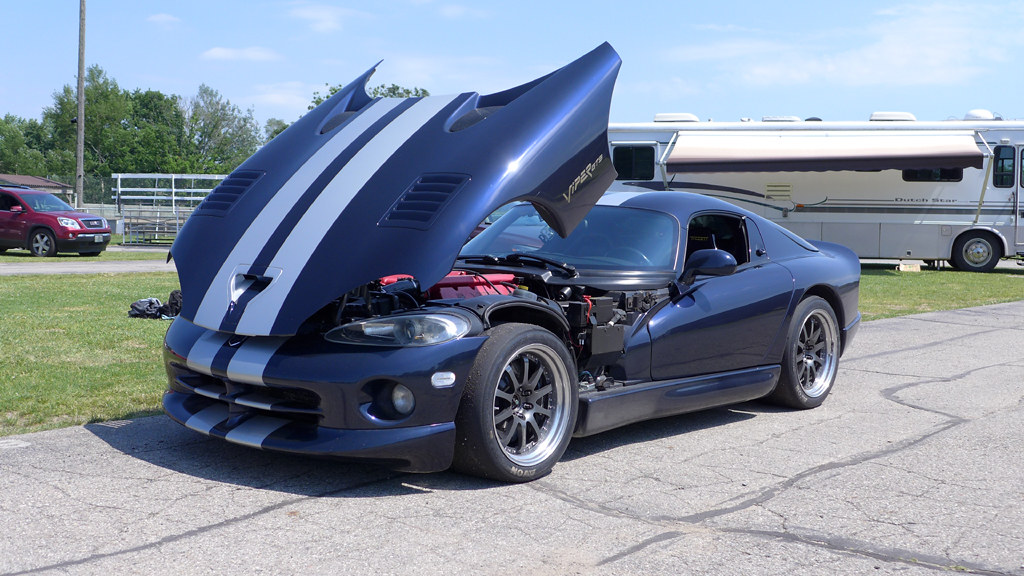
A picture of the car in between laps at the track. I can't wait to get back out there.
-
07-14-2019 #31Enthusiast
- Join Date
- Oct 2013
- Location
- New Braunfels, TX
- Posts
- 1,836
The wider your front tires get, the more you need to look at how long you are loading them and the heat/wear distributions. More camber doesn't help that much if you aren't leaning on the tires a long time and getting the outsides hot. It can also lead to flat-spotted inboard treads and reduced braking efficiency.
My frequent technique was to get the car turned, transfer weight to the rears with steady, careful throttle steer and let the fronts dangle a bit as the wheel unwinds. This works much better with narrower front tires and plenty of camber. Getting the tire temps and camber balanced takes some track experimentation, good notes and careful thought. A lot of early Gen2 fast guys were dropping the rear bar at some of the tracks, but I never did.
-
07-15-2019 #32Enthusiast
- Join Date
- Jul 2017
- Location
- Michigan
- Posts
- 71
Thanks Dean, your experience has been very helpful. Some small tweaks and logging should eventually get me where I want to be, I am just trying to accelerate the process since summer is short here in the midwest.
I do find it interesting that you said some early guys decided to drop the rear bar though. Conventional wisdom would say that would only lead to an even bigger understeer problem as stiffening at the rear would help grip at the front. I have to wonder what the rest of their setup was like for them to come to the conclusion that removing the bar was the best fix. I guess oversteer was a bigger problem early on due to tires and lack of aftermarket suspension components maybe?
-
07-15-2019 #33Enthusiast
- Join Date
- Oct 2013
- Location
- New Braunfels, TX
- Posts
- 1,836
Could be. My observation was that instead of working on mechanical grip, everyone seemed to immediately slap on big wings and splitters - then to Comp Coupes. I went with the 3-way EMI Penskes, monoballs and anti-toe brackets because I still wanted a real highway ride. Awesome combination!!
Last edited by GTS Dean; 07-15-2019 at 06:36 PM.
-
09-07-2019 #34Enthusiast
- Join Date
- Jul 2017
- Location
- Michigan
- Posts
- 71
I figured it has been a while since I updated.
I went to the track last week to see how some changes worked on the car. I will admit I was a little behind the 8 ball and not super happy with my preparation level. I forgot some things when I went to the track including a tire temp gauge so not sure how well I am heating the tires. I basically wasted the first hour of track time because I was still screwing with things. Overall though I got the car working better, mid corner grip was much improved over the last time and the car had good balance under braking. Turn in was really good, just like before, and the balance and ease at which you can catch the car when you overdo it is still excellent.
That being said I already knew the car was not going to be as perfect as I hoped. When I was inspecting the car earlier in the week I noticed that my rear poly sway bar bushings had developed a decent amount of slop, so rear roll transitions would be interesting. I eventually contacted mark at ipsco and he sent out new bushings since the premature wear was so unusual, but the postal service only works so quick and I didn't get them in time. My tires were almost heat cycled out starting the day, and really are now toast. I was planning on this being the last time using them. I discovered post track day that my very expensive and supposedly superior poly engine mounts were cracked. Kind of mad about that knowing what they charge for them and they failed after 2 track days, 2 autocrosses, and street driving. I don't drag race and haven't experienced wheel hop in the car so just a little frustrated. I have a plan to build some custom mounts over the winter so I never have to deal with a separated mount again. I also discovered I broke a bolt in one of my 3 piece Forgeline wheels after the track day. Going to contact them this winter and rebuild all the wheels and get the fresh rubber on them for the spring. My winter project list just keeps growing, hopefully next year I will really get the car dialed in.
The damaged mounts:
And for your viewing pleasure a couple of laps from later in the day when I remembered to turn on my camera. I figure fresh tires and fixing all my broken pieces should knock a decent amount of time off when I am out next.....someday
-
09-09-2019 #35Enthusiast
- Join Date
- Oct 2013
- Location
- Pittsburgh
- Posts
- 1,634
Great Gen 2 track build.
-
09-09-2019 #36Enthusiast
- Join Date
- Aug 2015
- Posts
- 232
That sucks about the motor mounts; I've heard of them melting before but not cracking like that.
-
09-11-2019 #37Enthusiast
- Join Date
- Mar 2017
- Posts
- 8
Great thread and great pics! You do beautiful work.
-
09-11-2019 #38Enthusiast
- Join Date
- Apr 2014
- Posts
- 380
Looks like fun.....I have the same Color combo (by Vin)! Good tip on the end-links! Love McMaster-Carr
-
09-11-2019 #39Enthusiast
- Join Date
- Mar 2016
- Location
- Kansas City, MO
- Posts
- 3,836
Nice thread.
-
09-11-2019 #40Enthusiast
- Join Date
- Jul 2017
- Location
- Michigan
- Posts
- 71
Thanks for following along everyone. I was hoping to do a couple more track days at different tracks this month, but with the broken parts and the rest of my schedule being busy I will probably be putting the car into winter project mode. Just more items on the to do list, but it should be in extra good shape next spring. Luckily my garage is heated and insulated, so I will try and keep the updates coming over the winter.
-
04-12-2020 #41Enthusiast
- Join Date
- Jul 2017
- Location
- Michigan
- Posts
- 71
So I know you are all bored currently sitting at home avoiding the pandemic, so I am here to give you some fresh viper content.
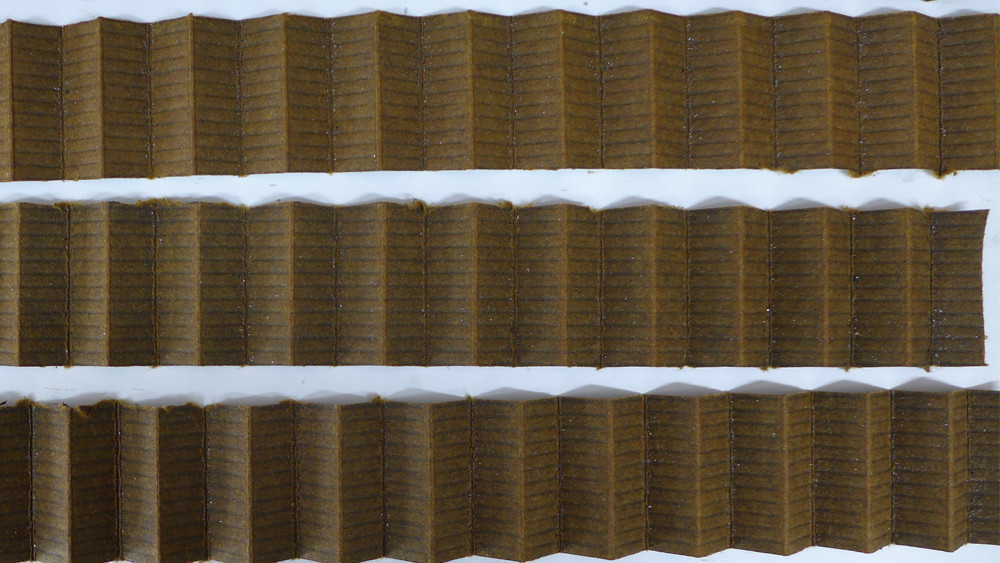
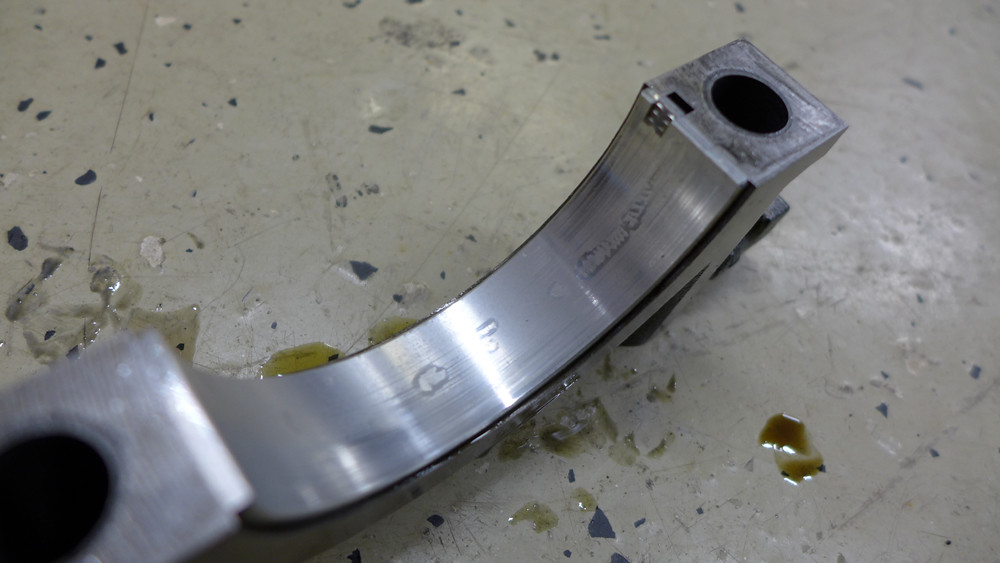
Lets start with the bad that I have been sitting on since last September when it happened. My main bearings started eating themselves. I cut open my filter after a track day and discovered a S%*T ton of metallic debris and then started pulling caps to investigate. Below is a picture of the filter media (the picture doesn't do justice what I could see in person). All the speckles are material and also pictured is the worst main bearing #6. 1-3 had no damage and 4-6 gradually got worse. Ironically rod bearing #3 was in great shape. Got to look at the bright side. Haha I caught it before anything spun or marked the crank thank god.
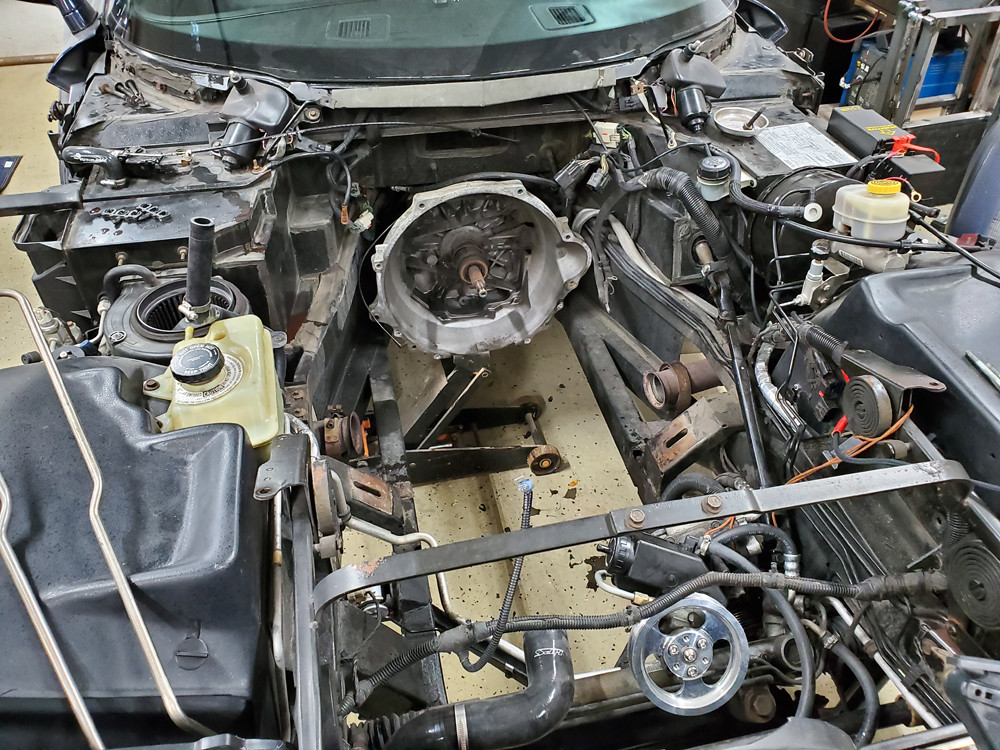
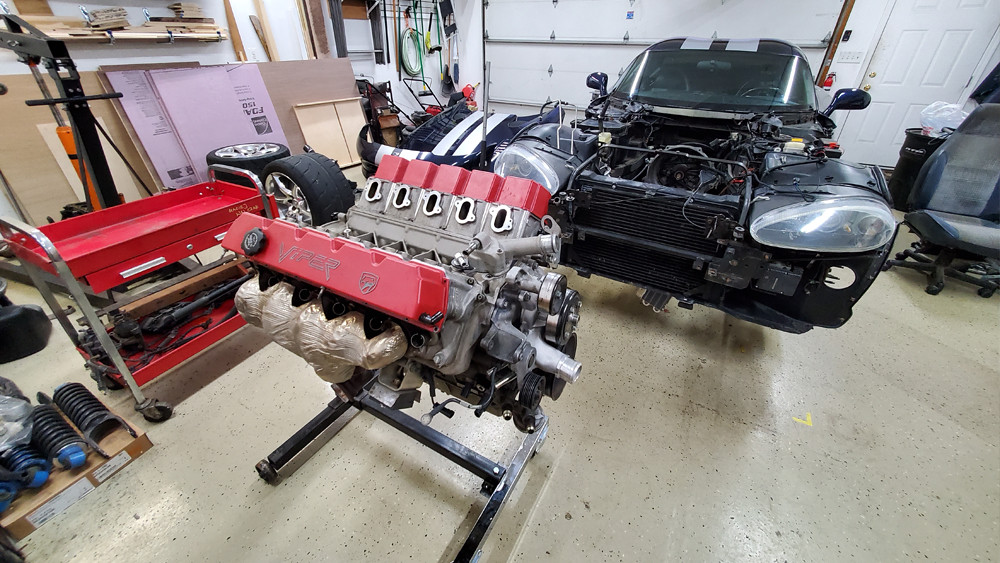
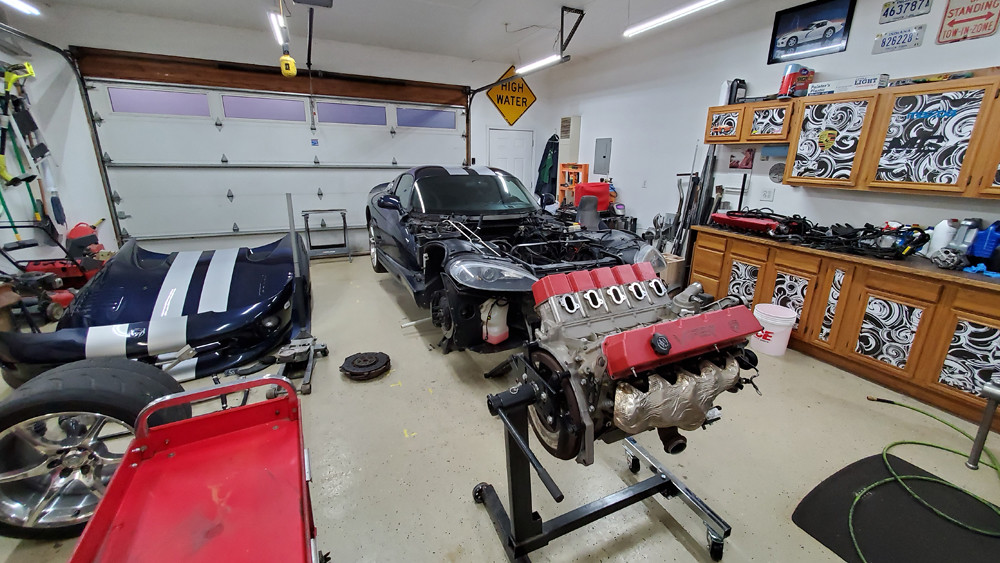
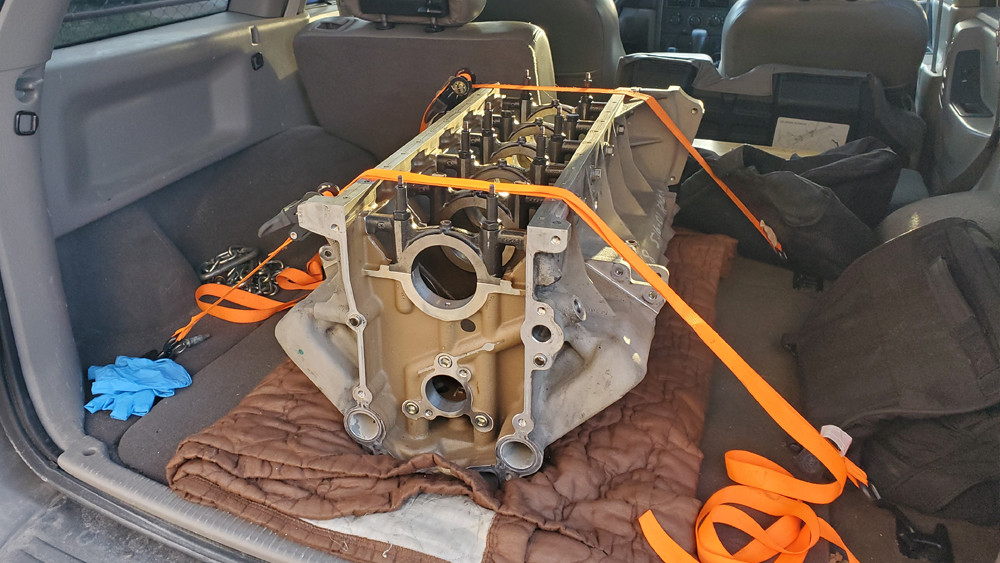
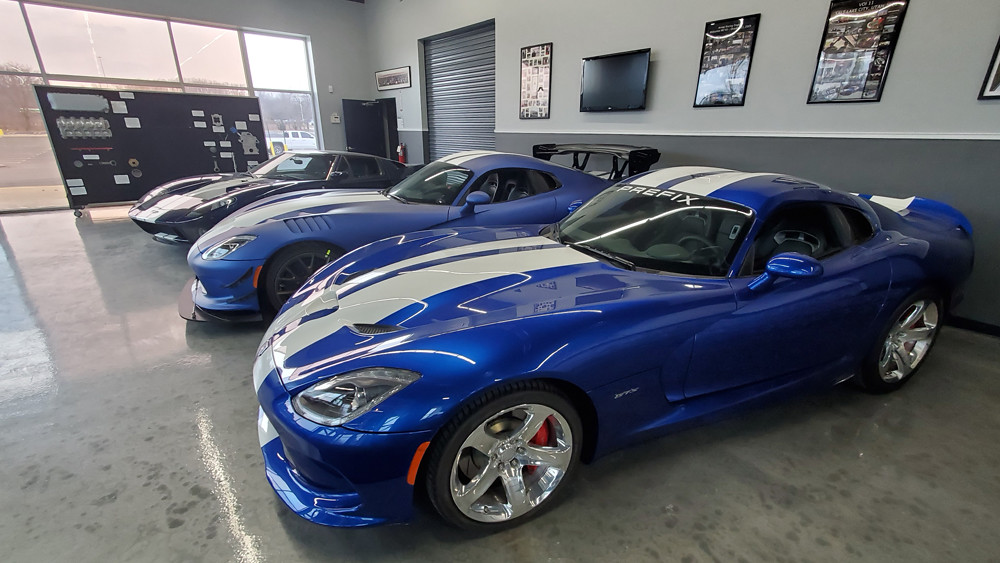
So about 1 month before Michigan shut down I yanked the motor. As usual I waited all winter until it was spring to do the work I should have been doing. Lucky for me I live less than a 15 minute drive from Prefix, so I contact Scot from prefix here on the forum. I stripped the engine and dropped off the block and crank to them. As usual they always have excellent eye candy inside the main entrance.
-
04-12-2020 #42Enthusiast
- Join Date
- Jul 2017
- Location
- Michigan
- Posts
- 71
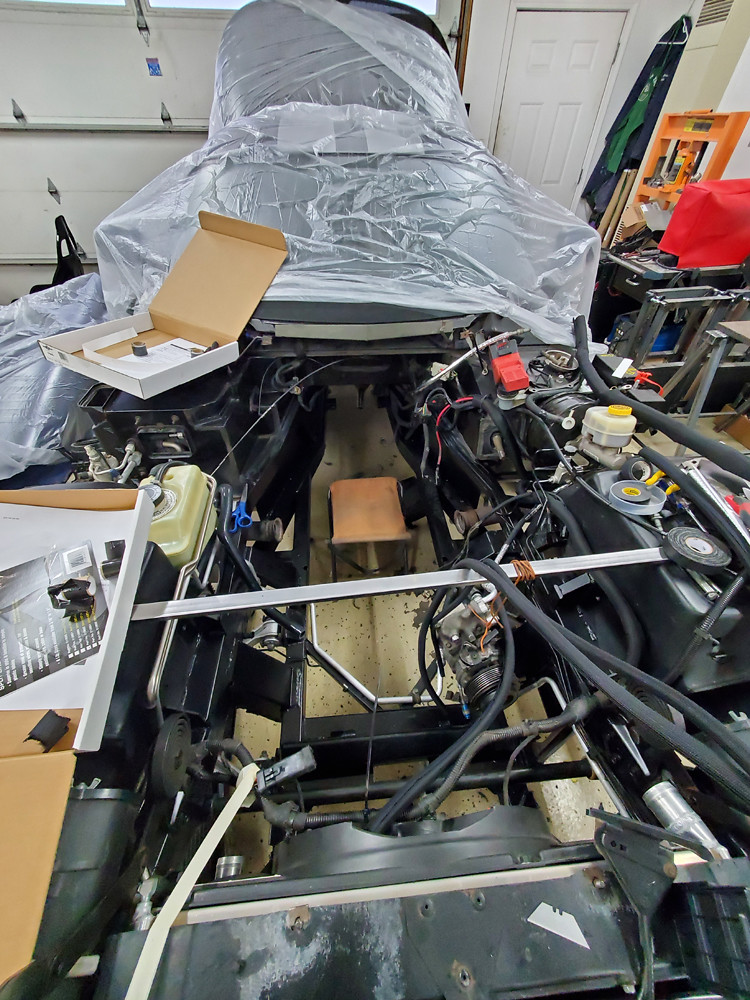
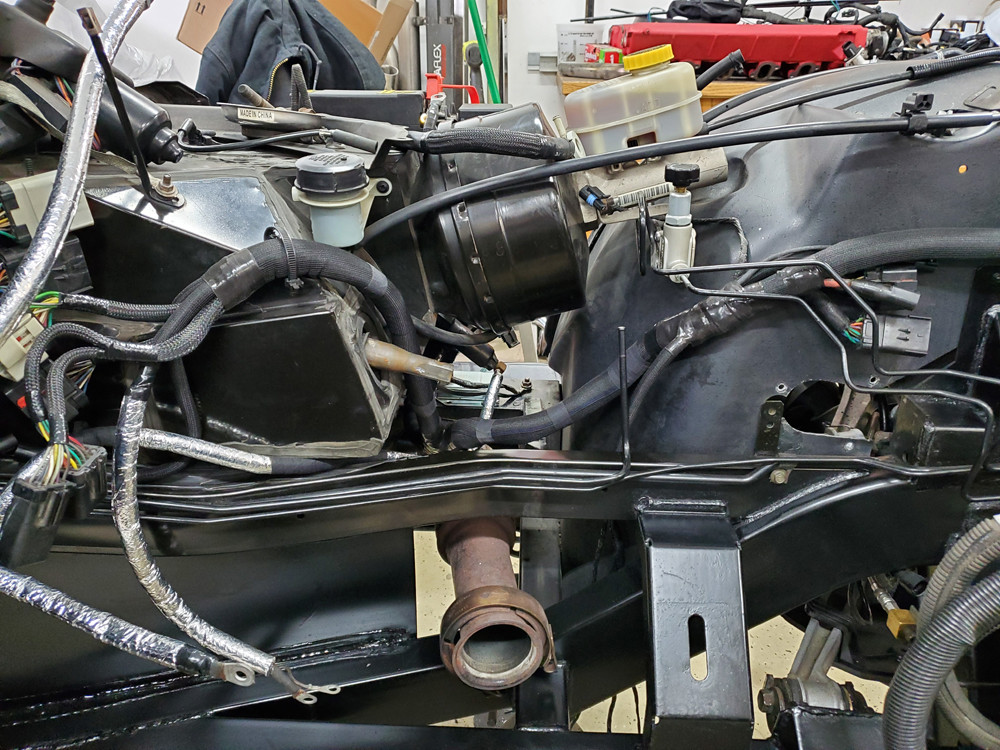
So while Prefix was working their magic I wanted to take care of the disaster that was my engine bay. It was filthy, the wiring harness looked like garbage, and there was a lot to be desired as far as how the frame left the factory.
Step 1 was attacking the wiring harness. After 20 years and 60k miles the outer tape was toast. The heat had melted some parts and it just looked bad. So it all was removed, mostly by cutting since it had melted into solid blocks. I don't have pictures of the entire process.
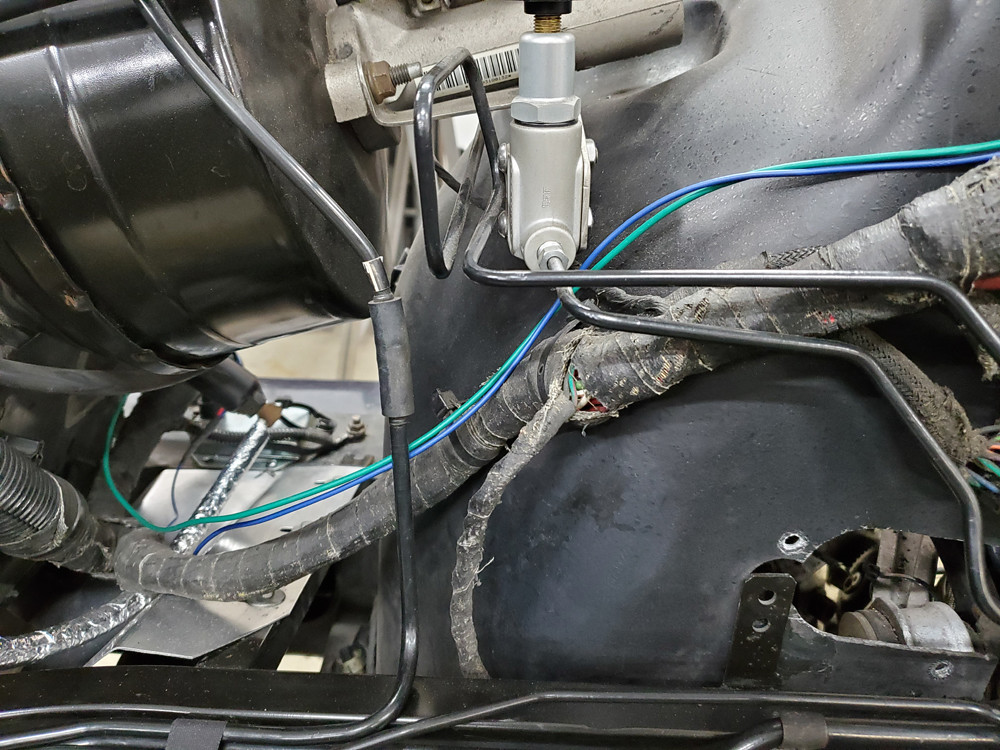
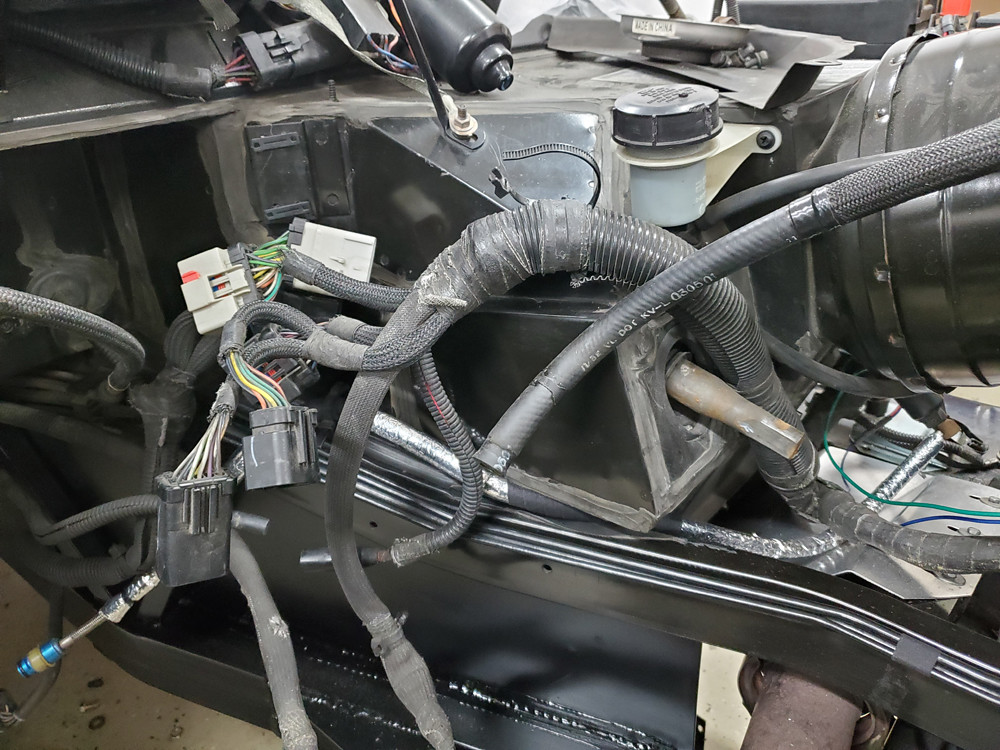
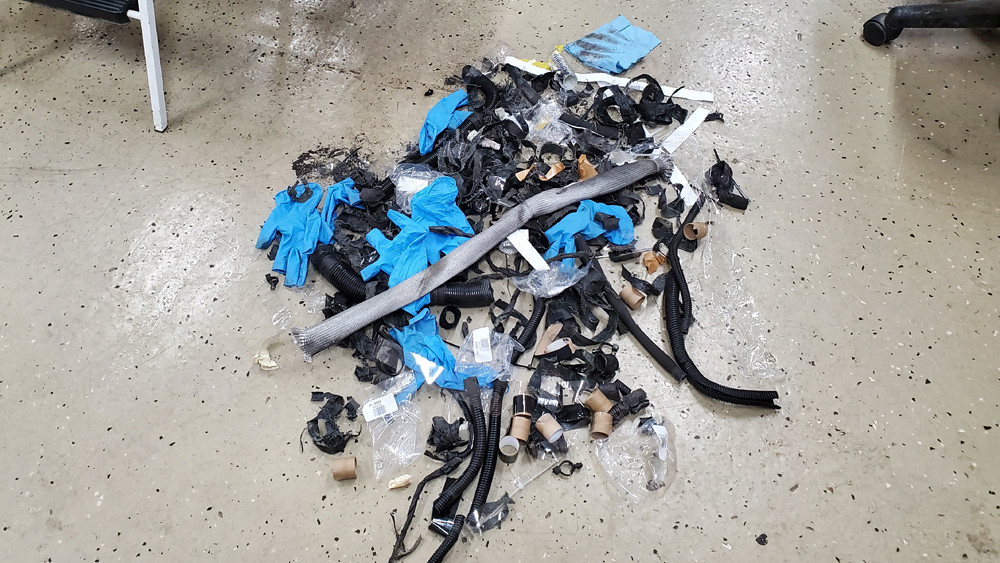
So here is some in progress and finished pictures. I used DEI easy loom to cover everything, self fusing tape to wrap the ends, and tesa tape in other areas. Everything was bundled before the loom went on. After the harness was contained I used a fiberglass/aluminum heatshield from McMaster Carr to wrap the main harness on the drivers side and any area that could be near the manifolds. There was no heat shielding from the factory on a lot of the harness. Along with that I put a full length heat wrap on the clutch line. The factory piece only covered part of it. The fuel line also got some, which was probably overkill. The stuff was relatively affordable and easy to use. I also put some new pieces on the ABS wire and first section of brake line by the hub.
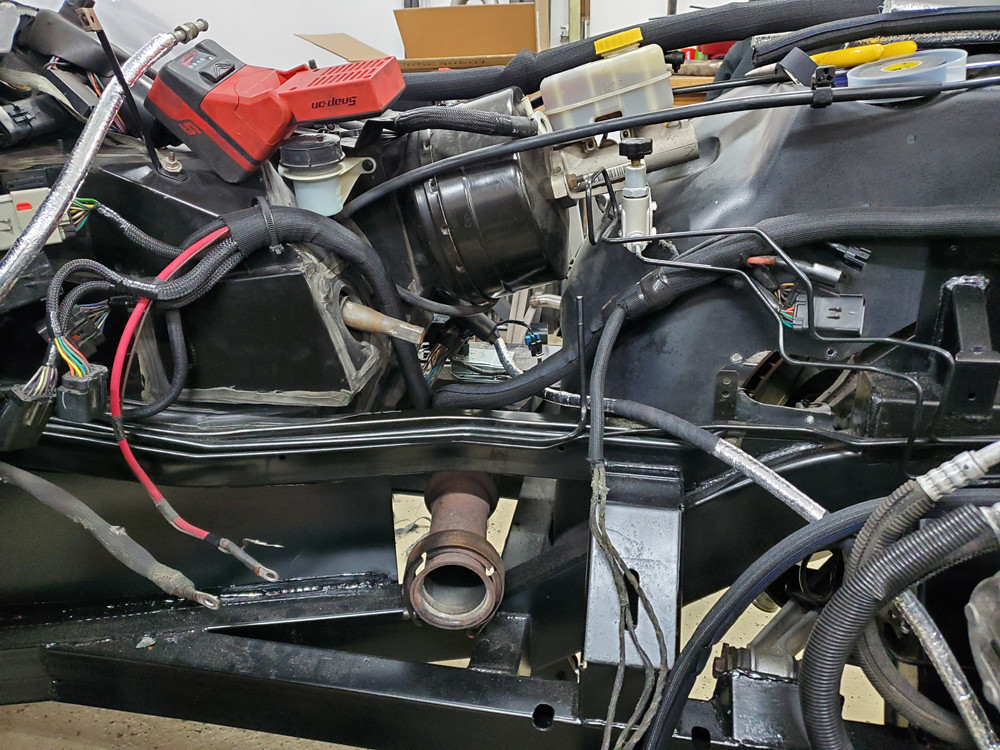
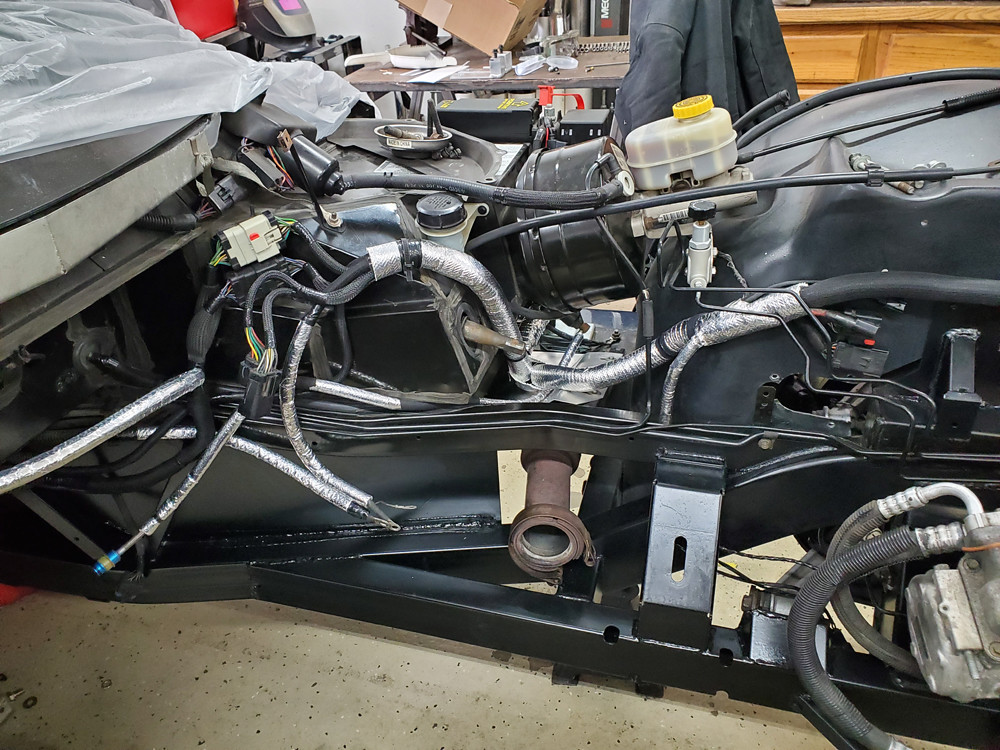

After the engine bay wiring got its make over I did the same to the wiring harness under the intake manifold. It was much less melted but still pretty nasty.

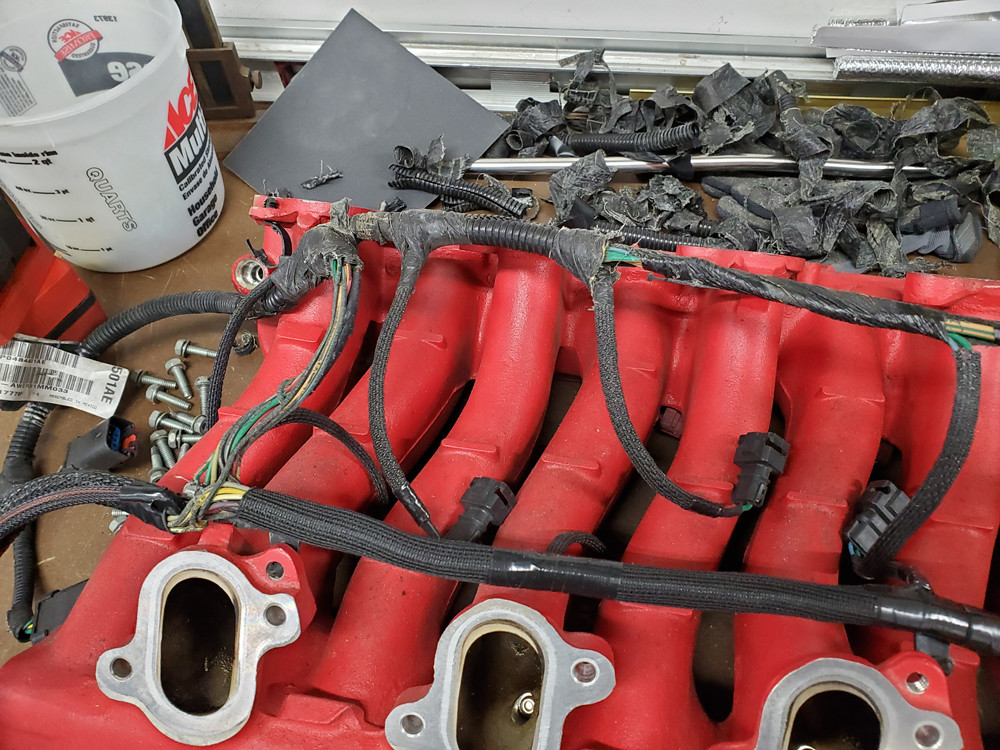

So that is it for today, I have more pictures I need to go through and I will try and post those in the next couple of days so stay tuned for some more stuff including some new fabricated parts I am excited about.
-
04-13-2020 #43Enthusiast
- Join Date
- Aug 2015
- Posts
- 232
I love the attention to detail, the harnesses look great! That really sucks about the main bearings....very odd to see damage there. I'll be interested to hears your/Prefix's theories on what caused that? Any plans for the engine while it's apart, or will it go back together in stock form?
-
04-13-2020 #44Enthusiast
- Join Date
- Jan 2014
- Location
- So Cal
- Posts
- 1,117
I do t know how I missed this thread, awesome work. It brings back memory’s!
-
04-13-2020 #45Enthusiast
- Join Date
- Dec 2013
- Location
- CANADA
- Posts
- 599
Love this thread. Amazing work, Mr Acoustics

-
04-13-2020 #46Enthusiast
- Join Date
- Jul 2017
- Location
- Michigan
- Posts
- 71
The final build hasn't been fully determined yet, but likely will be a mostly stock rebuild due to budget and money already being spent on other things. Originally Posted by 71firebird400
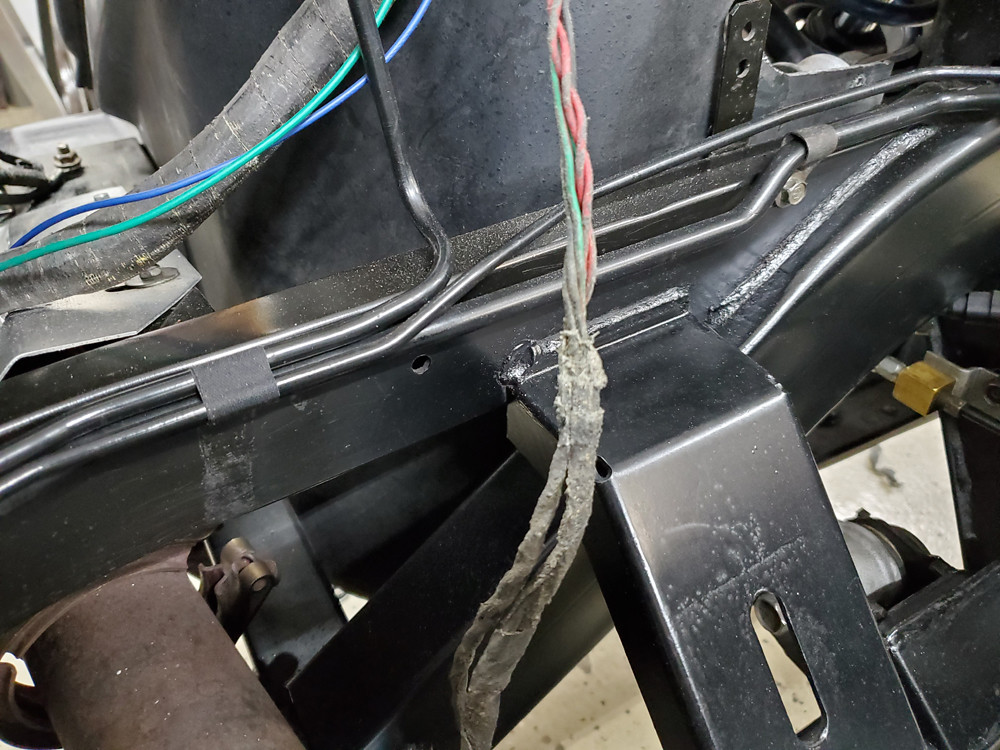
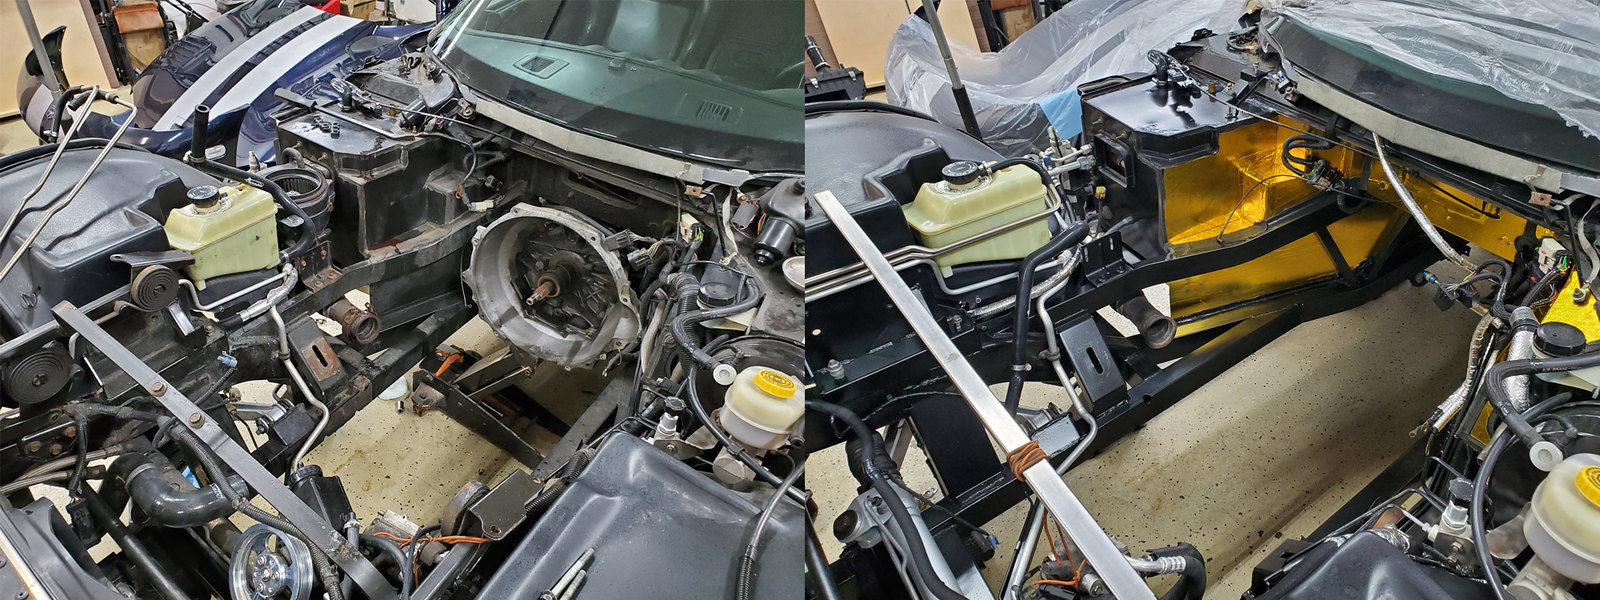
So after the wiring was dealt with I addressed something that plagues pretty much every generation of viper and that is the frame welding mess. Apparently they had the Flux Core turned up to 11 because I have seen Harbor Freight welders produce less weld splatter. Since the engine and trans was out and I had room, I scraped the entire engine compartment all the way to the frame tips, trans tunnel, and front wheel wells to remove the splatter. I also rounded over the corners of any brackets to make the engine bay more hand friendly. I always hated reaching my hands into the the engine bay just to rub up against the frame. The trans tunnel may have had the worst case of weld splatter, it was honestly impressive. It felt like the grainiest sandpaper ever and if you had on rubber gloves they would inevitably snag and rip. So after using a scraper and then a light sand, everything got repainted in a nice semi gloss black to match the factory finish.
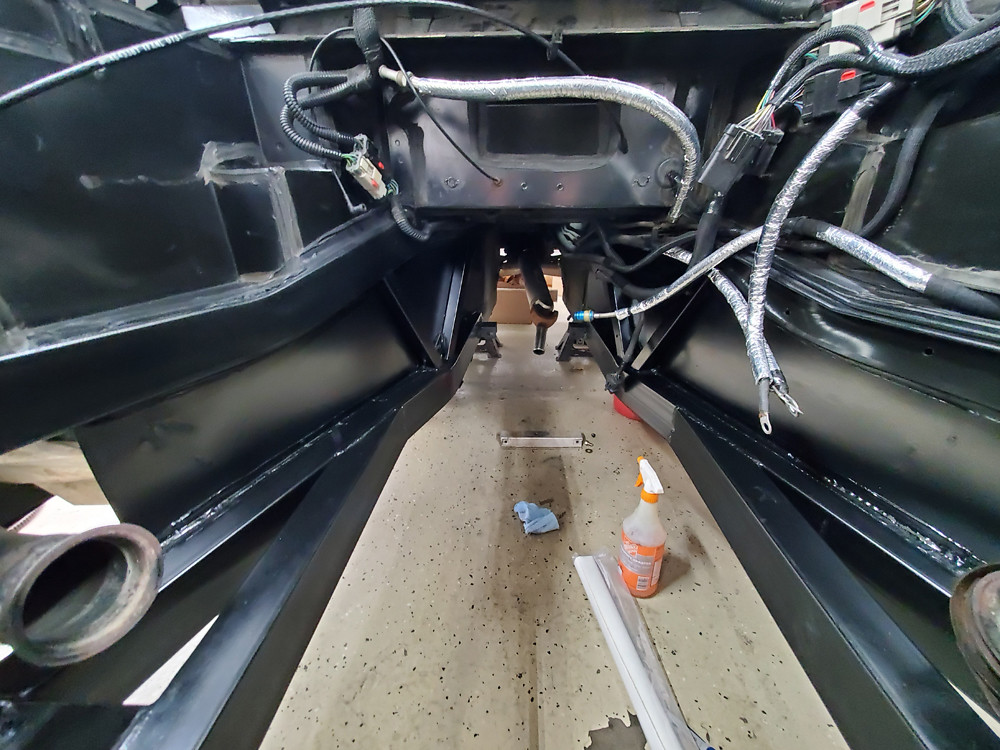
After that I made my own version of a McLaren F1 and went a little nuts with the gold reflective foil. While everyone addresses the side sills, which I have already done, after a hard romp or track session you can feel the heat on the trans tunnel side too. So I went overboard and did the entire tunnel and fire wall near the engine. Even if it is only moderately effective at reflecting the radiated heat it will have been worth it. Everybody knows bling factor is important too!

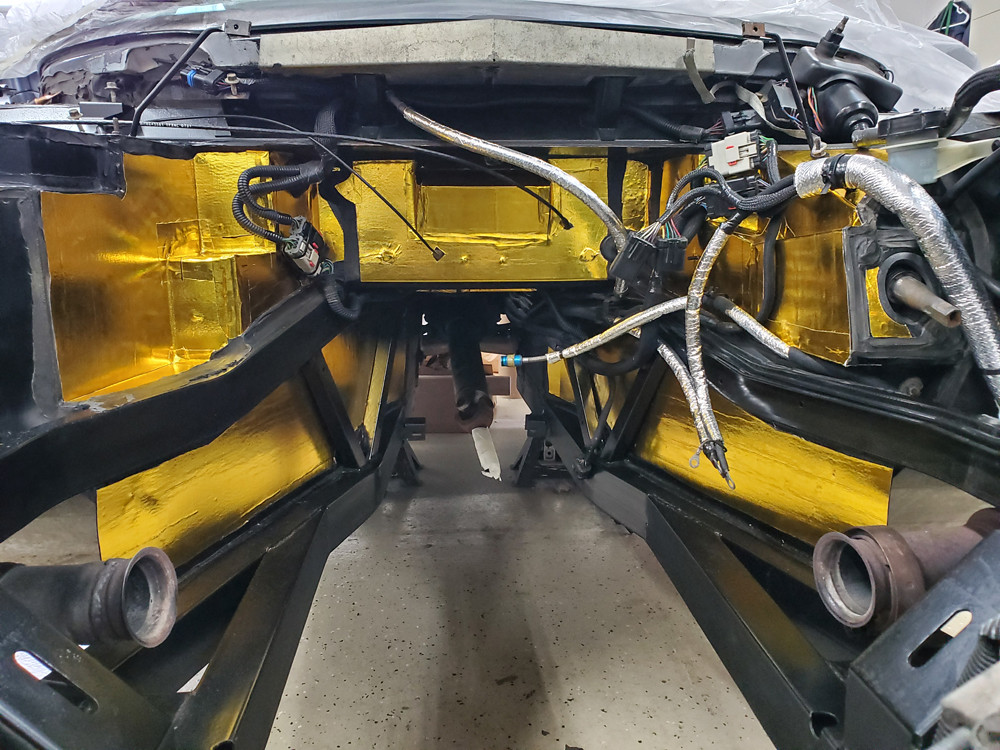
It is quite the transformation from when I pulled the engine. Too bad I won't be able to win any Concourse events now since I removed all the factory weld splatter. Oh Darn! Haha. Most of it will be hidden and covered up once the power train is installed though.
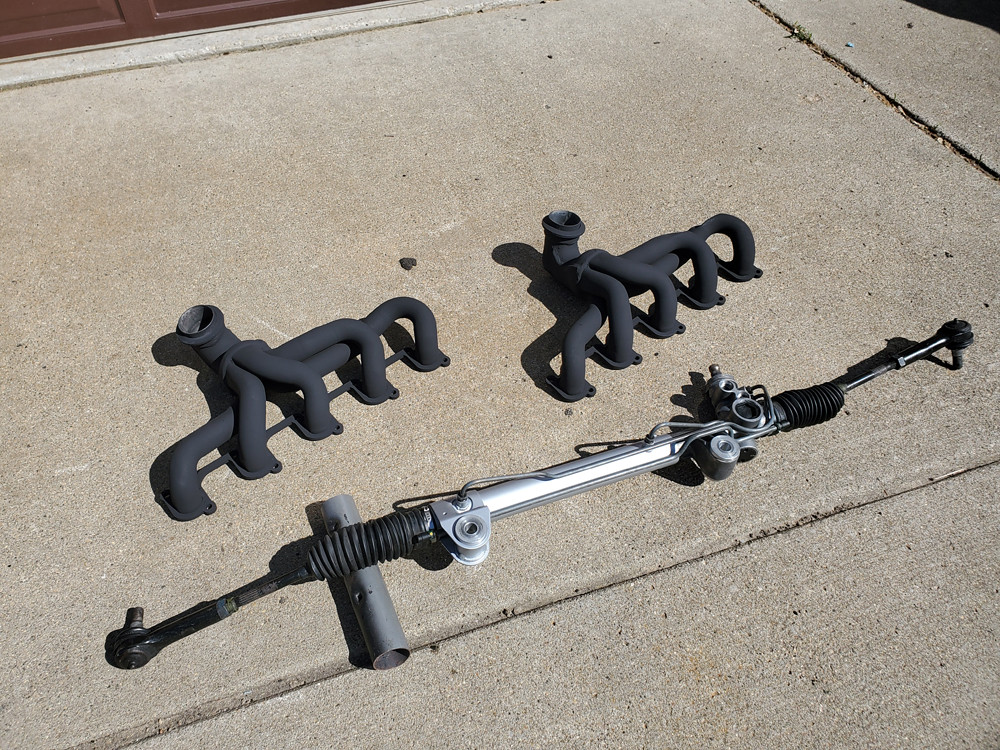
Another easy task to do while it was all apart was fix the rusty eye sore that is the stock exhaust manifolds. They all seem to have some rust no matter how little miles are on them. I ended up sandblasting them and hitting them with some high temp paint. Hopefully that will keep them looking nice until I do a heads/cam/header swap someday. I also went ahead and cleaned and rebuilt the steering rack. There was some fluid in the passenger boot indicating it was time.
-
04-13-2020 #47Enthusiast
- Join Date
- Jan 2014
- Location
- So Cal
- Posts
- 1,117
Nice work! I have to say, I have never seen weldments as poorly executed as those on the Viper. My understanding is that the frames were produced in Canada. All I can guess is someone at Chrysler was getting a major payoff.
-
04-14-2020 #48Enthusiast
- Join Date
- Oct 2013
- Location
- South of London, Surrey
- Posts
- 7,577
That's really great work, thanks for taking the time to post all the pictures.
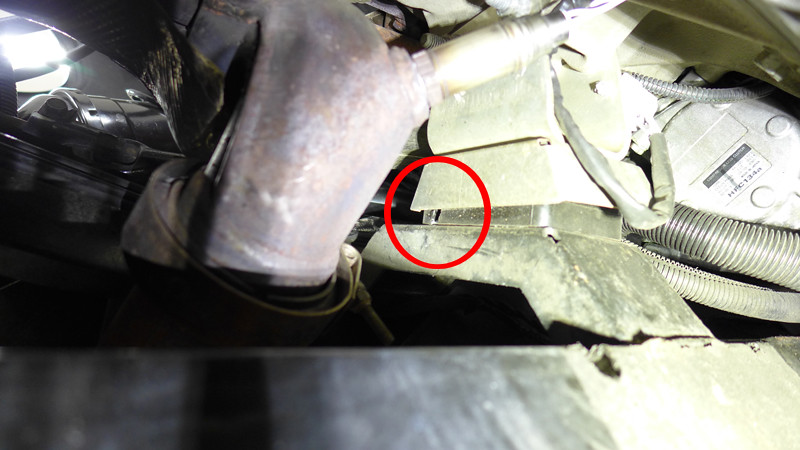
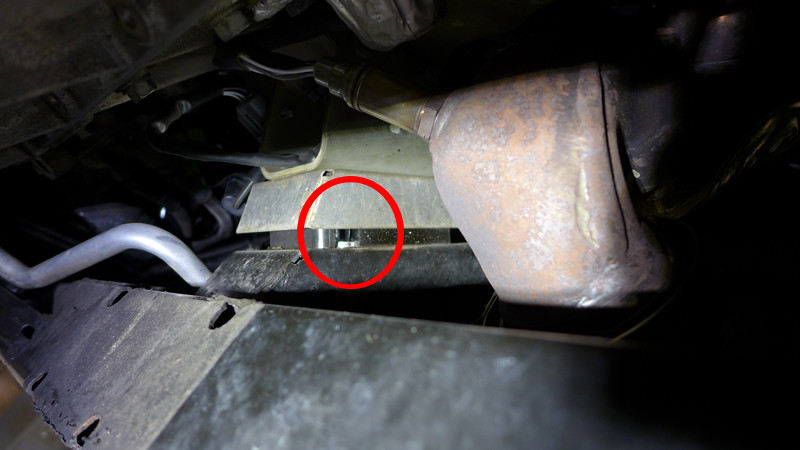
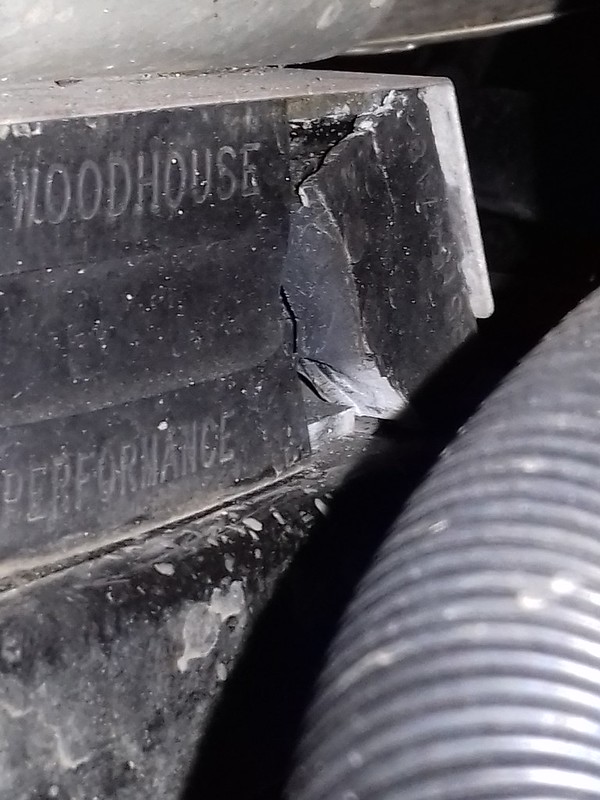
I have the Exact same issue with the So Called Upgrade Poly Engine mounts The cracking is in the same place.
I presumed it was from excess heat from the headers because the OEM heat shields do not drop down far enough to cover all of the mounts. I noticed the scorching on the lower parts of the mounts.
When I fitted Poly mounts on my friends car I got some sheet aluminium and extended the length to cover the mounts
Here is a pic of my "upgraded" mounts!

-
04-14-2020 #49Enthusiast
- Join Date
- Oct 2013
- Location
- South of London, Surrey
- Posts
- 7,577
Completely agree with you on the weld splatter on the frame, its dreadful, that's really great work you have done
Out of interest, did you go back to stock mounts or stick with another set of Poly ones?Last edited by Fatboy 18; 04-14-2020 at 03:25 AM.
-
04-14-2020 #50Enthusiast
- Join Date
- Jul 2017
- Location
- Michigan
- Posts
- 71
Yeah, someone probably got a good paying contract and did sub-par work. It makes me think of this slightly inappropriate but honestly fitting welding meme. Originally Posted by Camfab

 Reply With Quote
Bookmarks