
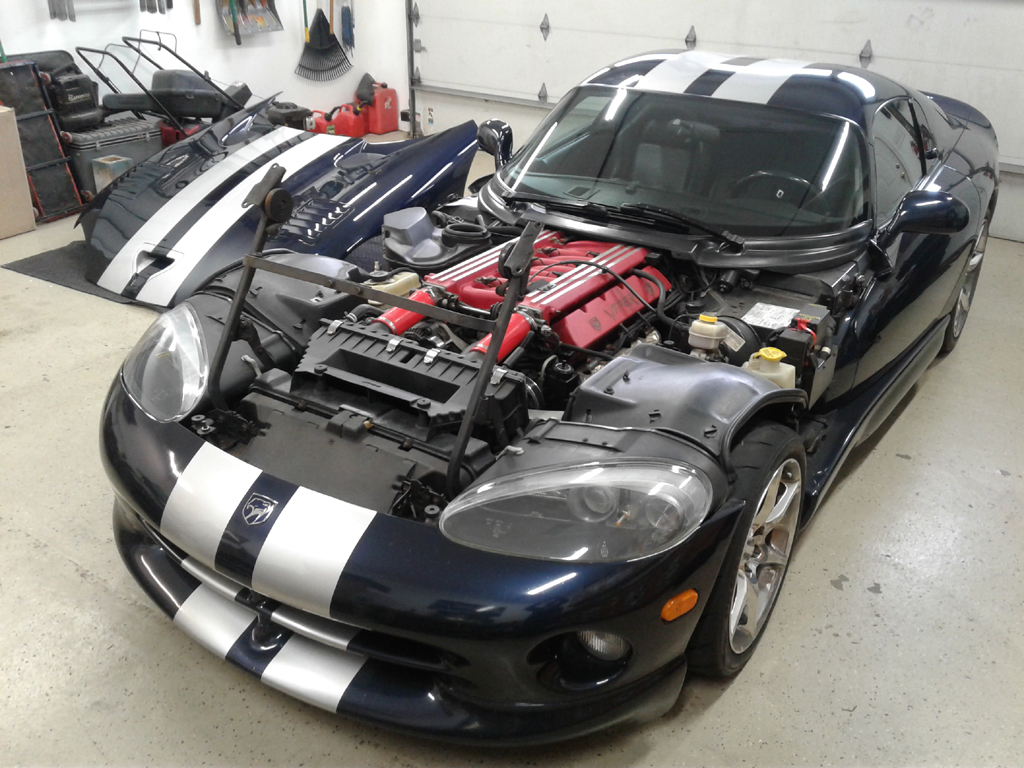
I figured I would post up some of the changes and progress of making my 2001 GTS ready for consistant track use. Also if you have any suggestions for further improvements feel free to chime in.
The car started off as a pretty much stock GTS. It had a Corsa cat back, generic smooth tubes, and a stereo upgrade.
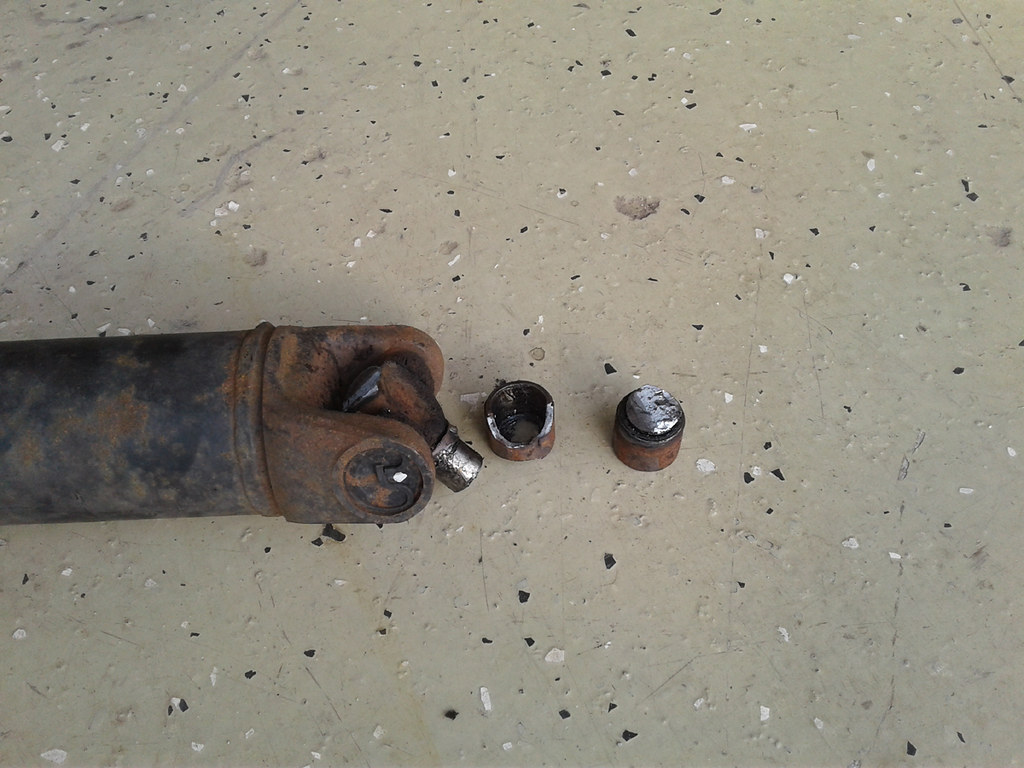
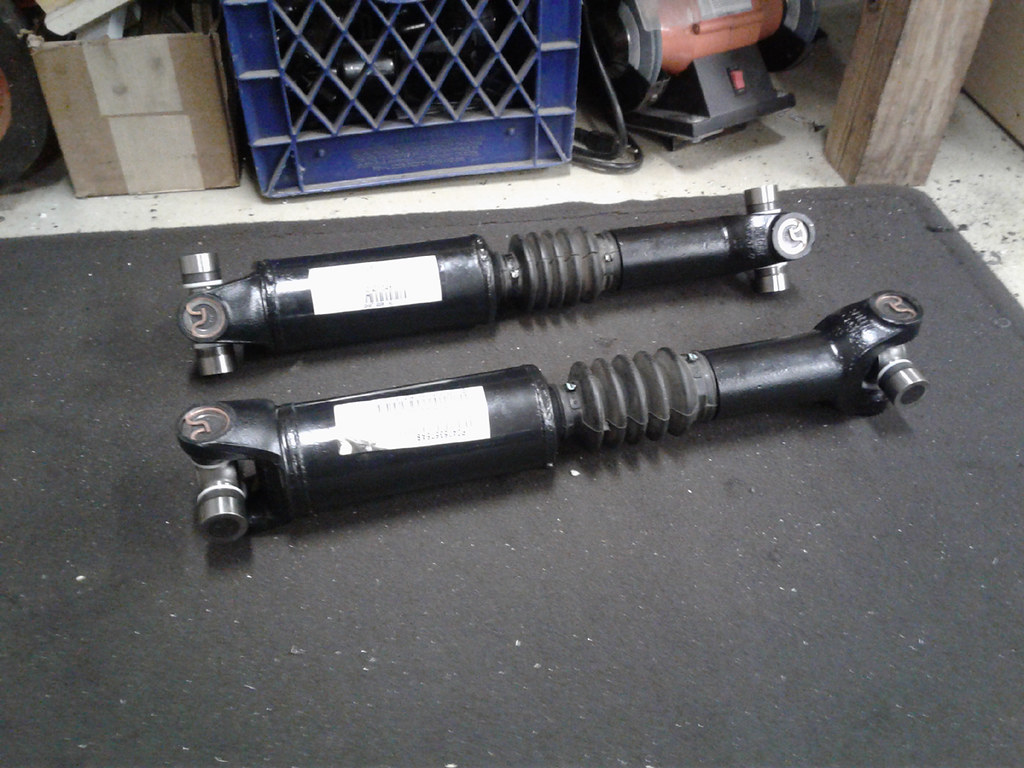
The first thing I had to upgrade was new u-joints after some "spirited driving" possibly with a friend in his car one lane over.
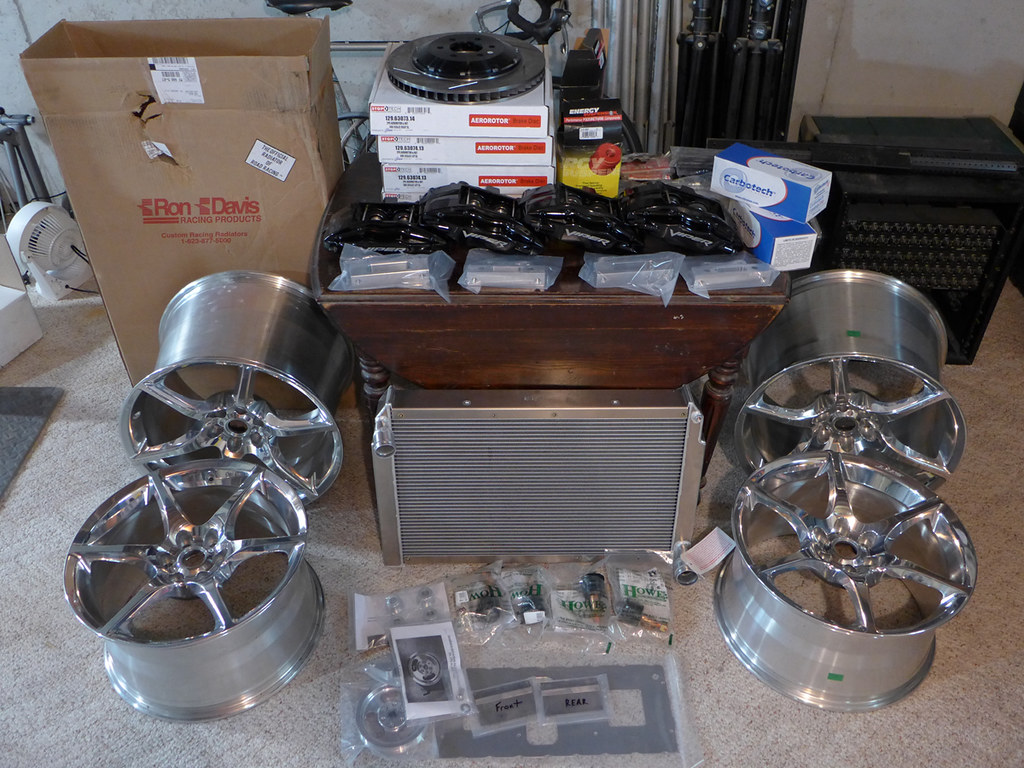
After that I went a little crazy and started ordering parts.
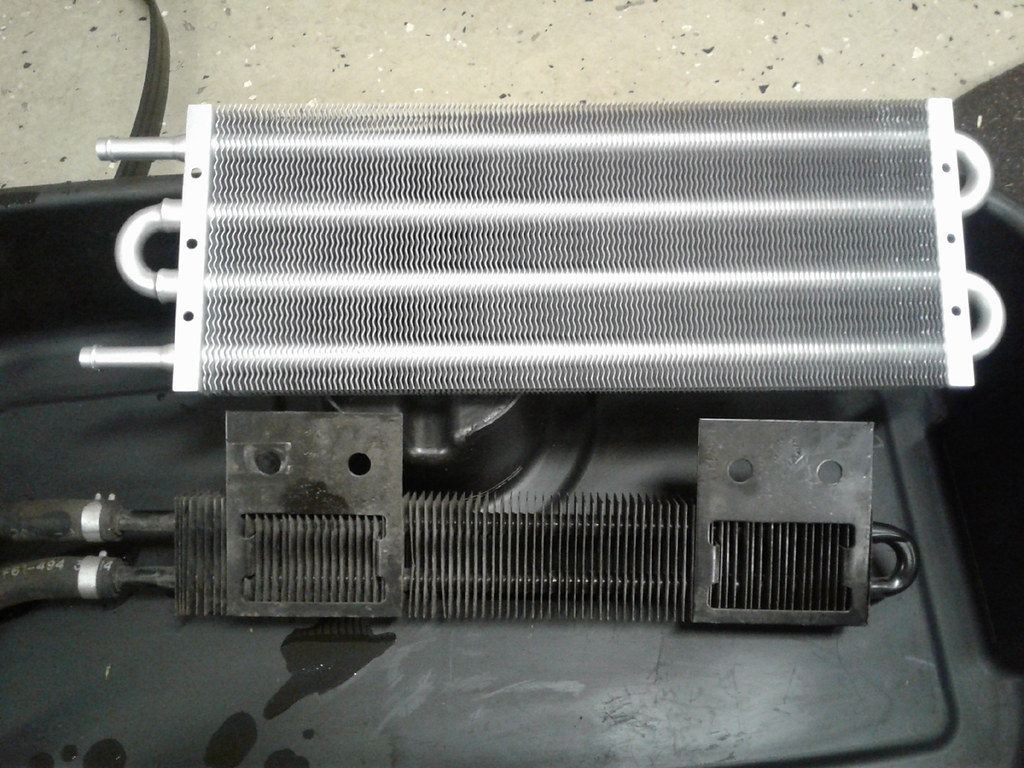
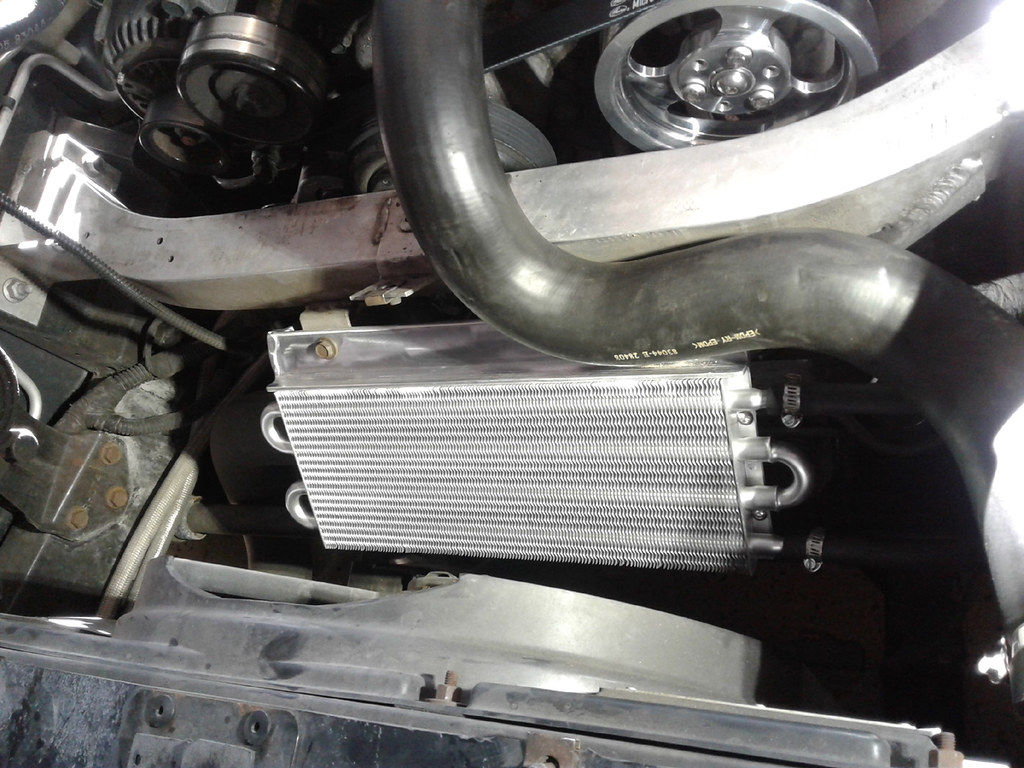
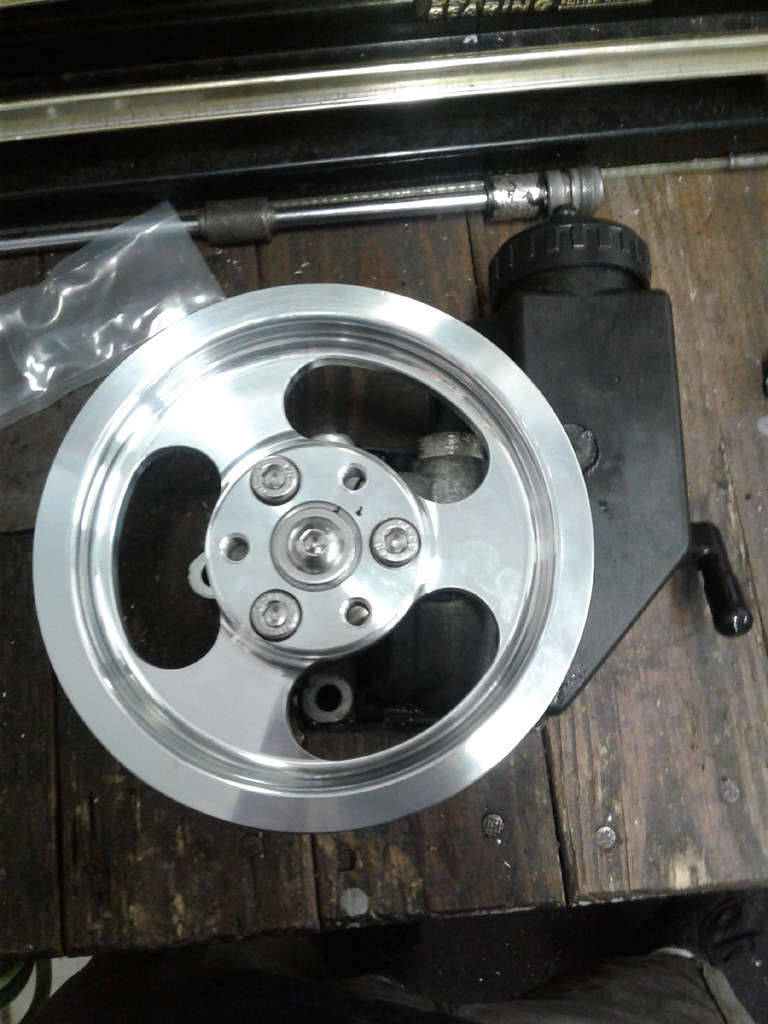
So I got started bolting parts on. I had read that the power steering system can be overwhelmed under hard driving circumstances and had experienced that in my last track car and didn't want a repeat. The cooler is a Mishimoto that from everything I can tell is the exact core that ROE uses on there kit. I ordered it from summit and then just welded up a simple aluminum bracket to attach it in the factory location. Needless to say it is much larger than stock. Along with the cooler I installed the Ipsco PS pump bracket and pulley.
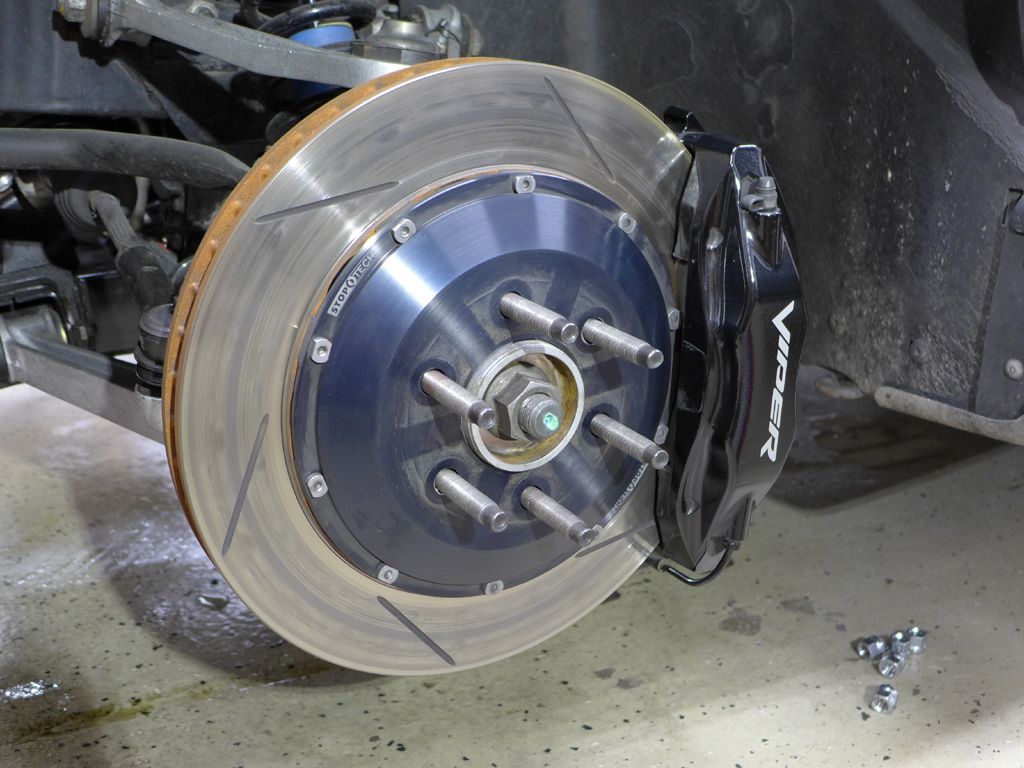
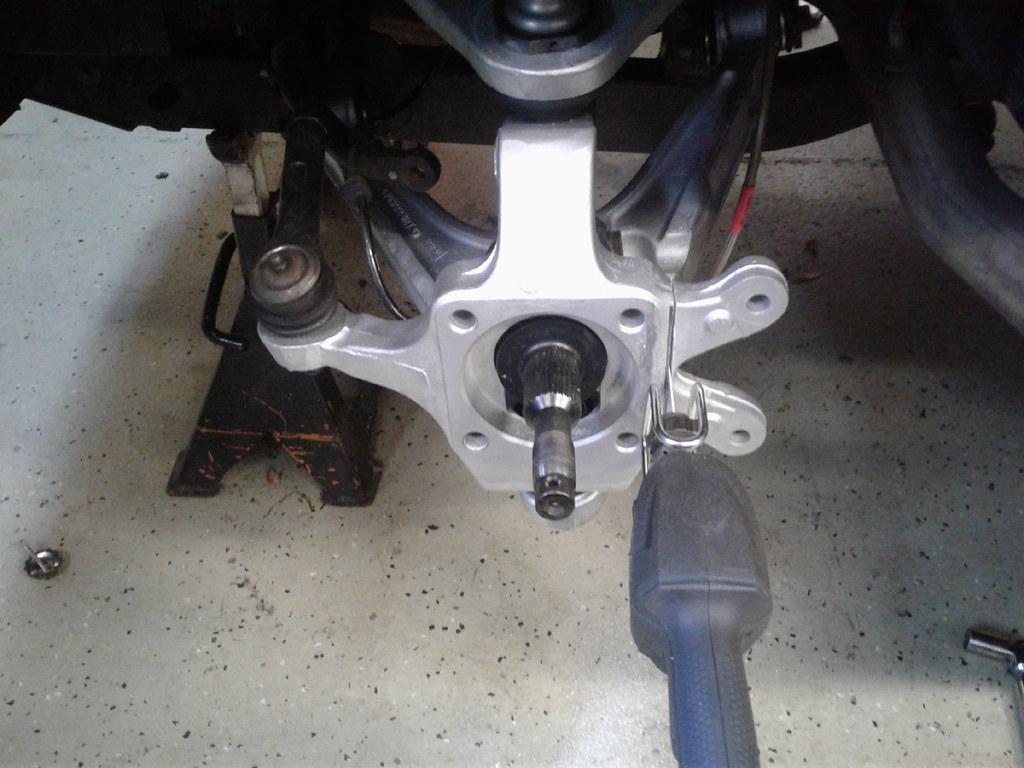
After that I tacked the suspension and brakes. I installed Poly bushings in all the control arms, Howe racing ball joints, Ipsco Brake Adapters, Braided Stainless Lines, Carbotech race pads (dusty and squeely, but totally worth it), Stoptech 2 Piece rotors, lowering caps, and new sway bar links. Cutting the ears off the rear knuckles for the brake brackets was a little uncomfortable but came out fine.
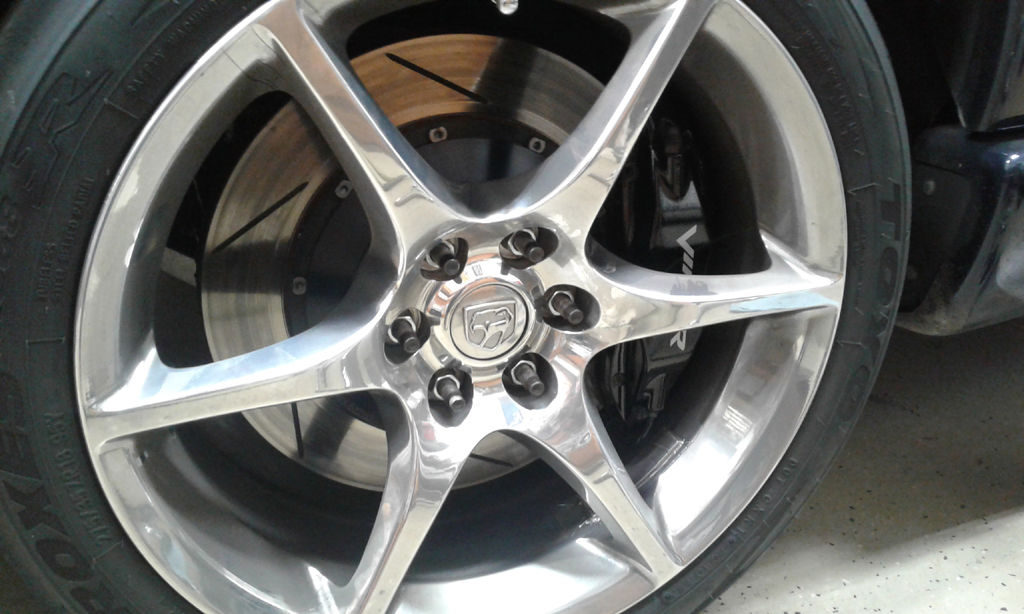
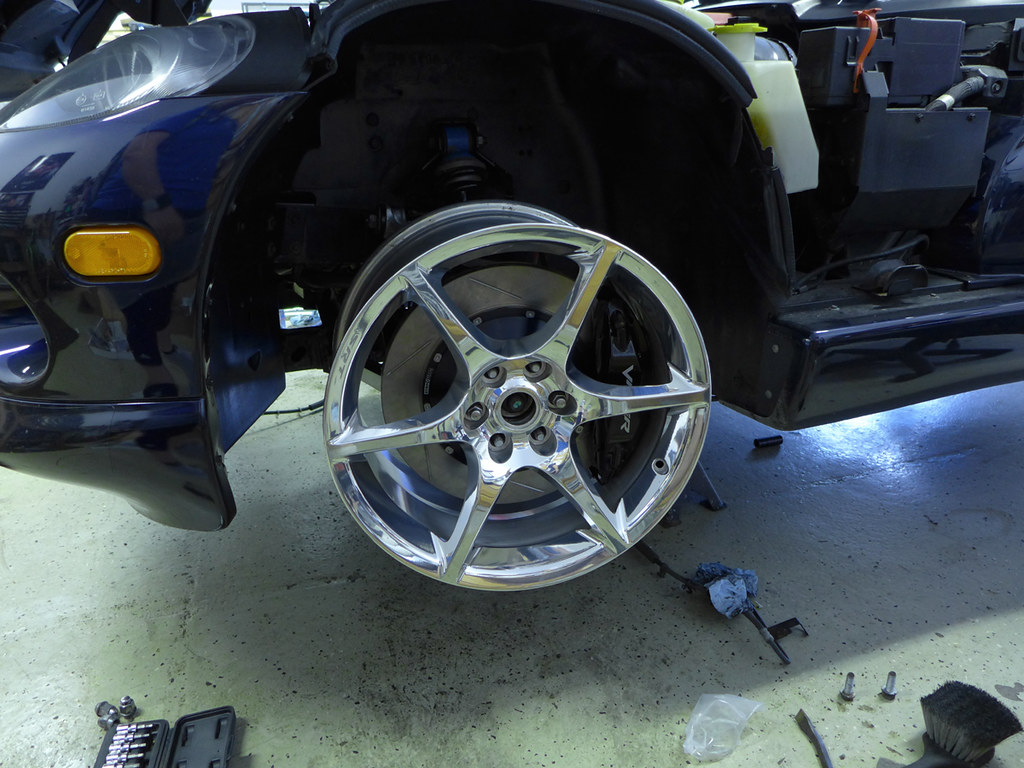
Of course I had to put my new wheels on to see what they look like.
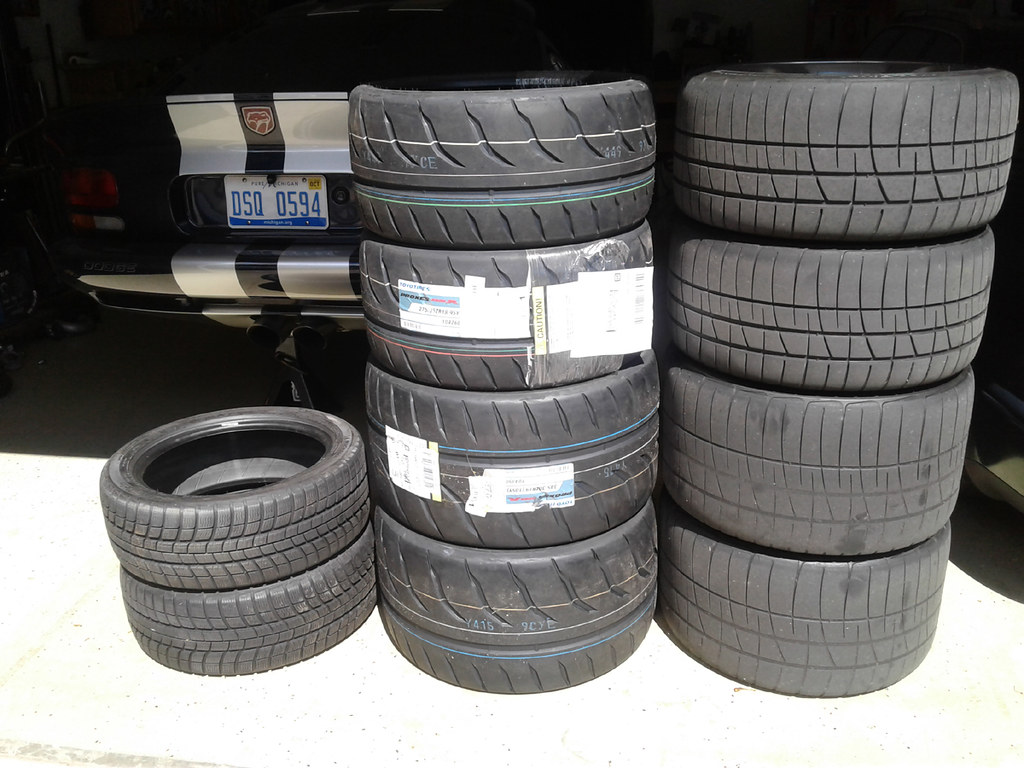
I decided to go with the R888r for my street tire setup. I kept the front a 275/35/18 so I wouldn't lose any more height vs a 295/30 and the rears are 345/30s. Grip is great, but mother of god they are noisy. I really liked the BFG Rival-s that were on the car when I got it, but they sadly don't make a 19in rear tire for the viper.
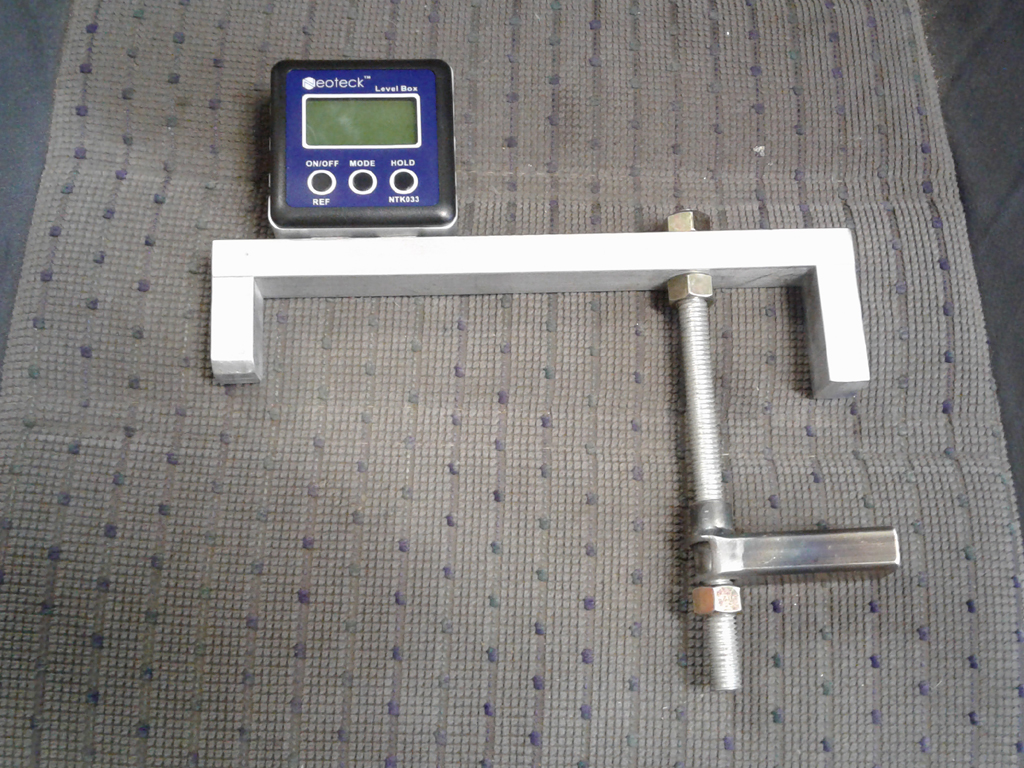
After all the work was done the final part was an alignment. The rear alignment is sensitive to side to side caster imbalance so I made up a tool so I could measure rear caster while doing the alignment. I didn't have access to a DRB tool and they are a little on the pricey side. I ended up going with a kinda in between alignment, not street soft, but not full on dedicated race car and I was happy with it. Not visible in any of the photos is the bracket I made for the rear toe links. Ipsco makes a bolt in bracket, but I thought that solution was a little cheesy and I was being cheap, so I did the more permanent solution and TIG welded some brackets directly to the frame to stiffen up the area. The car feels stable under hard braking so I am sure they are doing their job and keeping rear toe in check.
So this is the point my car ended up at for the 2018 summer season. Going into the winter I had plans to finish up all the mods and bolt in the rest of the parts from my pile and some others that have been arriving more recently. I will post my progress for the 2019 season in the next post.

Results 1 to 25 of 80
Thread: Prepping my GTS for the Track
-
05-28-2019 #1Enthusiast


- Join Date
- Jul 2017
- Location
- Michigan
- Posts
- 71
Prepping my GTS for the Track
Last edited by Mr. Acoustics; 06-02-2019 at 07:48 PM.
-
05-29-2019 #2Enthusiast
- Join Date
- Oct 2013
- Location
- New Braunfels, TX
- Posts
- 1,836
Your caster gauge & bracket is a nice piece of simple engineering. I would bet that a number of people would be interested in purchasing a kit if you wanted to make more. Can you tell me about your inclinometer? Who makes that?
Good luck with your competition. Car looks fabulous!Last edited by GTS Dean; 05-29-2019 at 07:51 AM.
-
05-29-2019 #3Enthusiast
- Join Date
- Aug 2015
- Posts
- 232
Agree with Dean- I like the caster gauge! Good looking car.
-
05-29-2019 #4Enthusiast
- Join Date
- Jul 2017
- Location
- Michigan
- Posts
- 71
Yeah the gauge was inspired after looking at pictures of the factory tool and figuring out how to make a simple version. The actual digital gauge part is just a cheapo angle finder you can find all over the internet for around $30. It has a magnetic base and just clings on, so you just flip it depending which side of the car you are on so you can read the numbers. You can also set a reference zero incase you are working on an uneven surface, luckily my garage floor is flat. I also used it to set front and rear camber with some small plates that indexed on the wheel center. I checked it against my friends borrowed LongAcre gauge and the numbers were good. Originally Posted by GTS Dean

-
05-29-2019 #5VOA Member
- Join Date
- Oct 2013
- Location
- Banned
- Posts
- 3,325
Well done sir!! That is some cool engineering!!
09 ACR With all the goodies
99 ACR TT 99 red RT/10 Roe S/C
97 B/W RT/10 TT 94 RT/10 TT
-
05-29-2019 #6Enthusiast
- Join Date
- Jul 2017
- Location
- Michigan
- Posts
- 71
So as is typical everything I wanted to do over the winter didn't get done and now I am playing catch up for my procrastination. I did drive maybe 100 miles though earlier this year when we had a really nice warm weekend and then the car went back into the garage. Most everything on the list for track prep is just durability mods. I typically track with a small group that just does private rentals of the track so it is pretty much unlimited laps and I wanted to make sure the car is ready for sustained sessions.
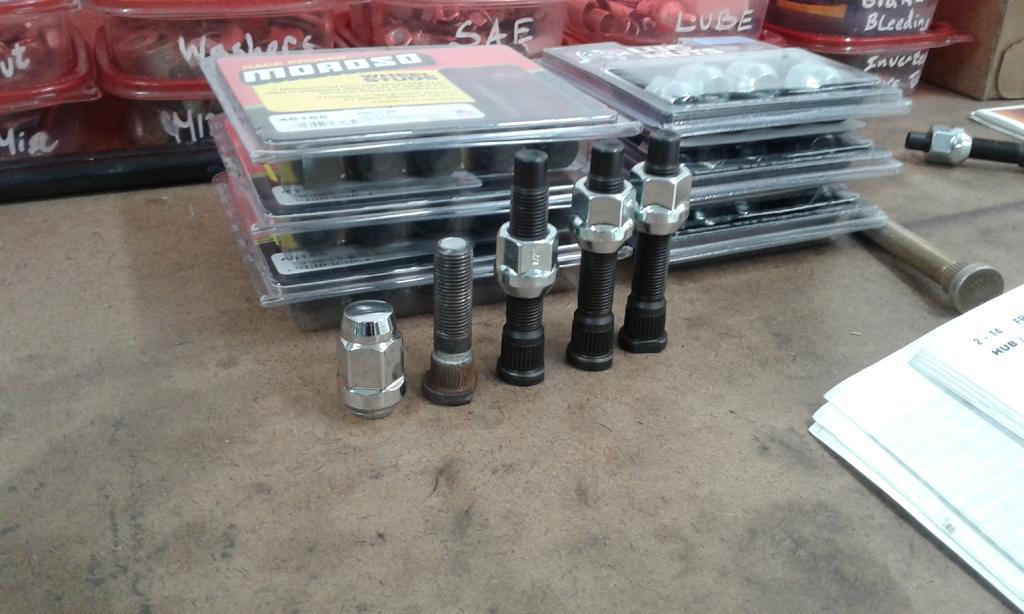
I started the year by replacing all of the wheel studs with Moroso 3in studs and through nuts. I almost bought some Titanium nuts, but then remembered I am slow (haha) so I should probably worry about my driving before minuscule weight. I chose the Moroso studs over the ARP(Baer) studs just strictly on length. I bought 1 ARP stud and decided it would stick out more than I like (it is off to the side in the 1st photo). It didn't hurt that the Moroso studs ended up being cheaper. Even if I run a large hub-centric spacer I should have plenty of threads.
The main thing I have been working on all may was the cooling system and oil breather system. I don't have any real pictures, because it is not exciting, but I replaced the radiator, water pump, thermostat (now 180deg), new gaskets, Silicone hoses for the heater hoses and Radiator hoses. What I do have pictures of is my slightly overkill catch can setup.
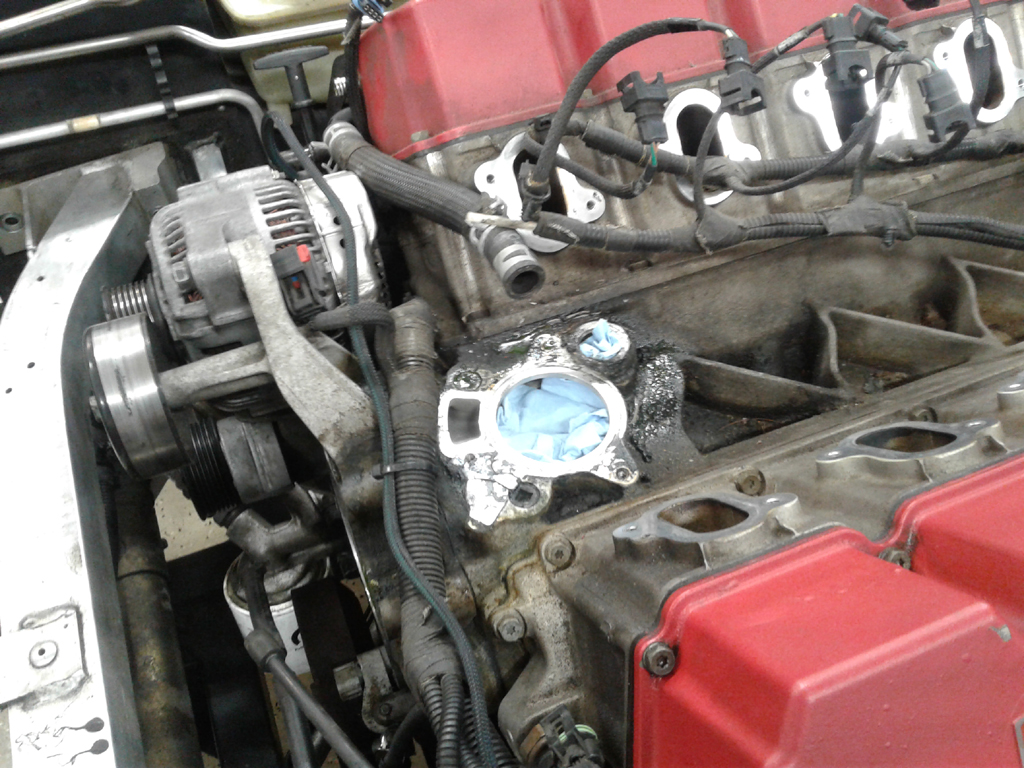
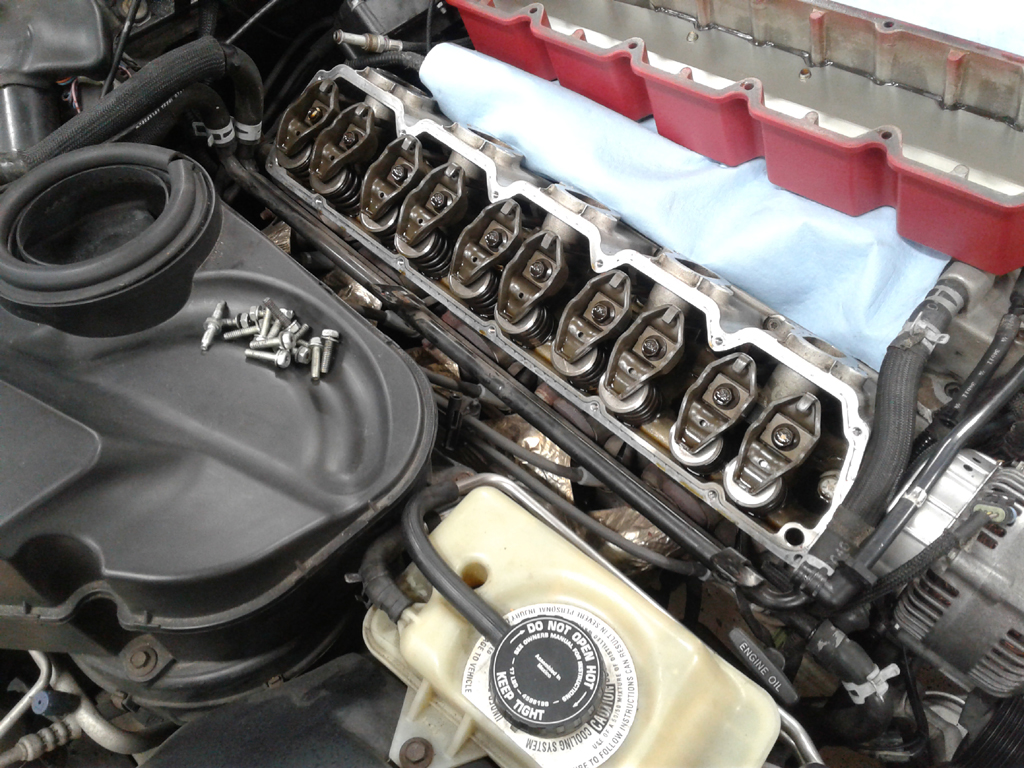
I have been smelling a little oil when braking hard and driving the car hard and figured I was pushing oil or leaking it. Turns out it is likely a little of both. When I pulled the intake the CCV rubber grommet was pretty hard and there was a layer of nastiness in the valley. Also discovered there were a few valve cover and intake bolts that were finger tight. Surprisingly there were no signs of an oil leak on the heads. Everything got cleaned, inspected, and new gaskets were installed.
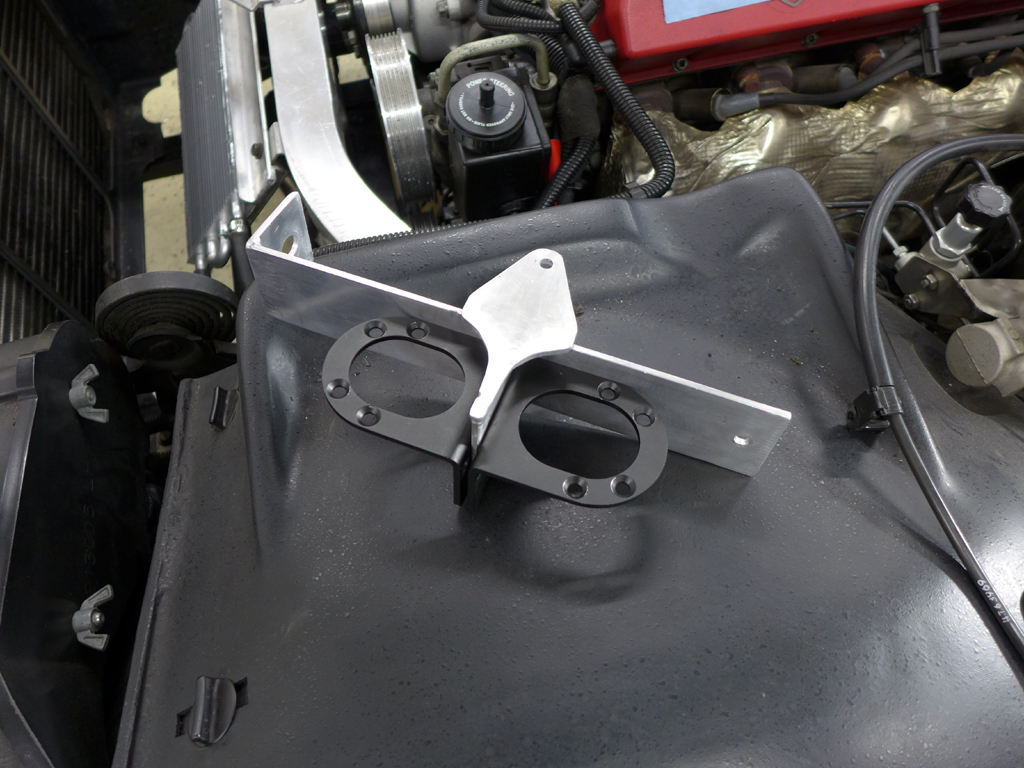
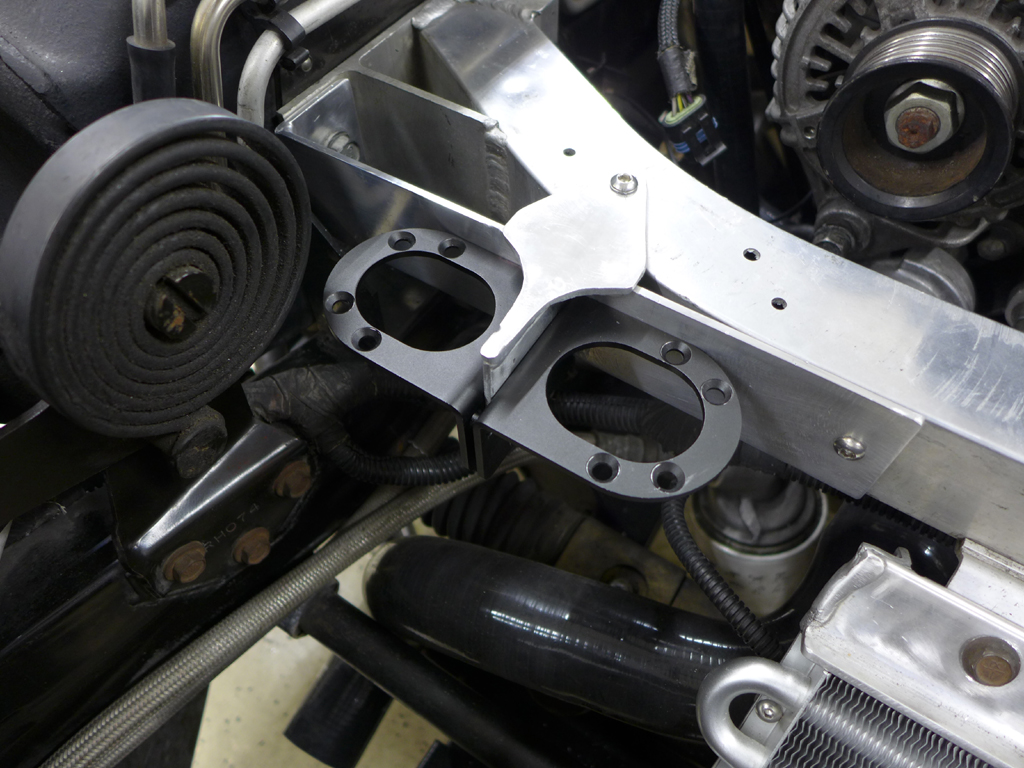
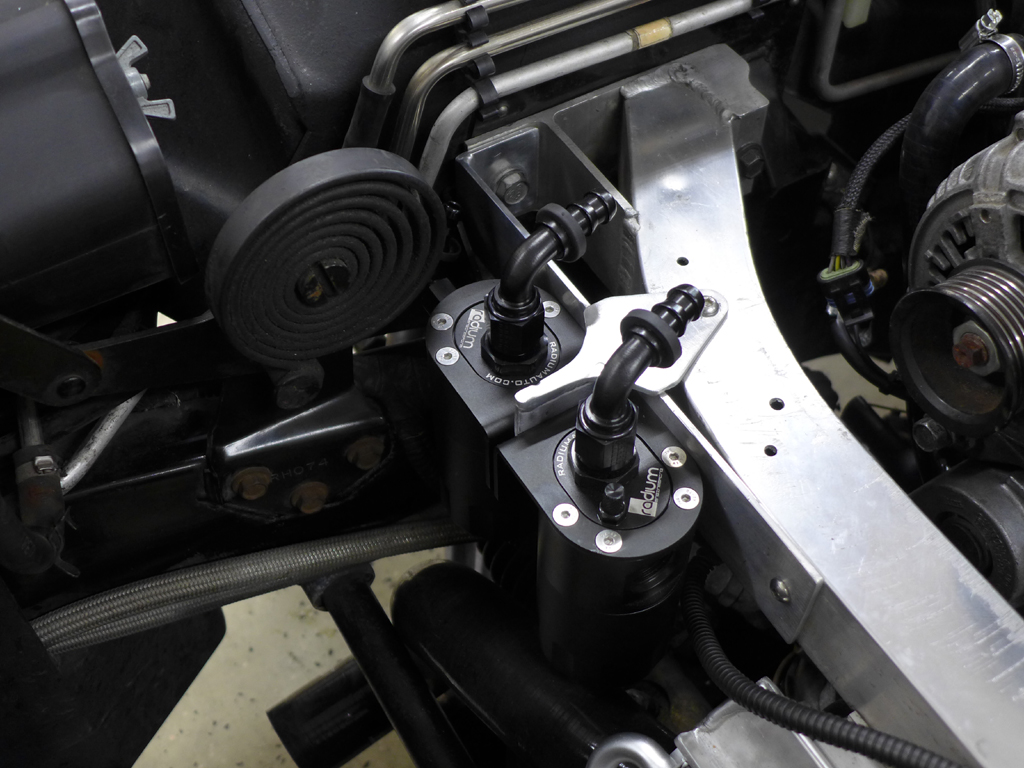
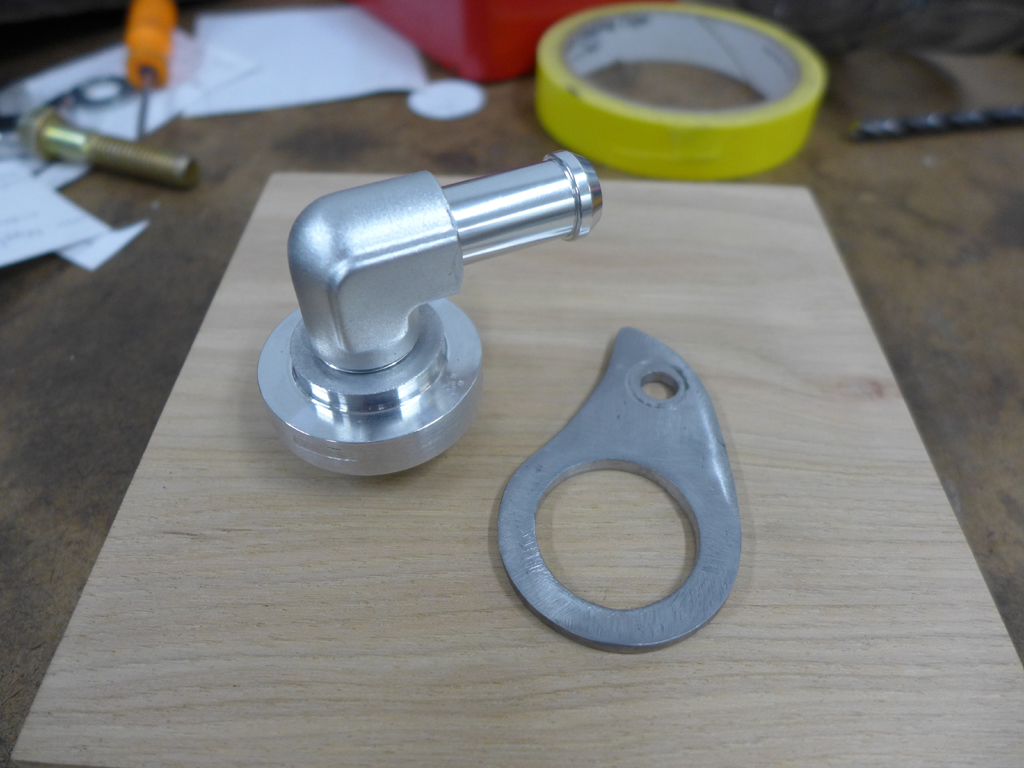
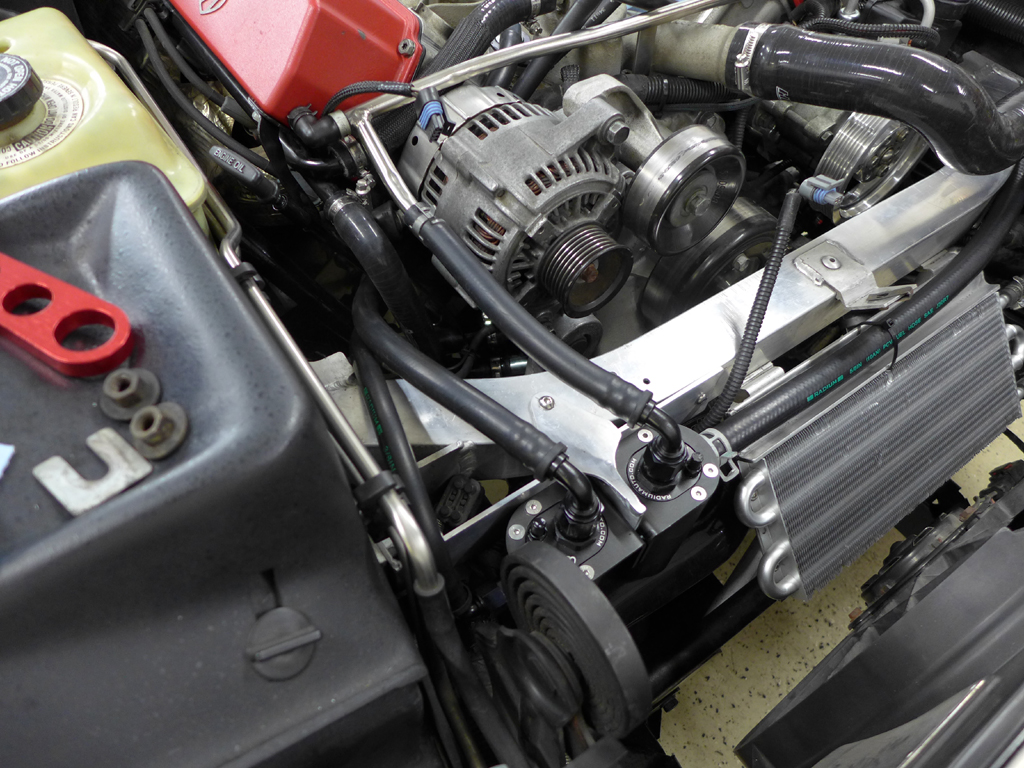
Then I set to fabricating a bracket for my catch can setup. I am using 2 radium engineering catch cans, 1 for the CCV port and 1 for the valve covers. They are pretty nice units and have an o-ringed dip stick so you can easily check how much you are catching. I wanted a sealed system so everything routes back to its original port. The bracket is just some aluminum welded together and 2 screws are threaded into the cross member and the 3 bolt attaches to the side with the original cross member bolt.
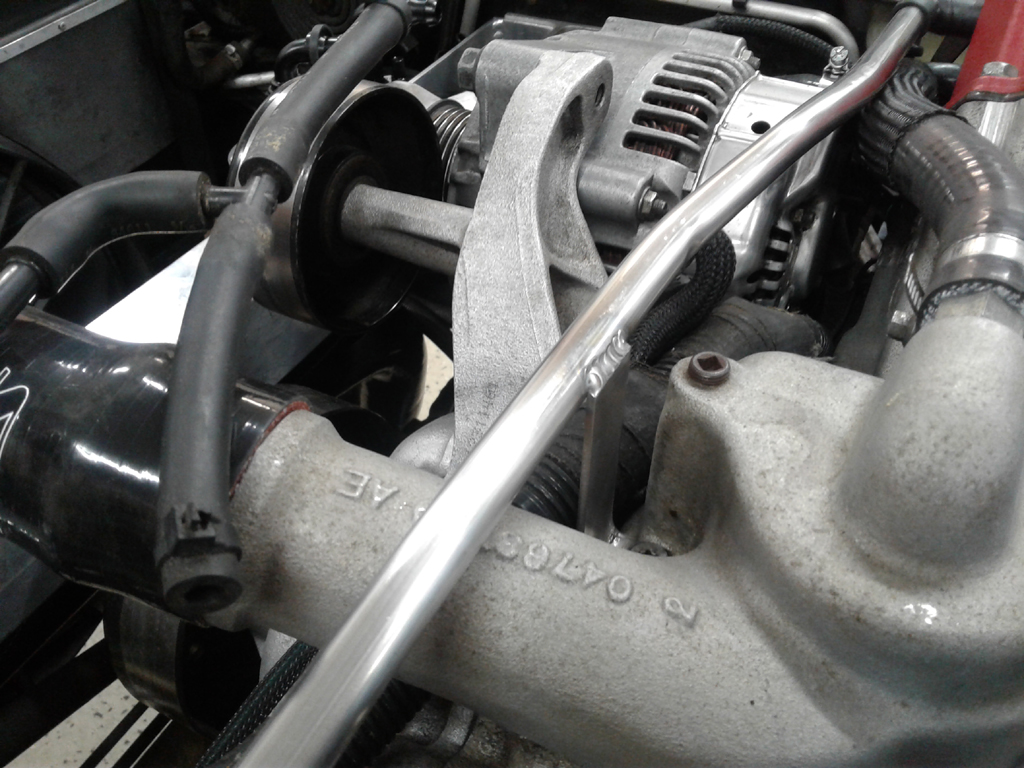
Since the catch cans are on the passenger side, the factory valve cover tube would have been on the wrong side, so I got some thin wall stainless tubing in the correct 1/2in size and made a much better connector piece. It is bent similar to the factory piece and doesn't rub on anything and has a small bracket TIG welded in the middle to keep it in the correct place. The outlet is now directly next to the alternator and is a straight shot into the catch can with a small piece of hose.

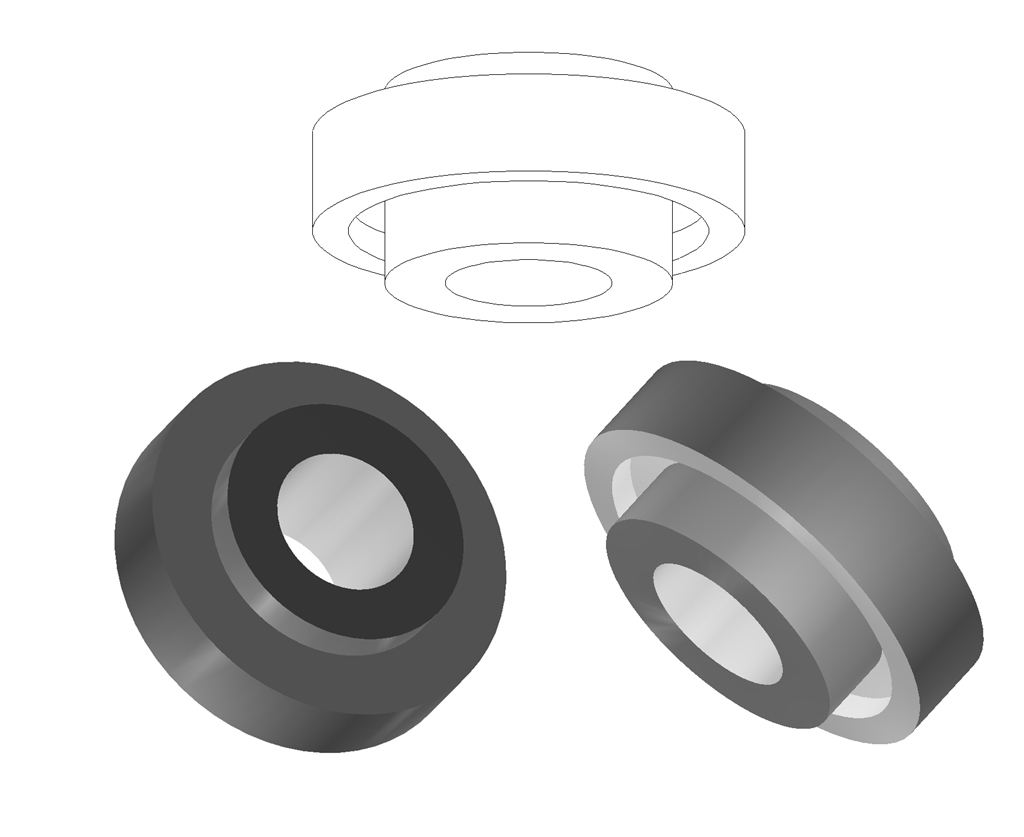
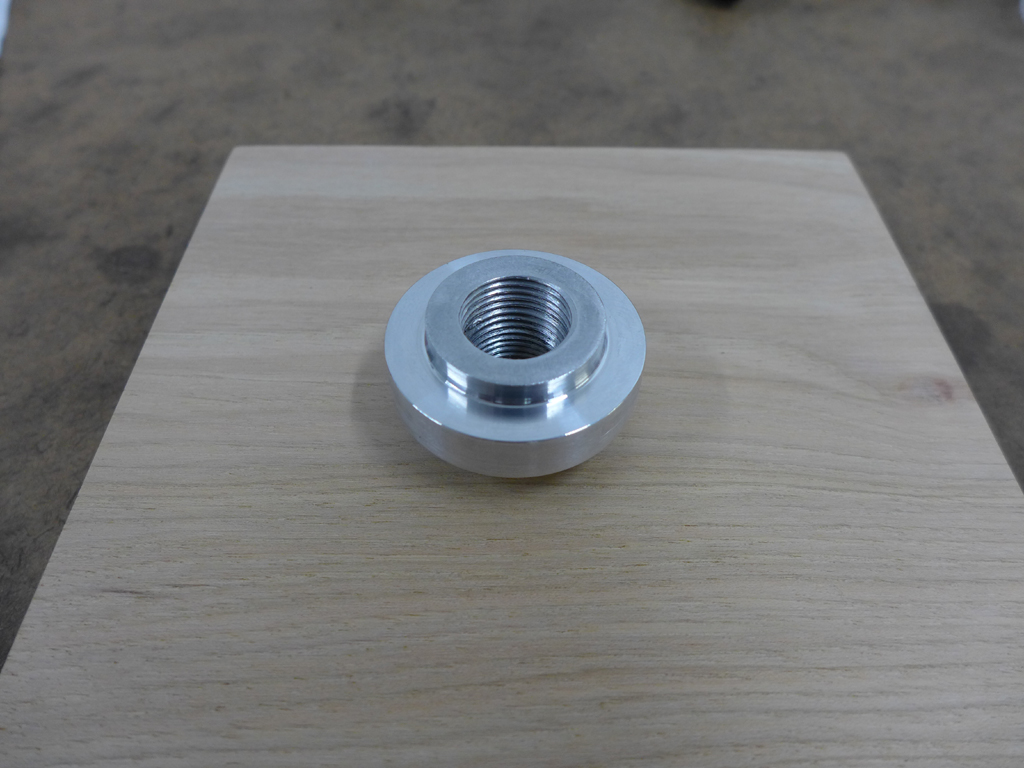
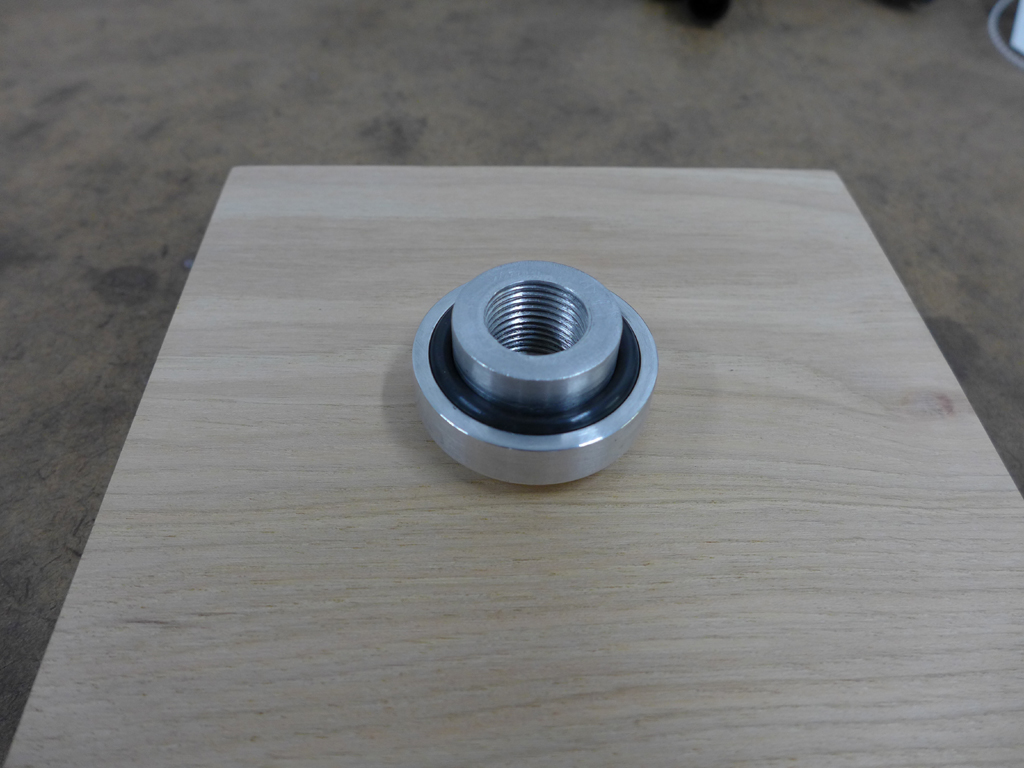
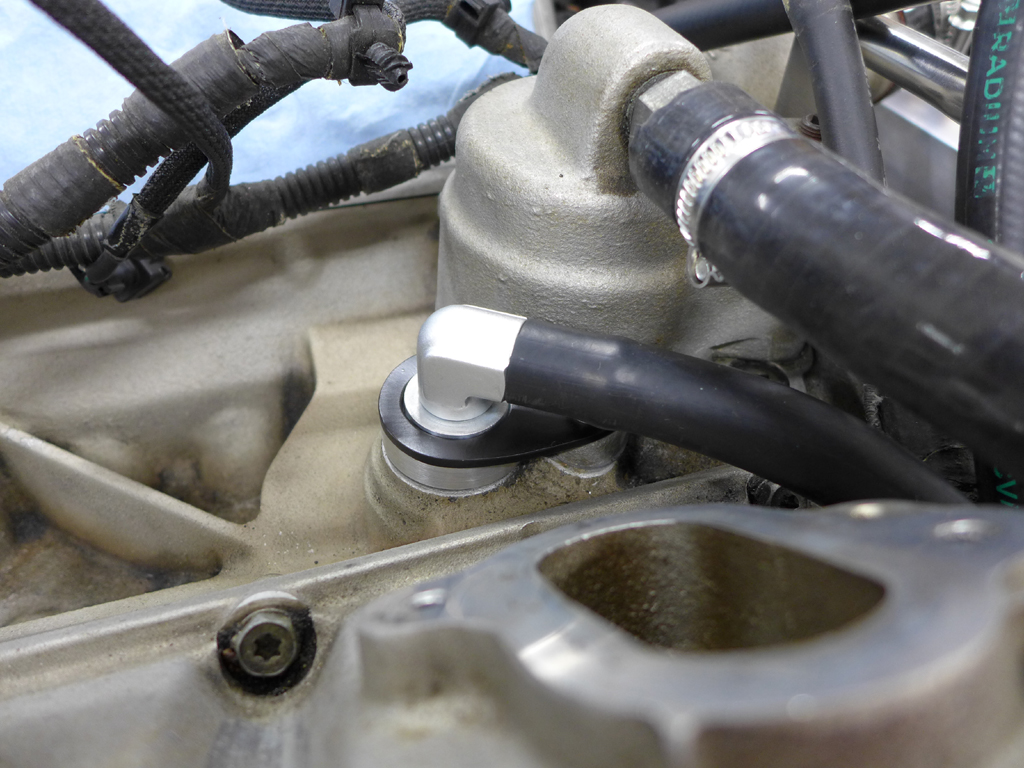
The factory CCV rubber grommet was trash obviously and I personally think it is a crappy design, so I decided to make something for it. I designed a threaded plug with an o-ring in the bottom that sits on the CCV hole and is held down with a bracket. I machined that and then a 90 degree 1/2 fitting is installed and that hose runs to the inlet of the second catch can. The internal diameter of the new fitting is at least 2x that of the factory plastic push in fitting so hopefully breathing shouldn't be an issue when combined with the valve covers. No more weird rubber grommet to harden up, just an o-ring that can be replaced for pennies if it ever goes bad.
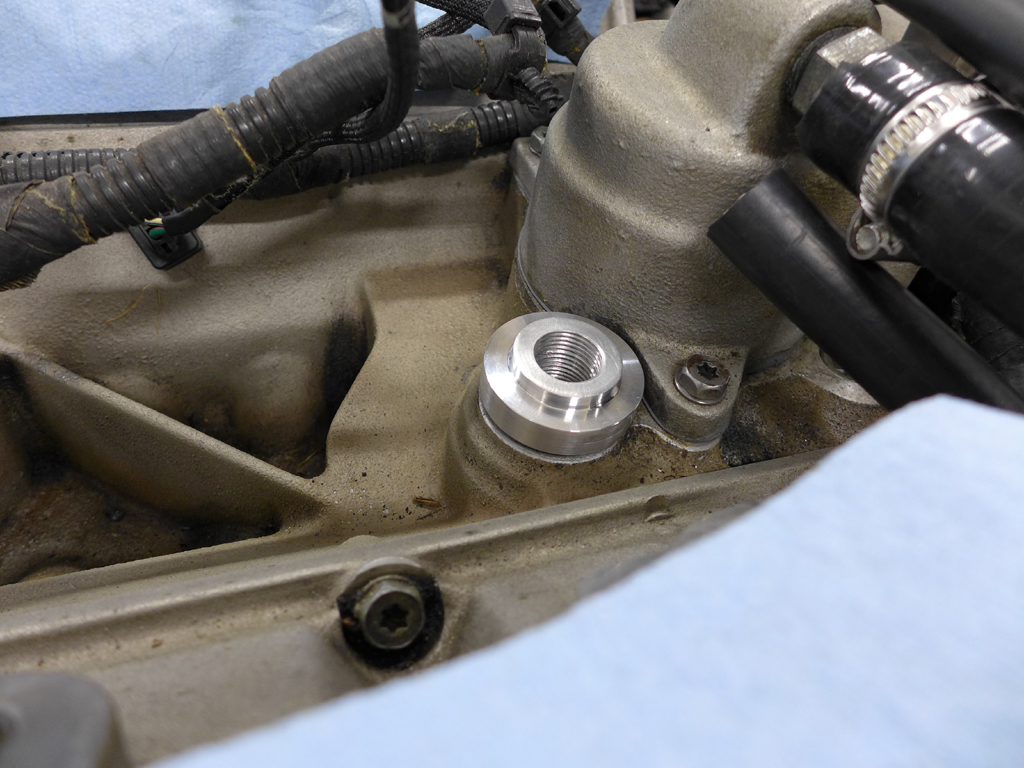
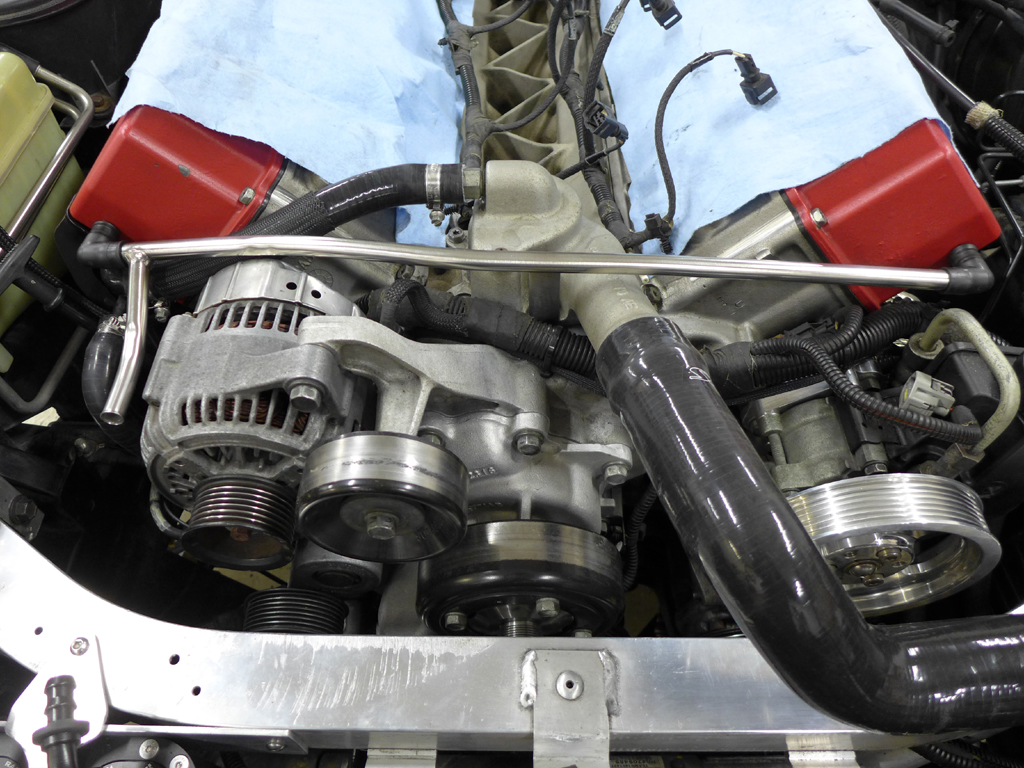
And here is the engine all back together. Tonight I started the process of flushing the cooling system to convert over to the newer long life coolant.
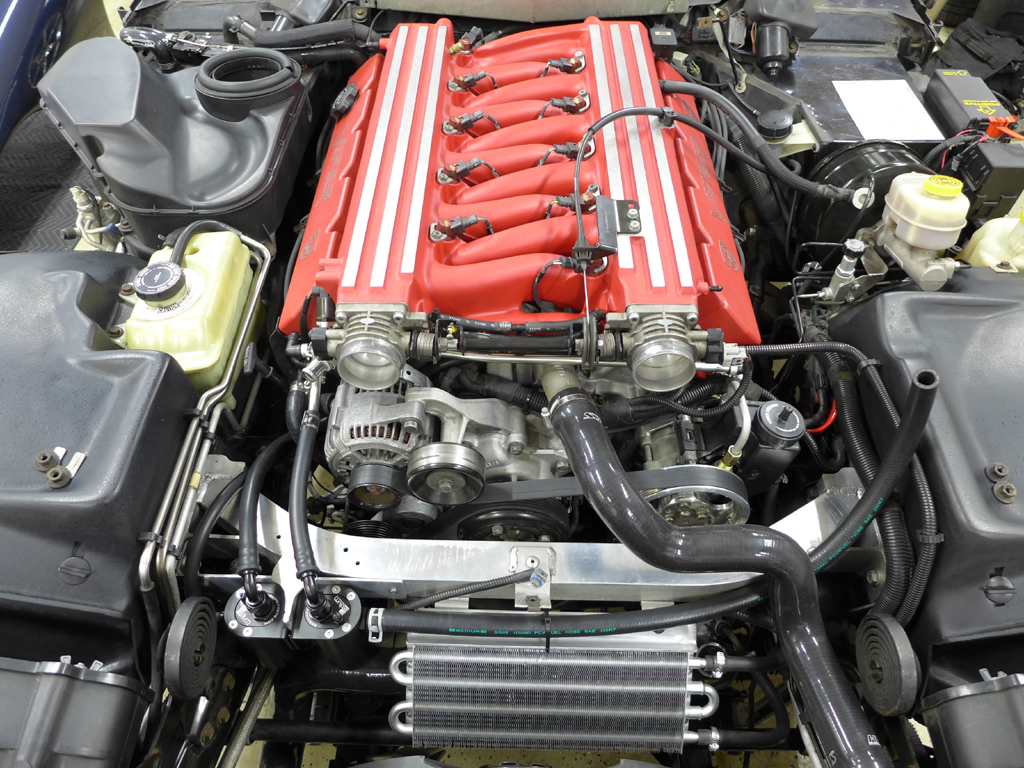
Hopefully this weekend I can finish up and install the remaining parts in my garage, which are actual upgrade parts that will make my car faster, so stay tuned for that.
-
05-30-2019 #7Moderator

- Join Date
- Oct 2013
- Location
- ALL OVER
- Posts
- 3,011
nice job
THE IGNORE FEATURE WORKS, TRY IT...
-
05-30-2019 #8Enthusiast
- Join Date
- Nov 2016
- Location
- Ohio
- Posts
- 556
Loving it. We've done a lot of similar work to our cars.
You know you're not far away. We should get on track or to an autocross sometime. I've been enjoying the car for 3 years now and have only been to one event where I shared space with another Viper :\
-
05-30-2019 #9Enthusiast
- Join Date
- Aug 2015
- Posts
- 232
Love the PCV valve. Any chance you have dimensions for the caster bracket?
-
05-30-2019 #10Enthusiast
- Join Date
- Jul 2017
- Location
- Michigan
- Posts
- 71
My plan is to hit up Mid Ohio this year once the car is done. Is there a particular group that you typically do track days with? I thought the Ohio region Viper group used to have a track day there, but I didn't see anything on there calendar this year. I know there are a bunch of Auto-x events in the Toledo area. If I can hit up all of the Michigan road courses and Mid Ohio this year I will be happy. Originally Posted by mackzilla
-
05-30-2019 #11Enthusiast
- Join Date
- Jul 2014
- Location
- Arkansas
- Posts
- 275
I'd buy one of those CCV plugs in a heartbeat if I could talk you into making one more. I've had to replace that grommet twice on my car. Not fun pulling the intake just to fix that one item.
-
05-31-2019 #12Enthusiast
- Join Date
- Nov 2016
- Location
- Ohio
- Posts
- 556
Ya I haven’t seen them active on track much this past season or two. Check out Akron Sports Car Club. They have extremely fast autocross. I’ve seen 4th gear on the regular and it might be a good mid-point for us to meet. Takes me about 1.5 hours to reach them at dragway 42. Originally Posted by Mr. Acoustics
-
05-31-2019 #13Enthusiast
- Join Date
- Jul 2017
- Location
- Michigan
- Posts
- 71
I had to go digging through my parts boxes, I kinds reorganized the garage and forgot where it got off to. Originally Posted by 71firebird400
Caster Gauge.jpg
Incase the picture is hard to read:
A - 20cm
B - 38.5mm
C - 29.3mm
D - 50mm
E - 13cm
The material is 0.75 x 0.5 inch solid stock that was cut to the correct length and squared on the mill, then screwed together. I am sure even if you don't have access to a mill you can just make them a smidge long and break out the sand paper or file and bring down to dimension if you want it to be that accurate. Close enough might be okay. The short leg needs the corners chamfered because of the shape of the knuckle (you can sorta see it in the picture). The clamp arm is made out of what ever you can find. I just used a small piece of rectangle tube with a pipe welded through it so it would slide better. You don't need to tighten the bolt much, just enough so both pads are contacting and it doesn't move. If you have anymore questions about it let me know.
-
05-31-2019 #14Enthusiast
- Join Date
- Jul 2017
- Location
- Michigan
- Posts
- 71
I would gladly make more, except I am not sure how that would go over with the guys at work. I don't have a lathe, so I had to be extra nice and sweet talk the fab/mechanic guys to let me go play in the fab shop for a little bit to do my own projects. Most of them don't care, but a few raise a stink and could complain to management if I was in there more often. If you know anyone with a lathe, it is a pretty easy piece to make and I could provide dimensions. Just grinding the tool into shape that would cut the groove for the o-ring took the most time. I will let you know if I can pull it off Originally Posted by ACR_Matt
I will have to check out their events. Have you been to Pitt Race in your viper yet or any car, I hear that it is a fun track? Originally Posted by mackzilla
-
06-02-2019 #15Enthusiast
- Join Date
- Jul 2017
- Location
- Michigan
- Posts
- 71

Well it has been a decently successful weekend. The car is almost fully back together and ready for the track.
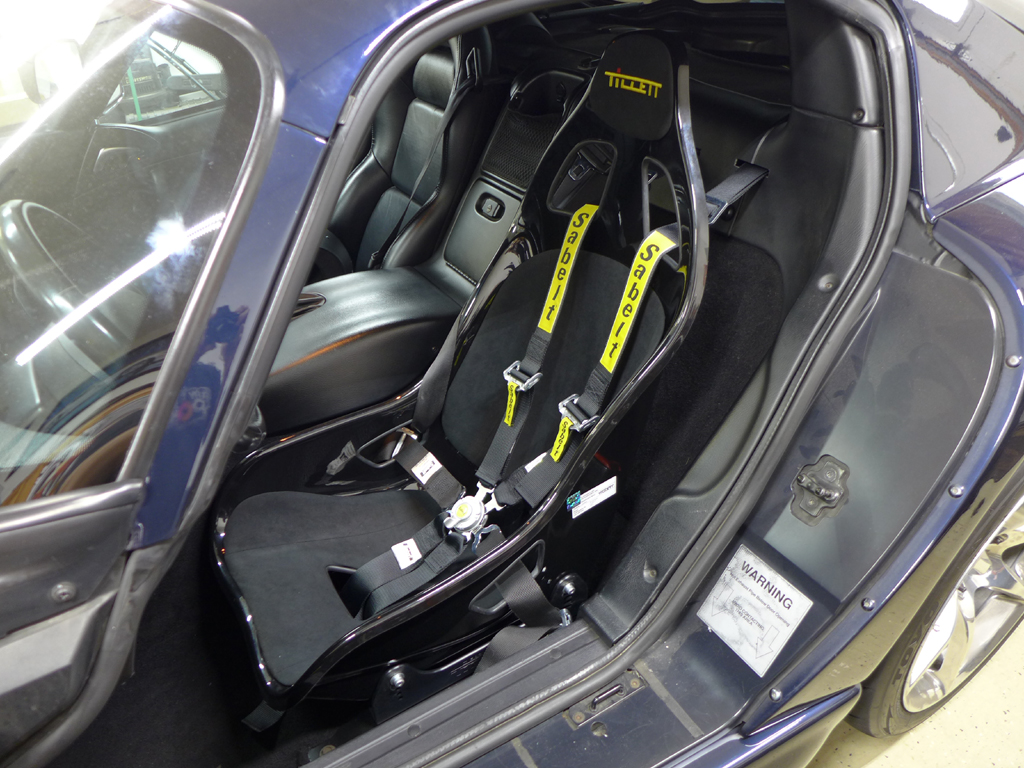
First off I am now officially part of the Tillett seat club. I purchased this seat a couple months ago, along with some other big purchases which we will get to, after going to my local race shop and sitting in a bunch of seats. I just finally got around to mounting it. The other seats I was considering were the Recaro Pole Position and the Profi which are both seats that will fit in the small Viper passenger compartment. The seat I went with is the B6 Screamer in standard width, I am a skinny guy so no need for the XL. I used the TB F1 seat brackets and a custom adapter to mount it to the stock bolts. Planted Technology makes an adapter for the Viper, I just chose to make it my self because A. I am cheap, and B. I could more precisely dictate the height and placement of the seat for me. I currently have it set up at its highest position which is around 1.5in lower than a stock Gen 2 seat, and it only goes down from there, I am 6ft tall for reference. Headroom with a helmet is no longer a concern. I also installed a Sabelt 6-point harness and opted to route the stock 3 point through the loop for street driving. I can just tuck the 6 point away when I am not on the track.

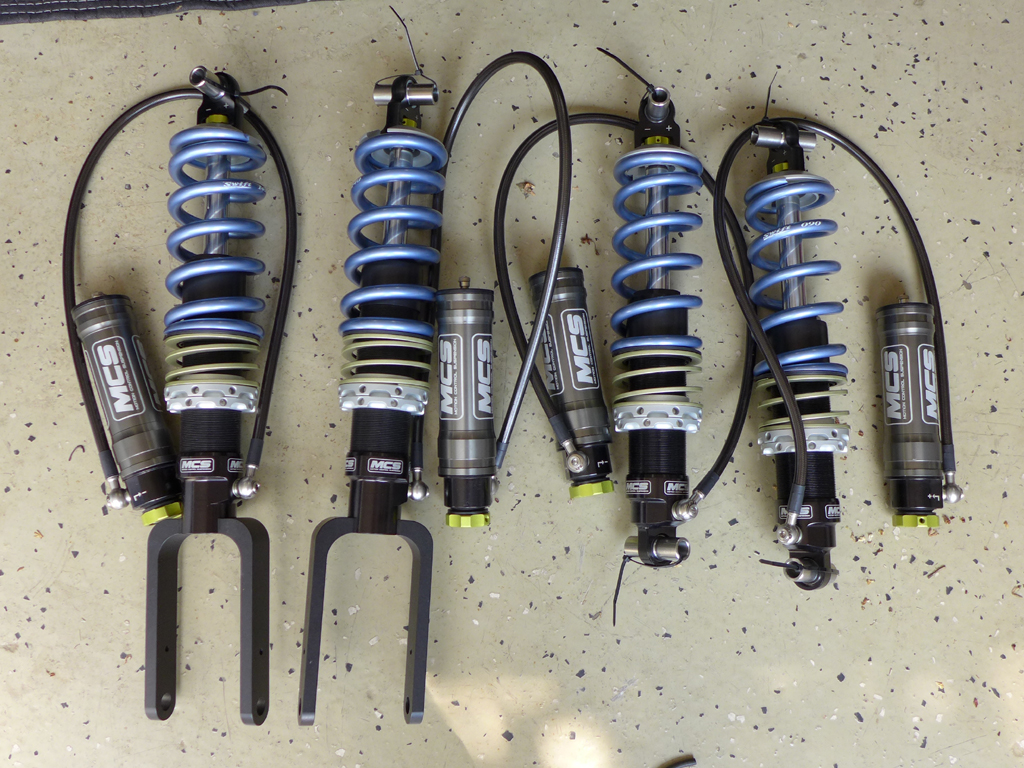
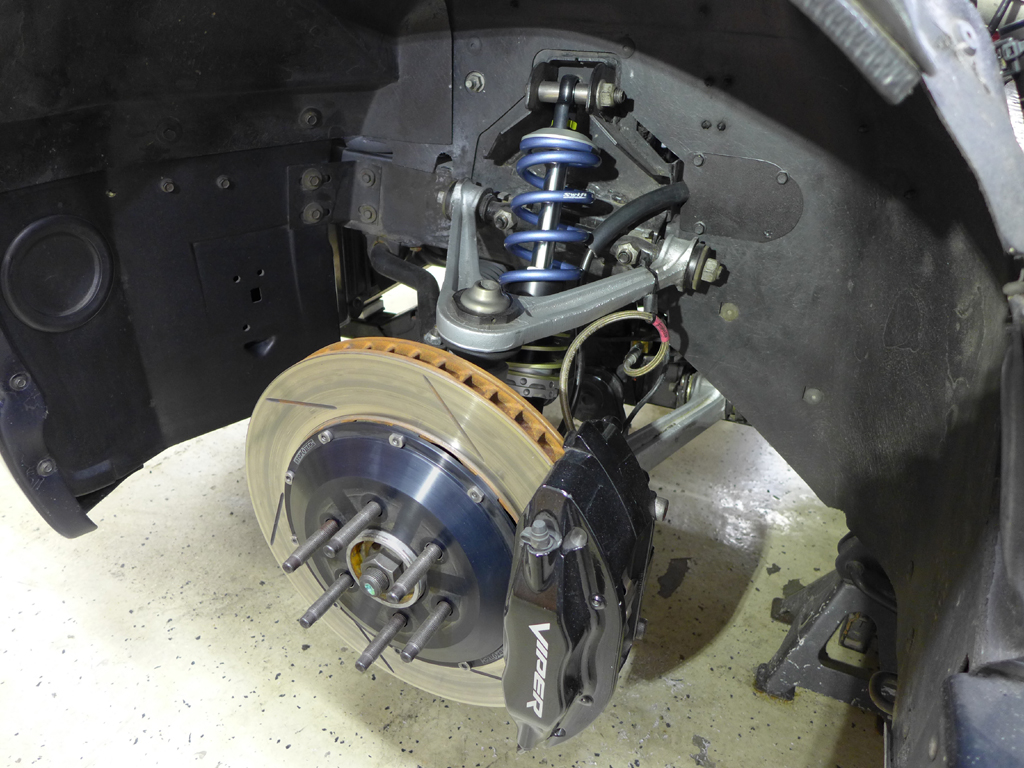
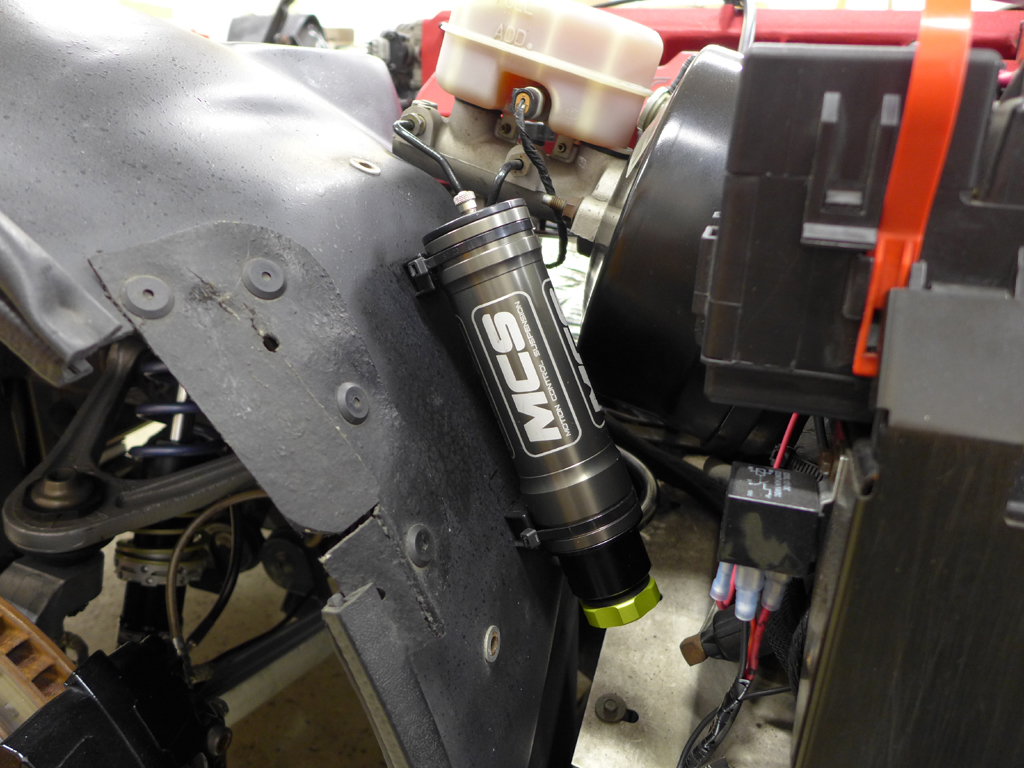
The other big purchase was new shocks, which was suggested earlier in this thread. Little did they know I was a few steps ahead of them. Originally I was going to get Penske shocks, but after speaking with Dan Cragin at Specialty Performance he informed me that EMI is mostly closed and getting work done on the Penske's would be difficult. So after talking with him on the phone a couple of times we decided on a shock setup based on current and future modifications and intended driving use for my car. So I ended up with the MCS 2-way adjustable shocks with remote reservoir. When they showed up I made the joke that they were almost too nice to put on the car. Haha Installing the shocks is easy, figuring out where to put the canisters is the hard part. In the front I mounted them to the rear of the wheel liner. I wanted to do on top of the front cross member but the upper radiator hose would be touching a lot more than I was comfortable with. I had to ditch my window washer fluid bottle on the driver side but nothing had to move on the passenger side.
The rear is another story. I don't have them mounted yet, just set in place. I am not sure where to even bring the reservoirs through the body. I am hoping to remove as few as parts as possible to get them routed. If anyone has done remote reservoirs on a GEN 2 and has advice, that would be greatly appreciated. Pictures would be even better.

Also I don't think I have mentioned these yet. I picked up a set of Forgeline ZX3r 3 piece wheels with tires for a song a while back knowing I would be doing these other modifications for the track. They are all 18x13 wheels with 335 currently mounted. I will eventually be mounting Hoosiers on them. We will see if I stick with 335's all around, I might re-hoop the fronts and go to 315's so I don't have to worry about rubbing, or it could be a non issue.
-
06-02-2019 #16Enthusiast
- Join Date
- Feb 2019
- Location
- Melbourne, FL
- Posts
- 59
Great thread. Thanks for the details.
-
06-03-2019 #17Enthusiast
- Join Date
- Oct 2013
- Location
- New Braunfels, TX
- Posts
- 1,836
You've got a really nice package going there - quite similar to my car!
I'm running EMI Penske triple adjustables and they are absolutely awesome. It's a shame Erik isn't as available as he used to be, but Dan knows what you need.
Erik set my bump cans up with very short hoses, so I had to work within that radius for mounting. I ended up using some short pieces of 2" radiator hose to slip them in and used some tie-wraps to hold them to the lower wishbones. As it is, I have to jack the front to get to them. In the front, I would have really preferred to have longer whips so I could mount them transversely behind the head lamps for adjustment, or parallel to the frame behind the splash shields by the upper shock mount hard points. The rears worked out pretty well and are very accessible for adjustment. You need to pull the rear carpet out of the tub and locate the body plugs and see if you can work your rear cans up inside for a clean mount.
I run CCW classics in 17x12.5 and 13.5 sizes. My fronts rub the swaybar just a tad at full lock in the pits. 315-17 or 305-18 is a great all-around front tire. I have run 335's square and it is absolutely phenomenal for cornering! The only problem is hood lip clearance in jounce + turn.
-
06-03-2019 #18Enthusiast
- Join Date
- Aug 2015
- Posts
- 232
Thank you for the caster bracket dimensions! Not to derail the thread but a couple questions since I really want to get my car aligned at home;
1. How are you measuring front caster? Angle gauge on the wheel, turn wheels 20* with slip plates and measure the difference? Or is there a way to do that statically?
2. Are you able to access the eccentric bolts/tierod ends with the car on the ground? Or is a lift required?
-
06-03-2019 #19Enthusiast
- Join Date
- Oct 2013
- Location
- New Braunfels, TX
- Posts
- 1,836
With a new adapter bracket, you can read directly off the front uprights too. That's the way the factory kit works. You may be able to find a 6990 kit on the eBay with the adapters in it. You'd just need to screw some small steel strips on for the inclinometer to stick to.
-
06-03-2019 #20Enthusiast
- Join Date
- Aug 2015
- Posts
- 232
Thanks Dean, that makes sense to me. I know you're well versed on aligning these cars; is it possible to do at home without a lift? Seems access to any adjustments is going to be an issue. I suppose you could measure, make adjustments and re-measure but there's a lot of labor in jacking the car up each time. Curious what your procedure is, if you don't mind sharing.
-
06-03-2019 #21Enthusiast
- Join Date
- Jul 2017
- Location
- Michigan
- Posts
- 71
Thanks for the pictures Dean. I actually though about behind the headlights for the front, but the MCS reservoirs seemed too long and would end up sticking up high enough where I thought they would hit the hood. I will have to look for the body plugs under the carpet in the rear, it looks like there is enough flex in the wheel liner to snake the canister through, so if the plug is nearby it should go smoothly. Luckily the hoses on the MCS shocks are pretty long so it gives me options for mounting.
71firebird400
I don't remember if I used the bracket for doing the fronts or the LongAcre bubble gauge I borrowed when setting caster. Also you can do an alignment without a hoist, but it will be a long process. If you are skinny you can reach the rear suspension bolts on the ground, but the fronts are pretty much impossible to adjust with out lifting the car, and the problem with lifting is that every time you set it back down you need to jounce the hell out of the suspension and roll the car to get the suspension to resettle. A hoist makes the process infinitely easier. I supposed you could stack some wood to get the car up enough do make the adjustments without needing to raise and lower the car.
-
06-03-2019 #22Enthusiast
- Join Date
- Nov 2016
- Location
- Ohio
- Posts
- 556
I am going to Pitt in July for the first time in my race car (944 spec racer). The Viper does periodic HPDE and lots of autocross + cruising. Originally Posted by Mr. Acoustics
-
06-03-2019 #23Enthusiast
- Join Date
- Oct 2013
- Location
- New Braunfels, TX
- Posts
- 1,836
I do wheels-on on my 4-post with slip plates and a jack bridge so I can access everything from underneath. Originally Posted by 71firebird400
You can start by measuring what your settings are at static curb height. Measure the ground clearance under the lower wishbones with wheels on. Then raise one end, pull the wheels, set up the caster/camber gauges on the hubs/knuckles and add or subtract a desired indicated amount with the suspension drooped. Set some wide wood blocks on slip plates under the lower wishbones with the wheels off at close to the same height you measured previously. Tighten the adjusters, go down on the blocks and jounce the car. See what you netted, then have at it again. Always make sure the steering wheel is straight when measuring. When you're where you think you want to be, put the wheels on and double-check. With external adjustable dampers, I always set them as soft as possible so the suspension will find center without preload, then reset when done.
-
06-06-2019 #24Enthusiast
- Join Date
- Jul 2017
- Location
- Michigan
- Posts
- 71
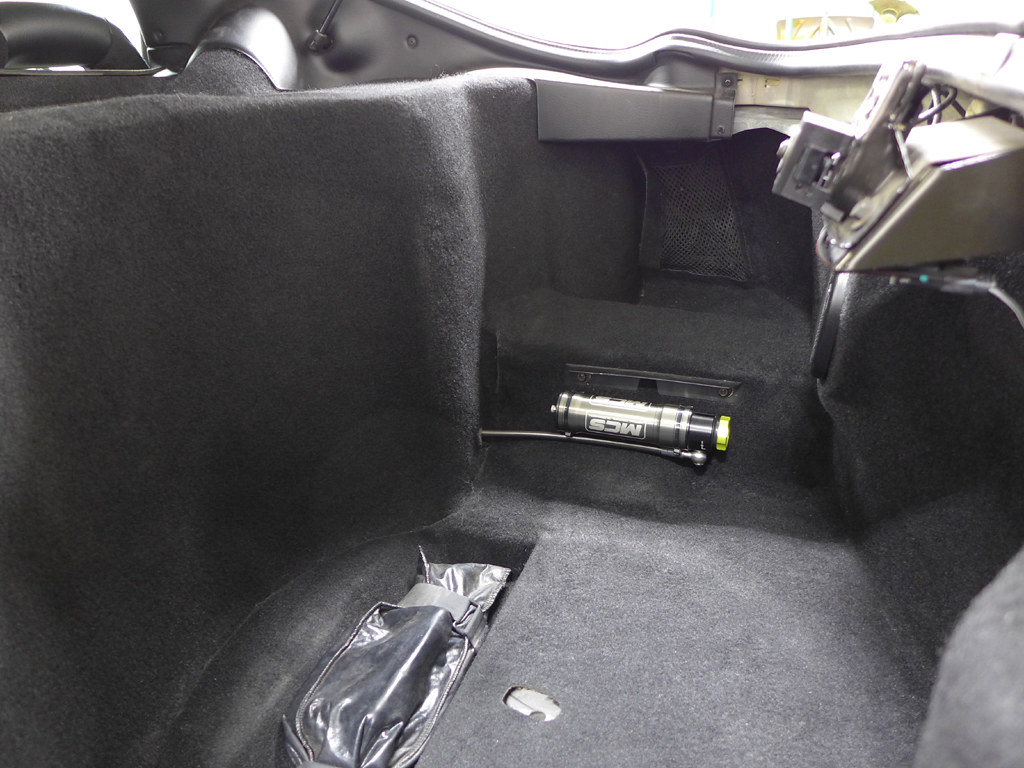
Well after removing the rear interior and discovering there really isn't an easy place to route shock reservoirs and then hemming and hawing on what to do, I eventually did what any reasonable person would do. I broke out the hole saw and drilled big holes in my car.
I wanted the installation to be hidden and keep the canisters out of the way during normal use, so I elected to mount them low in the spare tire well. I made block off plates with foam backing to route the hoses and seal the holes back up after the remote reservoir was passed through. No water, dust, or air is coming through the openings now. If I ever remove the shocks I can make just plain blank panels to seal the hole and no one would ever be the wiser unless they removed the carpet. Once I put my flat load floor panel in it completely hides and protects them from me just throwing things in the trunk. With the trunk cleaned out for a track day the compression knob is right there and easy to adjust and otherwise hidden in normal use. Now with the shocks in I can finally set ride height, corner balance, and align the car.
The only thing left that I want to look into replacing is the rear lower shock mount. Mine are starting to look a little rough, so if anyone knows of a better than oem piece or has the dimensions for a universal poly bushing that will fit let me know.

-
06-07-2019 #25Enthusiast
- Join Date
- Dec 2018
- Location
- The Front Range
- Posts
- 137
Very well done!


 Reply With Quote


Bookmarks