

Did the writeup for the brake ducts recently. The day I did the install of those I took advantage of the fact I had the wheel wells out to do the rear applique on the car. I had not gotten around to doin the writeup though so here it is a couple of weeks later.
The rear ducts on the car are not particularly difficult to install but the rear applique is a far more tedious task. There are various folks that have done the install of the rear applique without removing the rear bumper. They have simply pulled the stock piece out with the tail lights and the re-inserted the Carbon Fiber piece. I made the descision to remove the rear bumper and do it that way. Having done it that way, I would suggest that you do it that way yourself as well. Three reasons, first, it's simply safer and there is less likelyhood of you scratching anything. Second, there were clips on the rear applique where it meets the bumper (at least on my car) that you cannot remove unless you remove the rear bumper. You can't replace them either when you reinstall the new part. Third, the rear applique was on very tight on my car. I don't see that I would have been able to muscle it out without, at least, breaking a tab opening on the rear bumper plastic. These cars are hand built and the tolerances will vary. What may come off easily on one car will be tighter on the other. Bottom line... if you ask me, take the rear bumper off. Opinions will vary.
As to whether this is a one, two or three person job. Here's my take. I did it myself but I have the benefit of a lift to work with that allowed me to position the car as needed to avoid having to lift/manuver parts very much. Bottom line, having done it alone, I STRONGLY SUGGEST you have an extra pair of hands to help you if you decide to do this. You don't need a "Viper Tech" buddy, but just an extra pair of hands there just to help you move around the light but awkward parts.
As a reference, what I am working with is my 2013 Viper GTS.
Only part I needed for this is obvious:
- Xtreme Supercars Carbon Fiber Rear Applique or Tail Light Surroud.
All the other fasteners and parts are the re-used ones that come off as you disassemble the rear.
I mentioned this on the brake duct write up as well, but I think it's worth repeating. The Xtreme Carbon Fiber pieces are excellent. The quality and workmanship is great. The weave looks great and the gloss clearcoat on them is perfect. I purchased them from Xtreme because I'm an hour drive from them but you can get them from a number of vendors online. Bottom line though, they are awesome parts and the fit was nothing short of perfect for me.
The install:
VERY FIRST THING TO DO....... DISCONNECT THE BATTERY IN THE TRUNK. This is necessary to avoid getting an error code because of the LED tail lights. I did not have this happen to me, but I had read it is a problem so err on the side of caution. You'll live if you have to reprogram a few radio stations. ;-)
To get strted you need to remove the wheel wells. To get the wheel well off you need to remove quite a few fastners. I would suggest an cordless drill/driver to do this because of the sheer number of screws on each side.
The screws are torx head screws with the exception of four hex heads. The torx are T-30's. The hex heads are 10mm.
First remove the screws along the wheel well edge. Along the perimeter of the wheel opening.
After that get the two screws in under the rocker panel. They are at the end of the wheel well where the rocker ends at the wheel well. While you are there you will see three of the hex head bolts you need to remove. Only two are seen in the photo below. The third is inward and slight above these two when looking at it from outside the wheel well.
The forth hex head is in the shot below. Remove it as well.
There is a torx head screw in the upper portion of the wheel well. Remove it. It's in the shot below.
The last screws to come out are where the wheel well meets the rear diffuser panel under the car. There are three on each side.
If you have a 2014 or newer car or if you installed the J-pipe cooling duct ends on a 2013 (as I did and described in a write-up I recently did), you need to remove the pins that are holding the duct end in place.
Once you have all the screws out you need to work the wheel well shield out. When I did this I found the best method was to move the shield out from behind the body at the outside edge. Be careful of the body work. I put some blue painter's tape on the outside edge of the body just in case. Once you have the outside edge out, the wheel well shield bends pretty easily so simply bend and move it out as you go. I found it best to bend in the front and rear (as you look at the wheel well from the side of the car) inward and then in a rolling motion down and over the brake rotor and suspension arms. If you feel any resistance, double check that you removed all the screws. It comes out fairly easily.
Once you have the shield out, this is what you should see.
You will have to remove both wheel wells covers.

Results 1 to 12 of 12
-
06-20-2018 #1VOA Mamba Member

since 2013
South Florida

- Join Date
- Nov 2013
- Location
- Miami, Florida
- Posts
- 600
Carbon Fiber Rear Applique Install
Luis V.
Miami, Florida
2002 Dodge Viper GTS - FE #298 & 2013 Dodge Viper GTS
-
06-20-2018 #2VOA Mamba Member
since 2013
South Florida
- Join Date
- Nov 2013
- Location
- Miami, Florida
- Posts
- 600
Before you move on to getting the rear bumper off, I suggest you protect the painted surfaces just to be safe. I taped around the rear applique on the trunk lid area. I also covered the rear bumper itself so that when I removed and re-installed the applique, I would avoid scratching the paint. The trunk lid itself needs no protection because it will be open and out of the way. Heres what I did.


The process will now move to remove the whole rear end of the car, essentially, as one part. This means that the rear applique, tail lights, bumper and lower diffuser all are removed as one unit. The whole assembly is held in place by set of fasteners. Those are:
- 8 plastic nuts for tail lights.
- 10 expanding body pins along the trunk opening at the rear applique
- 10 screws/bolts along the bottom of the rear diffuser. 6 of these you already removed to get the wheel wells out. The last 4 are where the diffuser and belly pan meet.
- 2 bolts you access from inside the wheel well area that I will show you in some shots below.
Let's start with the tail light nuts. To get to those you have to push back the carpeting in the trunk. Easy enough to do by lifting out the weather strip at the trunk and pushing it out of the way. The plastic nuts come off by hand without much fuss. One is deep in there toward the outside of each tail light.

The outside nut.

All four nuts removed.

Next I'd get the two bolts in the wheel wells out. The two bolts are deep in there looking in from the wheel well towards the tail lights. The passenger side is real easy to get to, the drivers side is a tight affair. Unless you have a small air ratchet or a power ratchet, this is a 1/8 turn at a time affair. The shots are below. You need to remove both bolts. They are both 10mm.
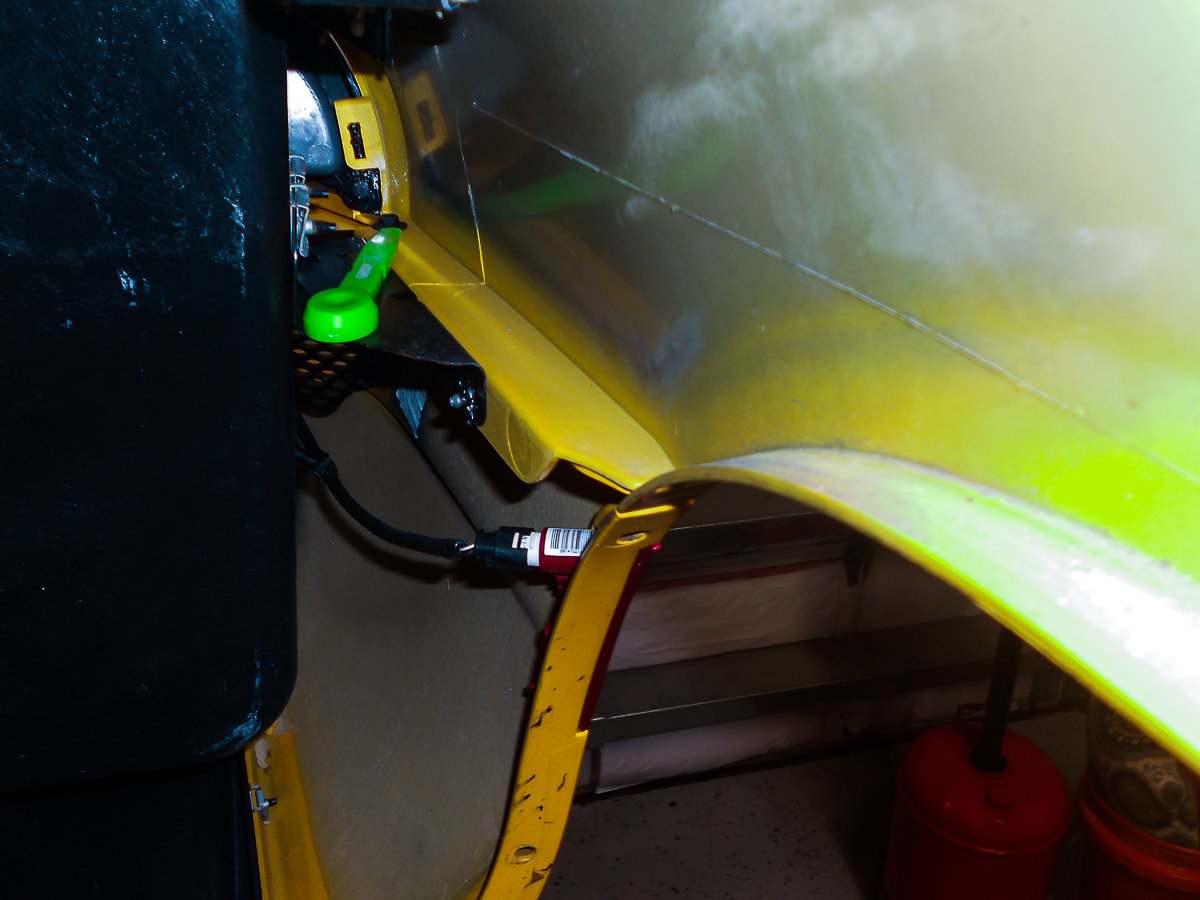
Passenger side. This one is clear. It is the hex head bolt all the way in the back near the tail light. The pressure clip, by the way, directly above it is a clip on the end of the rear applique. Remove the bolt.

The driver side. Much harder to get to. I put the green panel tool in there pointing the bolt out. As you can see here, this side is a lot tighter! remove the bolt.
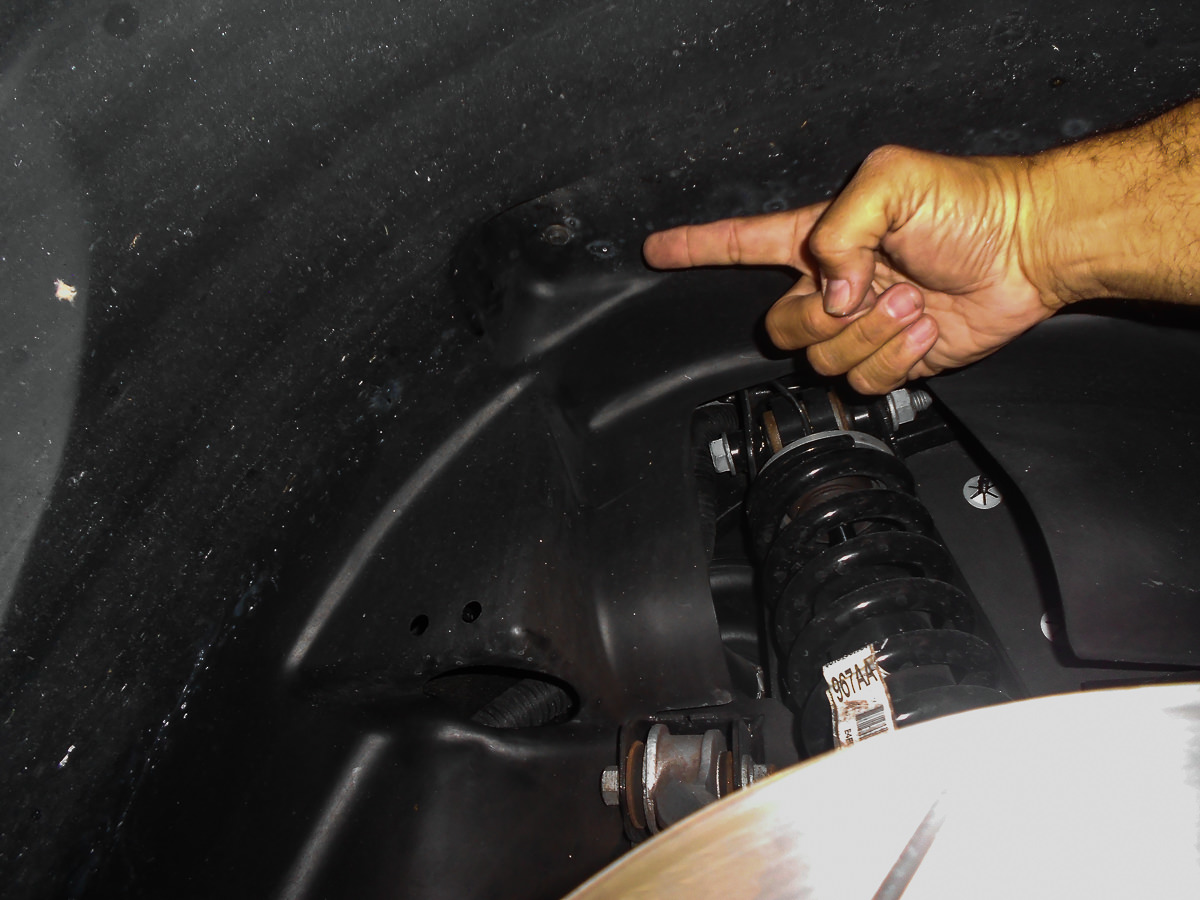
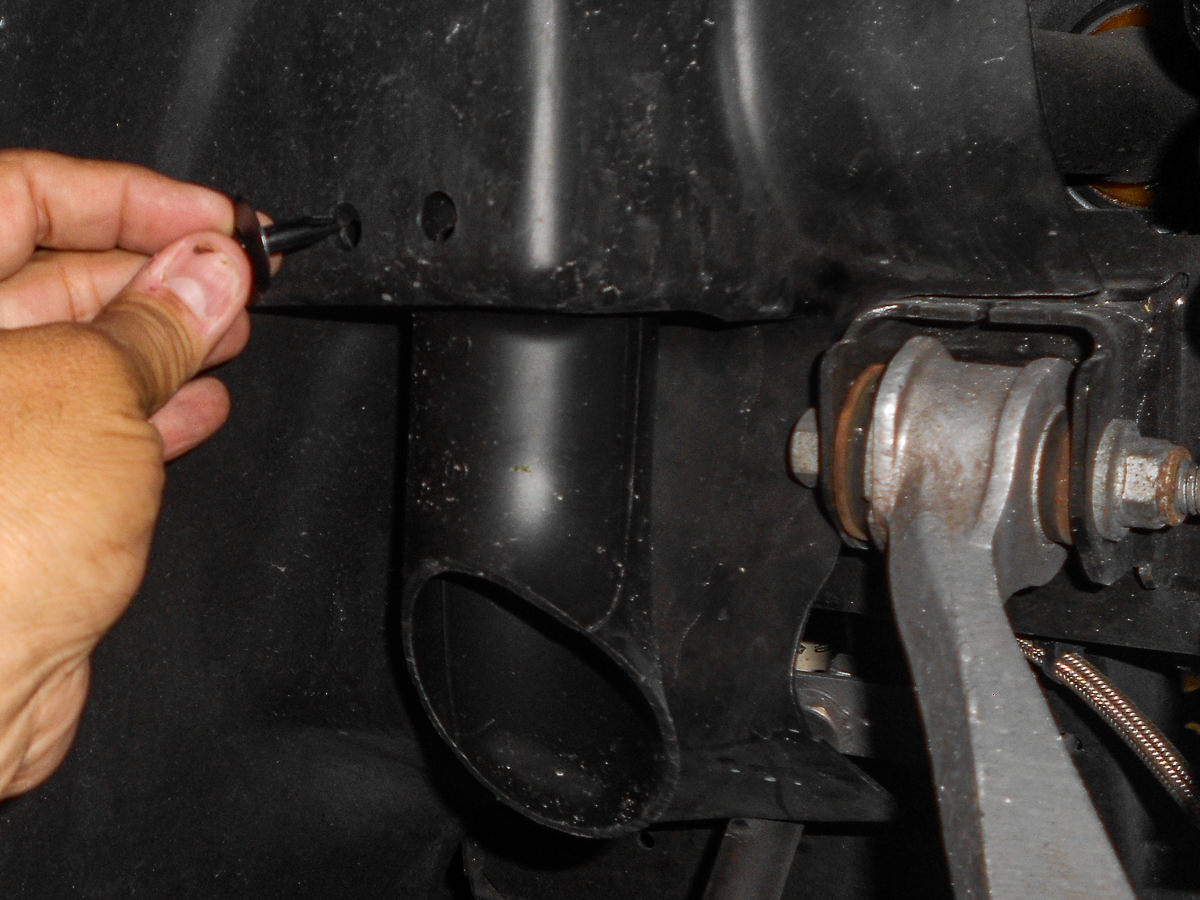
Next get under the car to remove the bolts where the belly pan and diffuser meet. Again, the 6 bolts at the wheel well extremes should already be out. The shot below shows you the bolts I am talking about.

In my case, I was working alone so I had to prop up the rear assembly to get the unit off. Again, I have a lift to raise and lower the car so this is easier for me. However, again, I suggest you have help here. Regardless, I suggest you get something under the diffuser to support the unit once it is free from the car. The reason is that once it is off, there are a few connectors you need to remove. It will be very difficult to do if you have to support it while undoing the connectors. Here is my high-tech support device....

Once you have a buddy to help you or you rig your own support you remove the last fasteners along the top of the rear applique. There are 10 pins that you simply pry the center up on and they release to pull them out.

 Luis V.
Miami, Florida
2002 Dodge Viper GTS - FE #298 & 2013 Dodge Viper GTS
-
06-20-2018 #3VOA Mamba Member
since 2013
South Florida
- Join Date
- Nov 2013
- Location
- Miami, Florida
- Posts
- 600
Now the process of getting the assembly itself off. I don't have photos of it since I was doing this alone and can't snap shots while doing it.
At this point there is nothing holding the assembly in place except mechanical pressure. To remove the bumper assembly you will pull out on the two sides that wrap towards the wheel wells. This will "release" the bumper at the bottom. Basically, you are pulling out a lip that "snaps" in under the quarter panel. Once those are out/loose, then you will lift slightly and pull back the entire assembly. I pulled on the top edge of the rear applique a bit (where the plastic body pins were removed) and the whol thing will drop out and away.
The shot below is after I already replaced the rear applique. Sorry... the shot I took when I had the bumper off was blurry so I used this instead but, you get the point, this is what you would have. The bumper, diffuser and rear applique off as one piece.

At this point you will have to disconnect two plugs that are the wire harnesses to the bumper. These are for a number of things including the tail lights, backup camera, plate lights, power for the trunk latch, and backup lights. The plugs are in the shot below, on the passenger side of the car. The plugs themselves are mounted to the frame using a pair of christmas tree pins.

Once those are loose, you need to remove the cable that is the key driven mechanical trunk latch. It comes off easily by moving a plastic guard/lock and the curved cable end comes right out.
Last remove the backup camera. It is held in place with a couple of small torx head screws. It's easier here.

Those four connections should be it. At this point you shold be completely free of the car and can move the bumper assembly completely clear of the car. Give yourself some space now.
Next you will be removing the rear applique from the bumper. The first thing to do is disconnect the tail lights and license plate lights from the wire harness. Each light has one plug. The applique is held to the bumper with a series of tabs along the bottom edge of the applique. Before simply separating it you may have to remove two clips. There are two wire loom clips (in my case) in the center are of the bumper. Those clips are attached to the rear applique tabs. If you don't remove these two (they are simply pressure mounted) you could tear the tab mounts in the bumper. Remove the two clips. I am pointing at one but you can see the other a few inches away. It has the tie wrap on it. The photo below is on the Carbon Fiber piece. Again.... did not get the shot of this as I was taking it apart. Sorry....but you get the idea of the clip.


Once those are off, gently pull the rear applique off the bumper. It won't be too hard. Go slow and remove the lights and applique together as one piece. This is the bumper with the applique removed. The connector in the shot is the tail light connector. This shows the tabs that hold the applique on the bumper clearly.

Now we have to transfer the parts from one piece to the other. You will be taking off the two license plate lights, the trunk release button, the trunk latch and, the tail lights.
Be extra careful with the license plate lights and the trunk release button. They are pressure mounted but the plastic that holds them is brittle. The photos below show you the latch held in with three screws (small torx head), the two lights, the trunk release and the back camera opening (camera was already removed earlier).


Remove the lights, latch and trunk release and set them aside. You'll be putting them into the new rear applique.
Once those are out you remove the tail lights. Both lights have screws all the way around the perimeter. I want to say there are seven torx heads all the way around. The lights in the original rear applique look like this.


Now transfer all these to the new Carbon Fiber Applique. The Xtreme Supercar version has hard plastic/rubber inserts in the unit in the precise locations needed to allow the mounting of all the devices. They have three cutouts from the pressure mounted license plate lights and rear trunk release. Just put every onto the new applique. Take your time, don't over tighten. You are not pulling a boat on this. It's just holding the pieces in place.Luis V.
Miami, Florida
2002 Dodge Viper GTS - FE #298 & 2013 Dodge Viper GTS
-
06-20-2018 #4VOA Mamba Member
since 2013
South Florida
- Join Date
- Nov 2013
- Location
- Miami, Florida
- Posts
- 600
At this point, you should have a great looking rear applique with all the required hardware on it except the backup camera which you will install when putting it back on the car.
Now it's time to put the rear applique back on the bumper. Start in the center and gently push the bumper onto each tab on the applique. THe applique is FAR MORE RIGID than the original piece on the car. It will be a lot easier to push the bumper openings over the tabs, one at a time. I started in the center and worked outwards. Once all the tabs are on the applique should look real good on the bumper and lined up on it perfectly.
Now here, push the two wire loom clips onto the applique tabs. This also helps keep the bumper tab locked on nicely. These pitures are with new applique and this is what you should be seeing now (no more "after the fact" shots).

Next, connect the tail lights and the license plate lights and trunk release button back onto the wire harness. Double check that all those plugs are well connected. You don't want to have to take everything apart later.
Now get the whole assembly close to the car again as you now need to reconnect the two wire harnesses. Get those plugs in and remount the christmas tree mounts into the frame as they were before (if you removed them).
At this point there are two small clips you need to transfer onto the new applique. The clips are on the far end of the applique and are there to align the applique to the quarter panels. There is one clip on each side.

Now here you'll need to bring the whole assembly back up nearly into place so that you can reattach the backup camera and the truck release mechanical cable.
Again, I did this alone, so now that everything is reconnected brought my high tech support system back in to bring the whole assembly back onto the car.
If you have a set of helpers, then bring the bumper assembly back up onto the car carefully. The process is the reverse of what you did to remove it. Open the two sides apart (the ones that "clip" into the rear quarter panel) so that you can bring the bumper/applique up into place. CAREFULLY bring it up into place MAKING CERTAIN YOU ALIGN THE SIDE CLIPS to the tab slits on the quarter panel. Again, be aware the Carbon Fiber applique is more brittle than the soft plastic one. I keep saying that, but I just want you to be careful. The fit is excellent so just be careful and make sure you are all lined up and then bring the assembly into place snapping the side clips into place and make sure the top of the applique is properly aligned at the trunk opening for the plastic body pins to be put in. I put two pins in at the top to hold it in place all aligned. Take it slow and you'll get it in there.
Now move around to the sides and pull each side around, align it and then push them into place. Once that is done, take care of the two bolts that are deep in the wheel well area. Have fun with the driver's side. I did it with a 1/4 inch air ratchet wrench but you still have to get the threads started.
At this point.... take a step back and make sure it looks good.

Once you are satisfied with the fit... before you put all the pins, wheel wells and fasteners back in... I would get the battery reconnected and test all the lights, trunk releases and backup camera. Make sure it all works now.
Once you have confirmed it is all working and the fit is good... finish up.
I am not going to detail the re-installation of everything. Simply reverse the steps and get all the pins, fasteners, wheel wells, etc. etc. etc. back in.... Like I said with the last write up.... if you have extra clips or fastners....... you forgot one!Luis V.
Miami, Florida
2002 Dodge Viper GTS - FE #298 & 2013 Dodge Viper GTS
-
06-20-2018 #5VOA Mamba Member
since 2013
South Florida
- Join Date
- Nov 2013
- Location
- Miami, Florida
- Posts
- 600
Here's a shot outside with the new rear applique. Obviously I had the rear spoiler put on since. But this will give you a great look at what the fit and finish looks like.
 Luis V.
Miami, Florida
2002 Dodge Viper GTS - FE #298 & 2013 Dodge Viper GTS
-
06-20-2018 #6Enthusiast
- Join Date
- Jun 2015
- Location
- Calgary
- Posts
- 538
Great write up! I also have this part along with an ACR-e diffuser to install. This is helpful! I am also going to follow your thread on the rear brake duct install as I have those parts waiting to go on. I’m looking forward to your photo rich how to on the TA front splitters

-
06-21-2018 #7Enthusiast
- Join Date
- Jan 2018
- Location
- Micky town
- Posts
- 296
Nice write up Luis. If I may add... Order a couple of those alignment clips that align the outer ends (in one of the last pics) before u start. I broke 2 of mine (think there were 4-6 total?!). Cheap, but I had to make a parts run mid way through. Luckily my local dealer had them in stock.
Mine was an absolute beast to replace without removing the bumper cover, but doable. Not sure which way I would recommend honestly. This way takes more time and effort, but clearly there is less risk of damaging something. Just glad it is behind me!
Looks fantastic brother!
Troy
-
06-21-2018 #8Enthusiast
- Join Date
- Nov 2014
- Posts
- 2,665
Great job and totally convinced me I would never attempt to do it.
-
06-21-2018 #9VOA Mamba Member
since 2013
South Florida
- Join Date
- Nov 2013
- Location
- Miami, Florida
- Posts
- 600
Thanks! Originally Posted by parabs

I am actually on the fence about the front splitters. I'm thinking of lowering caps and don't know what the final clearance will be. Have to ponder it a bit more...
Thanks. I am really enjoying the look of the carbon fiber against the Race Yellow. Originally Posted by Lost me beer
On the clips, you mention you had more than the two outer ones. I only had the two outer ones at each end of the applique.
Hahahahaha! OK.... fair enough.... Originally Posted by ViperJon
Luis V.
Miami, Florida
2002 Dodge Viper GTS - FE #298 & 2013 Dodge Viper GTS
-
03-09-2020 #10Enthusiast
- Join Date
- Jan 2014
- Posts
- 327
Still here and kicking out parts
Luis, Originally Posted by Luisv
Thank you so much for this awesome "How To" install instructions. The Gen V Rear Applique' is a beast to install and that's why we don't guarantee to part if you don't have a knowledgeable
body shop or dealer install it. Too many times, people think it's easy, run out of patience and pry it out, or force it in (Or both) and crack, snap off or break it. It's a very labor intensive party to make, and even though it is Carbon Fiber, It's not indestructible.
Wayne and I look forward to your other "How To" installation instructions for other parts
Thanks so very much!
Laurelle
-
05-18-2020 #11Enthusiast
- Join Date
- Oct 2013
- Posts
- 502
Thanks for this thread - it was SUPER helpful when I did my applique swap!
-
05-21-2020 #12Enthusiast
- Join Date
- Jan 2014
- Posts
- 327
Great News! Originally Posted by Thawk97
Laurelle


 Reply With Quote
Bookmarks