

Had not seen a DIY writeup for this so I decided to help and do this. It's not particularly difficult but I did it because I have seen questions on it and figured some photos and info could not hurt.
What I am working with is my 2013 Viper GTS. Mention this for two reasons. First, I don't know if there are differences in the later years. Second, to answer the question of why I added the ducts in the wheel wells.
As background for those that may not have known/noticed/read about this. The 2013 cars do not have the ducts in the rear wheel wells. The cooling ducts on the pillars behind the doors feed hoses that go down into the wheel wells, but the hoses are just shy of making it into the wheel wells themselves. There are different stories as to why but, in the end, they are not there in the 2013 cars.
I did this at the same time as I did the swap of the rear applique or tail light sorround to carbon fiber. So since I had to remove the wheel wells anyway, I decided to do this at the same time. I separated this part for the writeup and I'll do another for the applique as well.
Getting back to this...... here's the info for the carbon fiber Brake cooling intake ducts and the wheel well ducts.
Parts I got for this:
- Xtreme Supercars Carbon Fiber Rear Brake Ducts
- Dodge/FCA Part Numbers 05043042AB and 05043043AB: These are the brake duct extension/nozzles/ducts.
- 1/4" Expanding Body Push Pins from local auto parts store
The Xtreme Carbon Fiber are excellent. The quality and workmanship on the ducts is great. The weave looks great and the gloss clearcoat on them is perfect. I purchased them from Xtreme because I'm an hour drive from them but you can get them from a number of vendors online. Bottom line though, they are awesome parts and the fit was nothing short of perfect for me.
The part numbers on the ducts for the wheel wells are valid and I simply purchased them at my local dealer. It took them 3 days to get me the parts.
The install:
Not particularly difficult and I was able to have the to pillar ducts done in less than an hour not knowing what to expect or remove. Hopefully the photos help you knock it out faster.
You start by removing two panels on each side of the interior. First you remove the interior pillar panel. This is the panel that covers the pillar immediately behind the door on the inside of the car. There are no special tools required. You simply pull back the rubber weather strip slightly on the top rear of the door opening and then pry the panel up. I did it by hand. The clips are not particularly difficult to pry off. Just go slow and apply even pulling pressure at the door opening and they will pop off.
Technically, you don't need to take the next panel off because the two nuts you need to remove are exposed. However, removing the next panel allows you to get access to the hose that is attached to the duct. The access to the hose makes it easier to get some slack in the hose to remove and install the hose from the duct itself.
To remove the second panel, which is the upper trunk panel on the driver and passenger side, you simply need to remove two push pins and pop one clip. The two push pins where not present in my car but they should be there. If you don't have them no big deal. The panel comes off by opening the trunk and pulling back the inner lip of the weatherstrip around the trunk. You don't need to pull the weather strip off the car's trunk opening. Once you pull the weatherstrip back you'll expose/free the upper edge of the panel. Pull back on that and, roughly in the middle of the panels length, you reach down and pry the clip free. Again, it's a single clip. You should be able to pull the part back far enough and shine a flashlight in there to find the exact location of the clip. Either with a panel tool or with your hand behind the panel, pop the clip and the panel comes out.
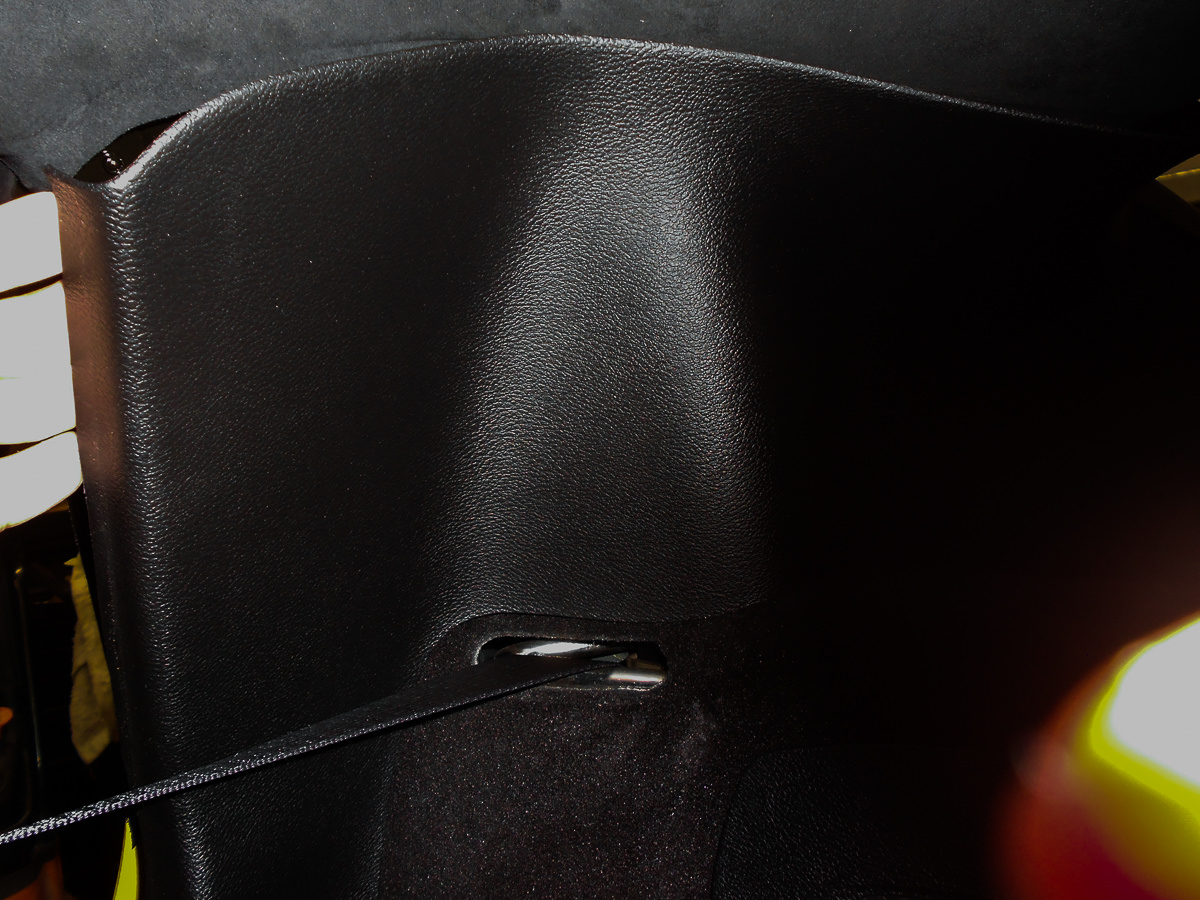
The photo shows the second panel and I am pointing to where the two push pins (if present) would be.
Once the second panel is off, you will have access to where the hose runs and the two bolts that hold the exterior duct in place. The next shot shows the two nuts you'll be removing. They are 10mm nuts. Remove the two nuts.
Once you have the two nuts off the brake duct on the outside is free. You can pull it forward and out.
The reason I feel removing the second panel is helpful is because you need to remove the clamp that holds the hose on the duct itself. Having access to the hose from the inside allows you to pull up some of the hose from the wheel well (you'll see where the hose runs) so as to have some extra slack in the hose. With the extra slack getting to the clamp screw is easy. I suggest a nut driver to remove this, but you could do it with a small wrench as well. loosen the clamp to free the hose. Make the clamp real loose to make it easy to remove with the hose.
Once you have the clamp out you have the duct in your hand. The photo below is the driver's side duct. The reason I show this one is that it has a pair of foam pads that wedge into the body of the car. These should be transferred over to the new duct. It stops the part from vibrating in the wind at speed. The pads have two face tape on them that you can pull off with the pad carefully. You can apply them onto the new part. The two face tape is just there to hold the pad in place when you reinstall the part. They will not move an inch once they are wedged into place. My point is, don't go nuts if you feel they don't seem to be held on there well on the carbon part.
After the pads are over, you need to remove the two t-bolts from the pockets on the back of the ducts. The t-bolts go into a slot that will prevent them from spinning when you tighten them back down. The t-bolts come out easily by hand and slide right into the new part. Once that is done, reattach the hose onto the duct and tighten the clamp screw again. Don't go nuts overtightening the clamp. You are not running 1500 psi through there. Tight but not so much that you break the duct. In my case I added some thin rubber pieces to act as a gasket where the screws go into the body. The bolts have a rubber washer but mine seems to have seen better days so I replced it with the rubber piece you see in the photo.
Once all that is done, slide the duct back into place. You'll hold it at an angle and push the hose back into the body and then move the duct back into place so that the t-bolts go into the two holes. Once there you want to push the duct back and up into the location when you tighten the screws. You want to be careful to keep the duct back into the body work and pay special attention to the tab on the bottom front of the duct. Make sure that is seated tightly against the body. This is to make sure that the tab is not broken by the door as you close it. As you keep the duct in position, tighten the two screws. You want to tighten them but do not overdo it. You could break the carbon fiber duct if you over tighten. Tighten it snugly and well enough to hold the part down as you release the part you were holding in position.
Once it is all done, close the door carefully the first time to make sure everything clears well. If in doubt, loosen the nuts and realign the part. With the Xtreme Supercars parts, the fit was beautiful. Here are some shots.
- - - Updated - - -
The Wheel Well Ducts:
Moving onto the other end of the cooling duct hose we have the ducts. This is very simple to do but does require you to remove the wheel well. There is simply no way to do this without that. But that is easier to do than it sounds.
To get the wheel well off you need to remove quite a few fastners. I would suggest an cordless drill/driver to do this because of the sheer number of screws on each side.
The screws are torx head screws with the exception of four hex heads. The torx are T-30's. The hex heads are 10mm.
First remove the screws along the wheel well edge. Along the perimeter of the wheel opening.
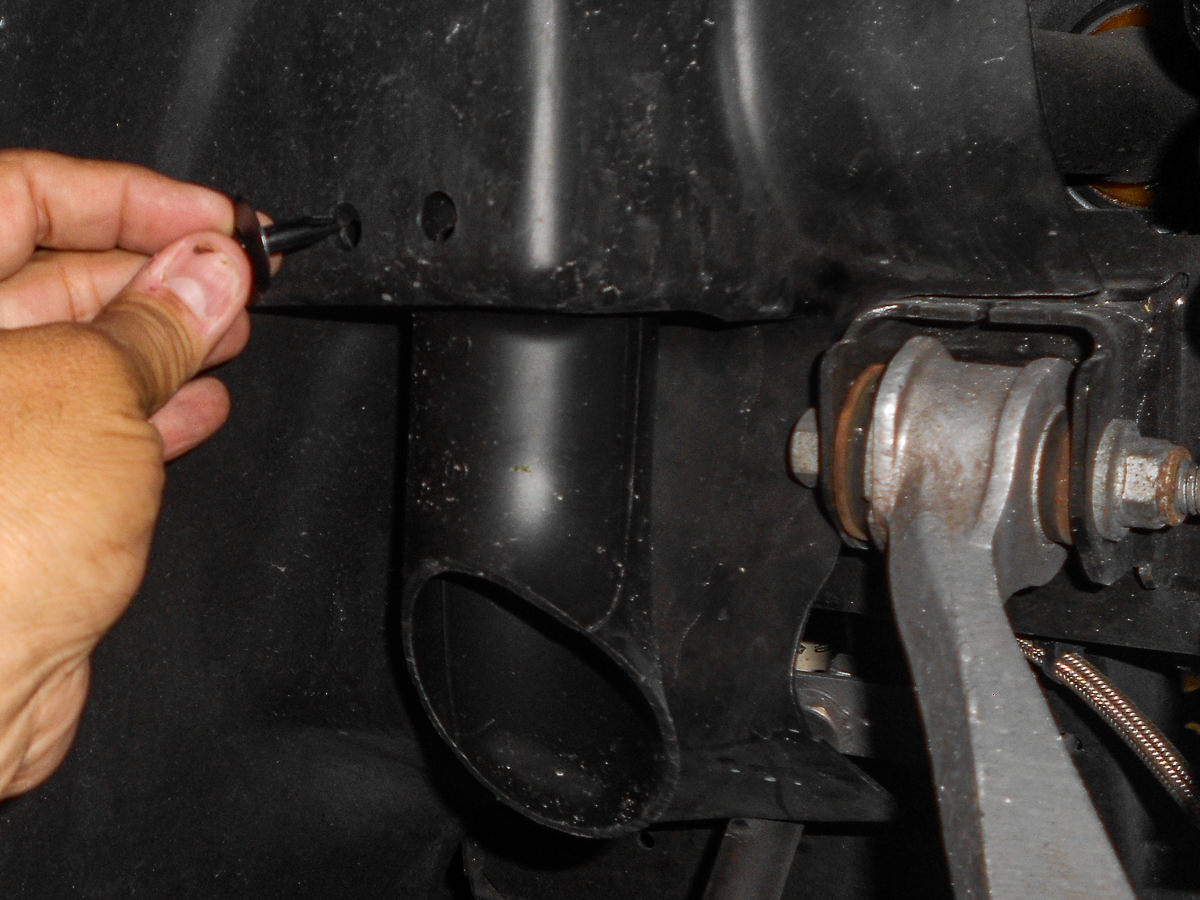
After that get the two screws in under the rocker panel. They are at the end of the wheel well where the rocker ends at the wheel well. While you are there you will see three of the hex head bolts you need to remove. Only two are seen in the photo below. The third is inward and slight above these two when looking at it from outside the wheel well.
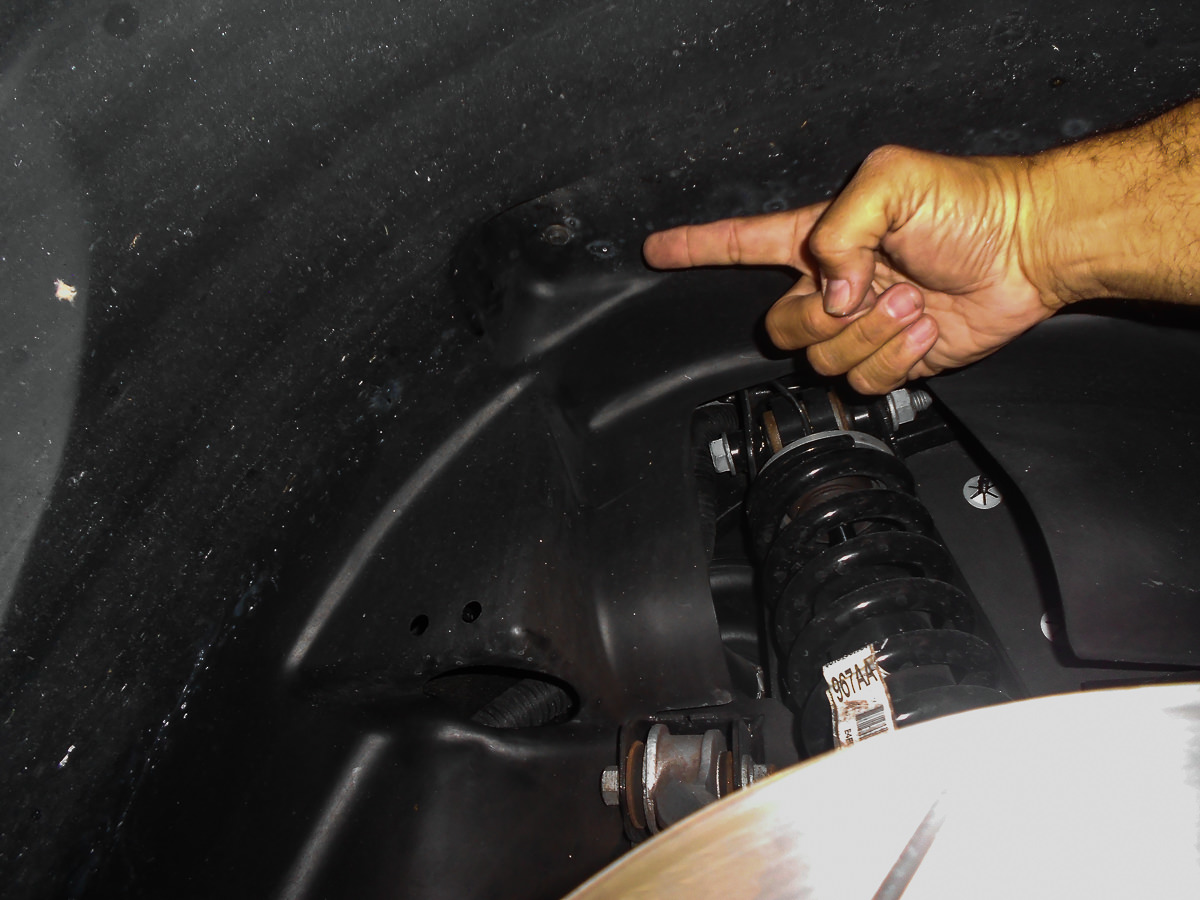
The forth hex head is in the shot below. Remove it as well.
There is a torx head screw in the upper portion of the wheel well. Remove it. It's in the shot below.
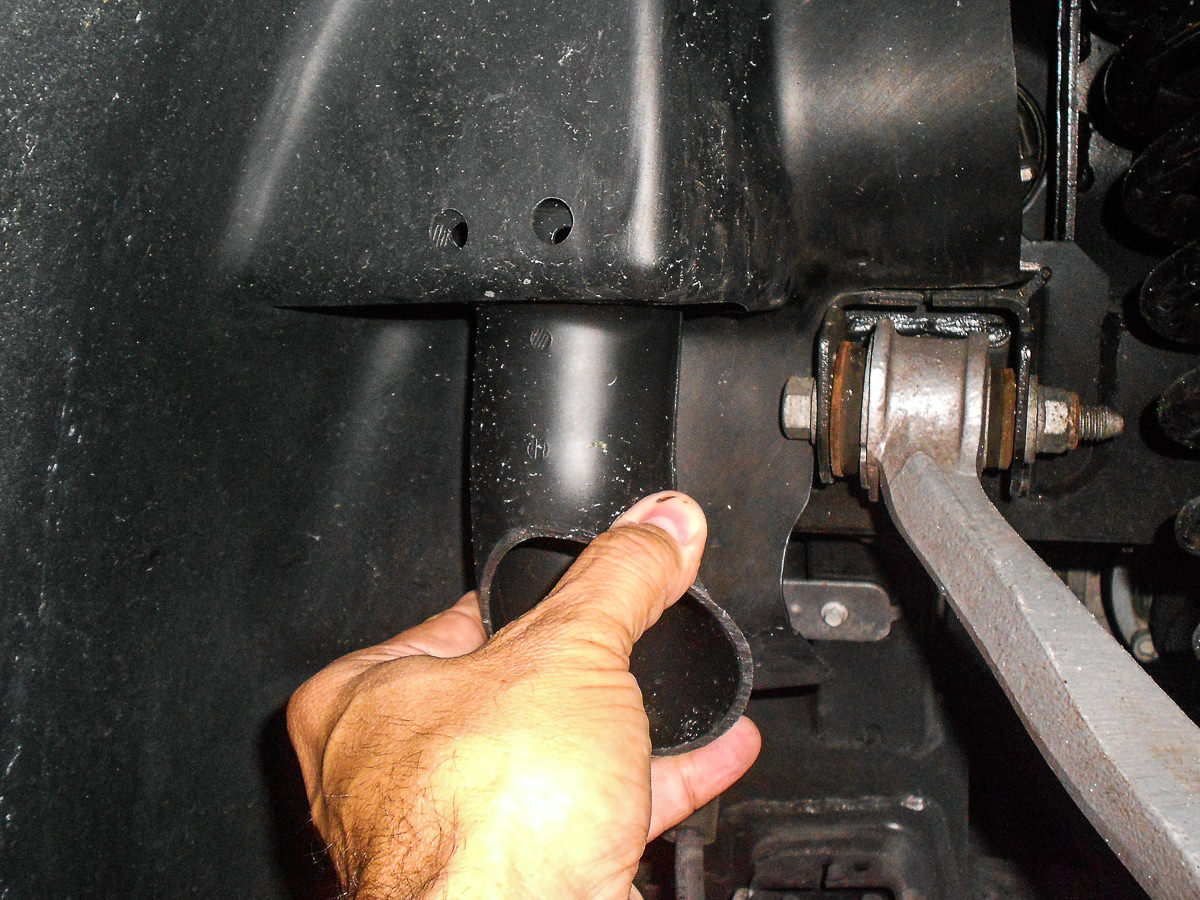
A quick note here. In this shot you can see the opening (right in front of the coil over shock) where the cooling duct hose should be coming out of. Also, you see that there are two holes, about 3/8" in size, right above that opening. Those holes are where the duct end would be held in place. The reason I mention this is that, clearly, the plan was to put a duct here. Otherwise, why make the holes? it just seems odd to me that Dodge never put them in. In any event, it works because you won't have to make the mounting holes. They're already there for you.
The last screws to come out are where the wheel well meets the rear diffuser panel under the car. There are three on each side.
Once you have all the screws out you need to work the wheel well shield out. When I did this I found the best method was to move the shield out from behind the body at the outside edge. Be careful of the body work. I put some blue painter's tape on the outside edge of the body just in case. Once you have the outside edge out, the wheel well shield bends pretty easily so simply bend and move it out as you go. I found it best to bend in the front and rear (as you look at the wheel well from the side of the car) inward and then in a rolling motion down and over the brake rotor and suspension arms. If you feel any resistance, double check that you removed all the screws. It comes out fairly easily.
Once you have the shield out, this is what you should see.
The hose is simply dangling in there on the 2013's. Nothing is holding them in place. Again, odd... but good because there is not much to do here.
Here's a bonus look: With the shield out you can see where and how the gas cap is mounted. With the shield out, its' real easy to get up in there to remove the gas cap. Just a shot I got and decided to put in for those (like me) that plan on painting it.
Back to the regularly scheduled program.......
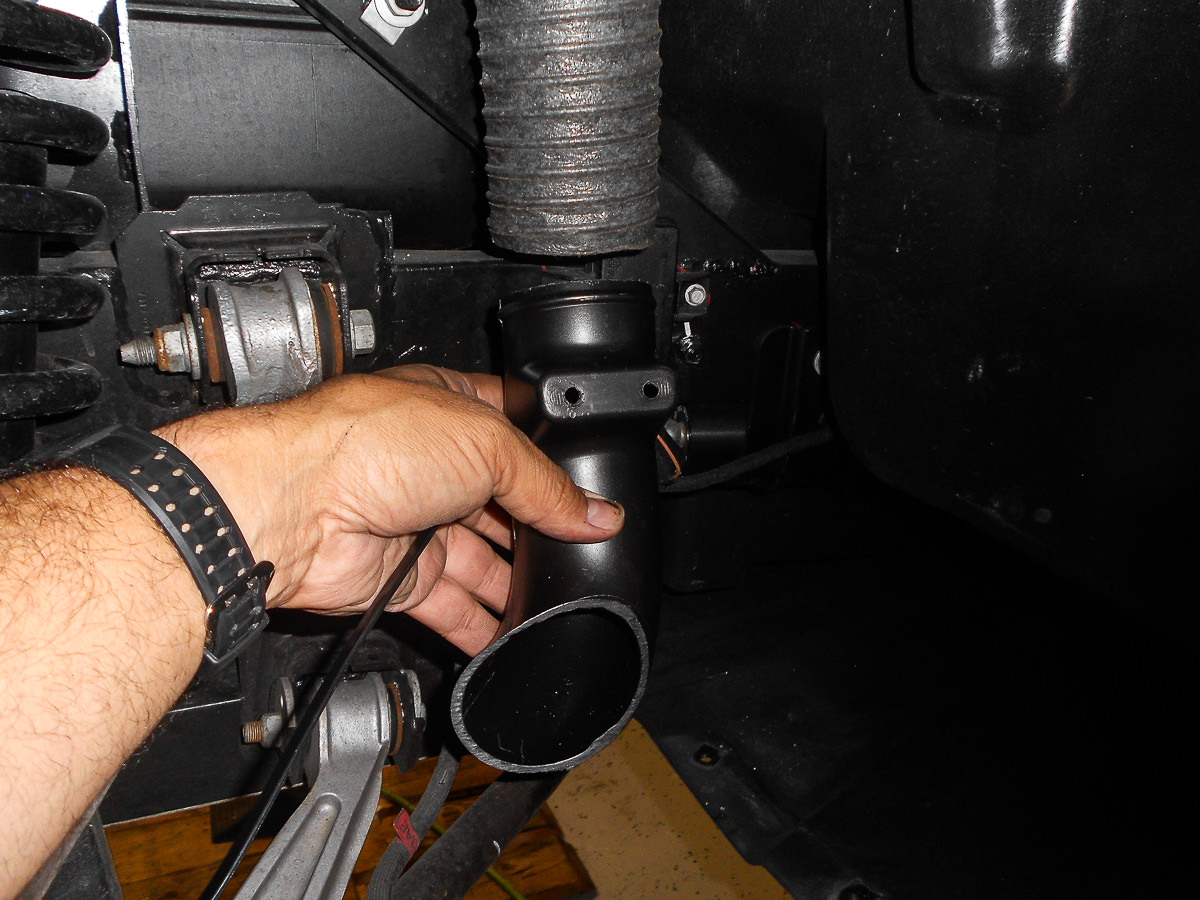
Now that it's out all you need to do is place the nozzle on. There are two part numbers and they are specific to a side. The parts are also marked as "LH" and "RH" to let you know to install on the driver's or passenger's side. In the shot below, I am showing you the LH or driver's side duct/end. The hose slides onto it fairly easily. The ends/nozzles come with long tie wraps. All you need to do is slide the hose on and put the tie wrap onto the hose so that the tie wrap is below the flange. I put them on and tightened them enough to make sure the hoze stays on. Again, the flange is there.
Here is what you have with the tie wrap on. (This is the passenger side again)

Results 1 to 13 of 13
-
05-27-2018 #1VOA Mamba Member

since 2013
South Florida

- Join Date
- Nov 2013
- Location
- Miami, Florida
- Posts
- 600
Carbon Fiber Rear Brake Ducts and Wheel Well Ducts
Luis V.
Miami, Florida
2002 Dodge Viper GTS - FE #298 & 2013 Dodge Viper GTS
-
05-27-2018 #2VOA Mamba Member
since 2013
South Florida
- Join Date
- Nov 2013
- Location
- Miami, Florida
- Posts
- 600
From here, all you need to do is install the wheel well back into place. To do that reverse your steps for taking it out. In other words, you start by rolling the top in over the brake rotor and suspension arm. As you do that, the only thing you need to remember is to feed the duct end/nozzle out through the opening in the wheel well. You don't need to fasten it in, simply feed it through. You'll fasten the duct once everything is back in place and screwed down. Once the wheel well is in its general location, you push back in on it to get the edge back under the body work. It takes moderate effort, but it will go back in.
At this point you should have the duct end sitting outside the shield and see this.
At this point simply align the holes and put in the push pins.
And the final look.

At this point all you need to do is put all the screws for the shield back in. If you have any screws left over.... ya missed one! ;-)Luis V.
Miami, Florida
2002 Dodge Viper GTS - FE #298 & 2013 Dodge Viper GTS
-
05-29-2018 #3Enthusiast
- Join Date
- Mar 2016
- Posts
- 71
Very good thread! Still contemplating doing this to my TA (should've came with CF ducts to begin with).
-
05-30-2018 #4Enthusiast
- Join Date
- Jan 2018
- Location
- Spring TX
- Posts
- 322
Thank you for putting this up. I've been on the fence about doing this and by just looking at them I could not figure out how the damn factory ones were even installed. Now I have a good idea about what the install is like. My car is all black and I'm thinking these would look great, but still can't decide how they would look on a black car. Nice work!!!
-
05-30-2018 #5VOA Member
- Join Date
- Oct 2013
- Location
- Banned
- Posts
- 3,325
Great write up!!!
09 ACR With all the goodies
99 ACR TT 99 red RT/10 Roe S/C
97 B/W RT/10 TT 94 RT/10 TT
-
05-30-2018 #6VOA Mamba Member
since 2013
South Florida
- Join Date
- Nov 2013
- Location
- Miami, Florida
- Posts
- 600
The main reason, I would suppose, is that there is no real weight savings between the two parts. (Stock and CF) I did it purely as a cosmetic upgrade because I thought it would look awesome against the Yellow. Originally Posted by silver7iron

The Carbon Fiber on the car would give you a more subtle look. It would actually be a little lighter, like a dark grey against the black. I'd like it but some prefer the solid black look the glossy black pieces give you. Originally Posted by chris_lee
Thanks.... hope it helps folks thinking about it. Originally Posted by 99RT10
Luis V.
Miami, Florida
2002 Dodge Viper GTS - FE #298 & 2013 Dodge Viper GTS
-
05-30-2018 #7Enthusiast
- Join Date
- Nov 2013
- Location
- CT
- Posts
- 818
Awesome job Luis!!! I just received my duct ends last week to do the same project.
I was cleaning my wheel wells a few weeks ago and saw no ends on the ducts. It really bothered me they weren’t finished on the 13’s. You just did all the investigative work for me. Thanks. I’m on it for this weekend.
-
05-31-2018 #8Enthusiast
- Join Date
- May 2015
- Location
- Watchung,NJ
- Posts
- 504
Awesome job Luis, thanks for posting.
-
05-31-2018 #9Enthusiast
- Join Date
- Jul 2015
- Location
- Northern California
- Posts
- 80
Luis, thanks for the post. I think SRT rushed the product out the door to meet public demand and hoped no one would discover the missing piece.
-
09-24-2018 #10Enthusiast
- Join Date
- Dec 2013
- Posts
- 37
Huh. My 2013 does *not* have the two holes pre-drilled in the wheel well liner to secure the brake duct extension. It's a June 2013 build date, so it's a pretty early one. Adding those holes must have been a running part change. Easy to drill the holes, of course; just pointing out that not all 2013s have them.
Thanks for this write-up! Looks like I'm installing the extension tubes soon. My driver's side ducting is absolutely useless right now; the existing tube doesn't line up with the hole in the liner, so all that nice cool air is doing nothing at all to benefit that brake. I can't make it line up, it just moves back, so something must be pushing on it. Sigh. The passenger side ducting does at least more or less line up with the liner hole.
I don't suppose you measured where those two holes are in the liner, did you? Looks like maybe an inch up from the bottom?
Do you think there's any way to mount the extension without removing the wheel well liner? The hole where the extension goes through the liner looks pretty big, but is it big enough to get the extension through? Maybe I can pull the ducting down far enough to secure the extension to it.
-
07-10-2019 #11Enthusiast
- Join Date
- Nov 2013
- Location
- Clearwater, FL
- Posts
- 1,521
Excellent write up! Wanted to bump this up since I'll be using this as a guide to replace my gloss black rear brake ducts with OEM carbon.
-
07-12-2019 #12Enthusiast
- Join Date
- Jun 2017
- Location
- Las Vegas
- Posts
- 146
Just when I thought I was done spending money on this car I run across this post. Nice write-up, I like how the carbon looks against black so I might have to open the wallet again!
-
09-07-2019 #13Enthusiast
- Join Date
- Dec 2013
- Location
- Thousand Oaks , CA
- Posts
- 307
Thanks for the write up and photos. I put the side brake ducts on today with no issues thanks to your help.


 Reply With Quote

Bookmarks