
For anyone who has a window that raises a bit slowly or hears a cracking noise when lowering/raising the window, this will be for you. Chances are that your plastic window regulators are in need of replacement. Luckily, direct replacements can be found for about $12 for both sides. Here is what you need and how to replace them.
Note: this is a fairly easy 1 hour job, but do keep track of all the different sized screws, as Dodge went a bit nuts in the randomness department.
*Based off of a 96- You will see a couple of different screw locations and door handle surrounds for other years, but this will get you 95% there*
**You may find a long black plastic rail in the bottom of the door. This goes onto the front window rail, to stop the window from rattling around. I glued mine back into the rail**
What you will need:
- Variety of flathead screwdrivers and a mid-sized phillips. A very small flathead is handy if you have one
- A T-30 Torx bit, preferably on a small ratchet and medium length extension
- Plastic panel removers (things will scratch without these)
- 23mm socket (Deep socket or the Craftsman Max Access as seen in the pic. A short 23mm will not work)
- 10mm socket
- White lithium grease (I found the spray type to be more helpful and much less messy)
- Adjustable wrench and optional small vice grips
- Butyl tape to reseal the inner plastic cover (I am sure your current butyl will be dried up and will not reseal)
- Painters tape if you have an earlier year car, with the door handle surround seen in the pictures
- Extendable magnet for some dropped screws
- Your favorite mechanics gloves
- Replacement "christmas tree" door panel fastener. the one in the picture is close, but not quite big enough FYI
- New regulators (I sourced mine from Amazon- Search for "Viper-9602-F-LR")
Okay, here we go....
**Lower the window to the middle position**
Remove the inner door handle. Put painters tape around the handle, as to not scratch the highly fragile door paint. Using the thinnest door panel remover, pry up slightly from THIS side and push it in THIS direction:
Here is what it looks like, so you can see how it slides in and out:
Remove this screw:
This single screw on the top left of the door:
Three screws for the speaker:
Unplug the main speaker:
These screws under the speaker:
This hidden screw on the very left of the door panel:
These three screws:
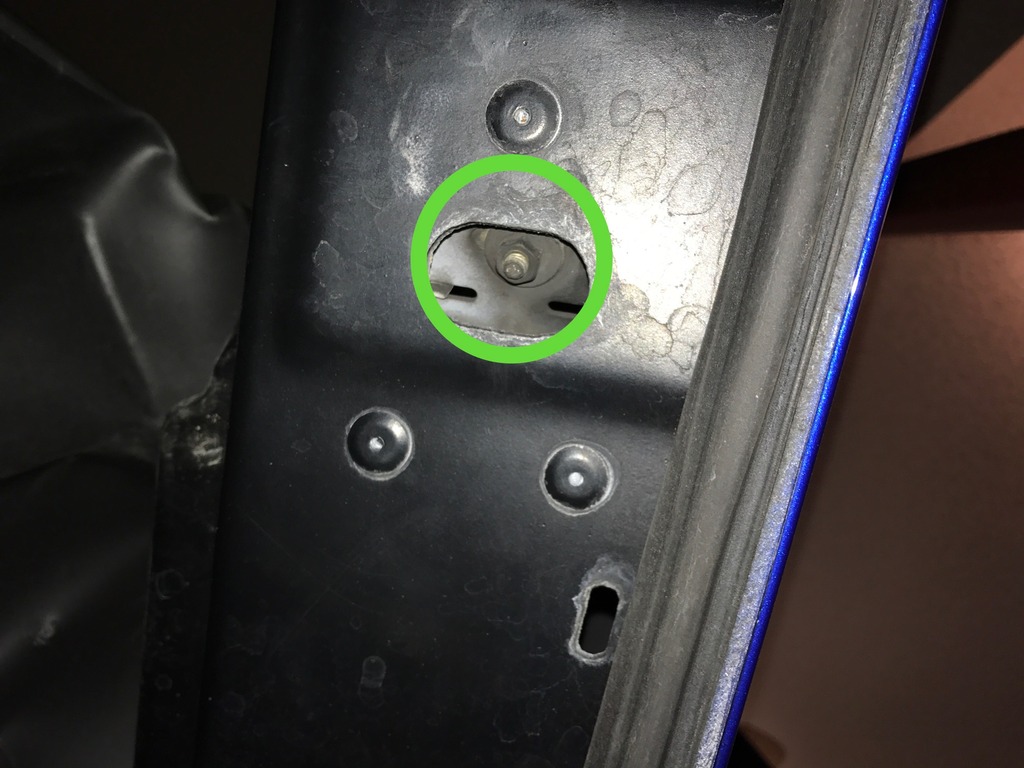
This single screw on the bottom outside corner:
On the right hand side of the door, you will have the christmas tree clip. Use a panel remover to pry it out, if it isn't already out:
Your upper inner stanchion (where the emergency exit handle is) should be loose enough to remove now. Swing it away from the door and pop out the connection for the emergency handle:
Get this screw out:
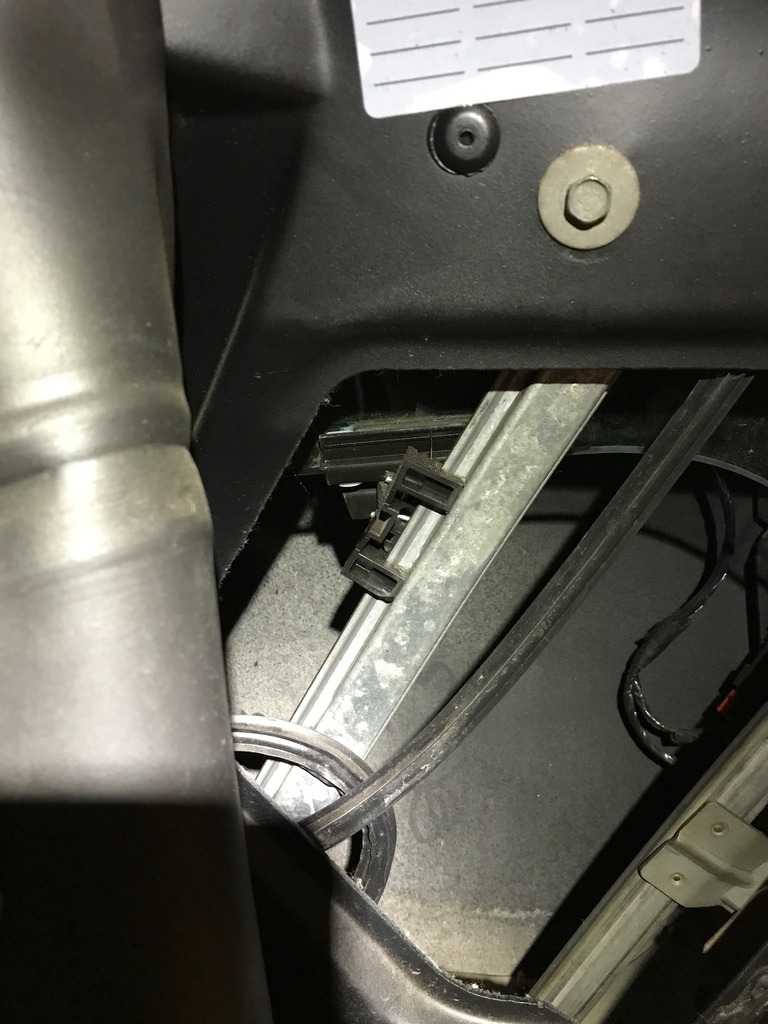
Pop out this very tiny guy from the door opener and unplug the electrical connection. Then use your 23mm to remove the door opener nut, this removing the door opener from the outside of the car:
Now you should be able to lift off the door panel from the door. Unplug the wiring for the tweeter:
Remove this side screw. Your outer stanchion will just need to swing out of the way, but you do NOT need to fully remove it:
Lift up the inner weather stripping and just lay it off to the side on the windshield (no need to fully remove it from the car):
Part 2 below...
Results 1 to 14 of 14
-
02-13-2018 #1Enthusiast


- Join Date
- Feb 2016
- Posts
- 175
Replacing window regulators and general inner door panel removal
Last edited by MacGyvers Mullet; 08-01-2018 at 01:04 PM.
-
02-13-2018 #2Enthusiast
- Join Date
- Feb 2016
- Posts
- 175
With the T-30 torx, remove this guy. It is connected to an adjustable stopper, so hold onto the stopper with your finger, so it doesn't fall down into the door (not the end of the world if it does, as it will just come out when you remove the window). You will also see the imprint of the screw, so you know where to put it upon re-install...though adjusting it may save breaking stanchion seals, but I have not tested this, since mine are already busted):

Remove this 10mm nut, which is found on the underside of the door. This will aid in removing the window and it is also needed to remove the window rail:
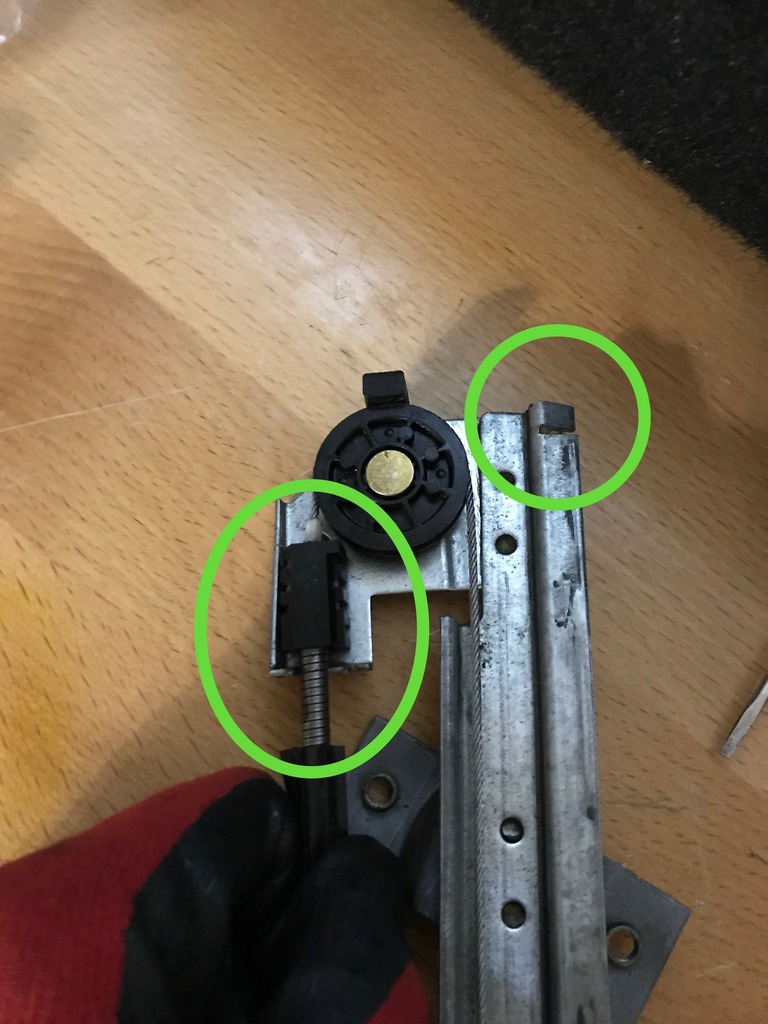
Here you see the window regulator on the rail, assuming you put the window in the middle position. Chances are, your OEM one is black:
Pry out the small clip from the window regulator:

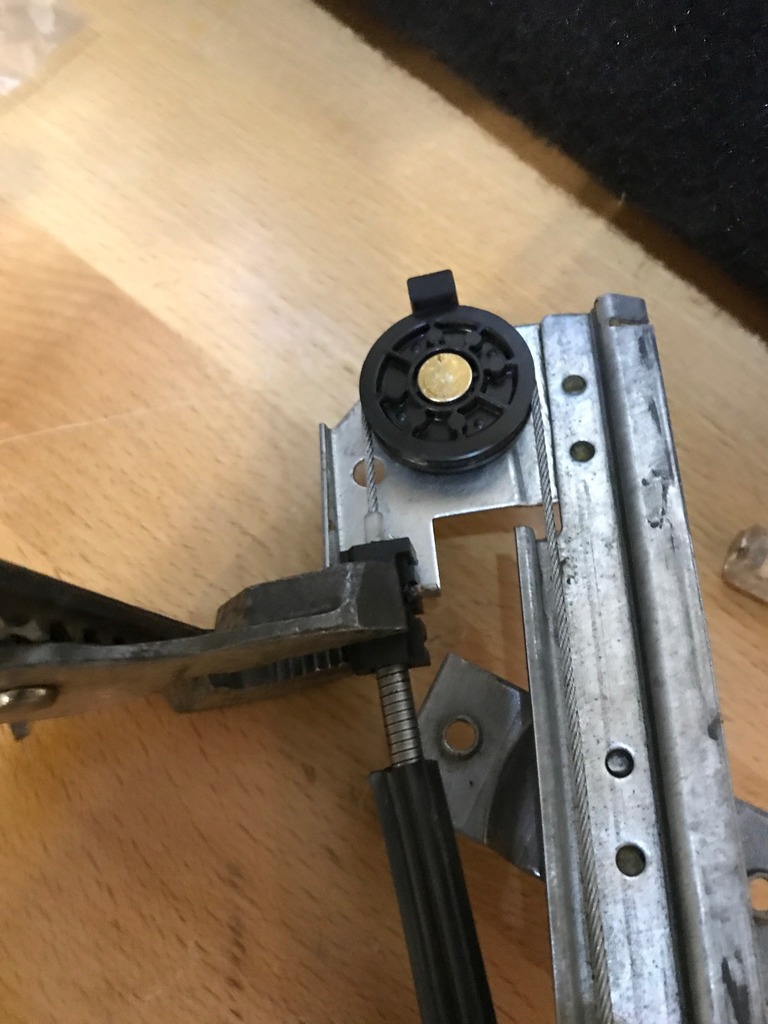
Now with both hands holding the window, push the window away from the regulator. This will fully release the window, so again...both hands. Lift out from the door and place on your ugliest blanket. Here is a picture of what goes into the regulator, so you have an idea:


Now with the window safely aside, remove these two 10mm nuts:

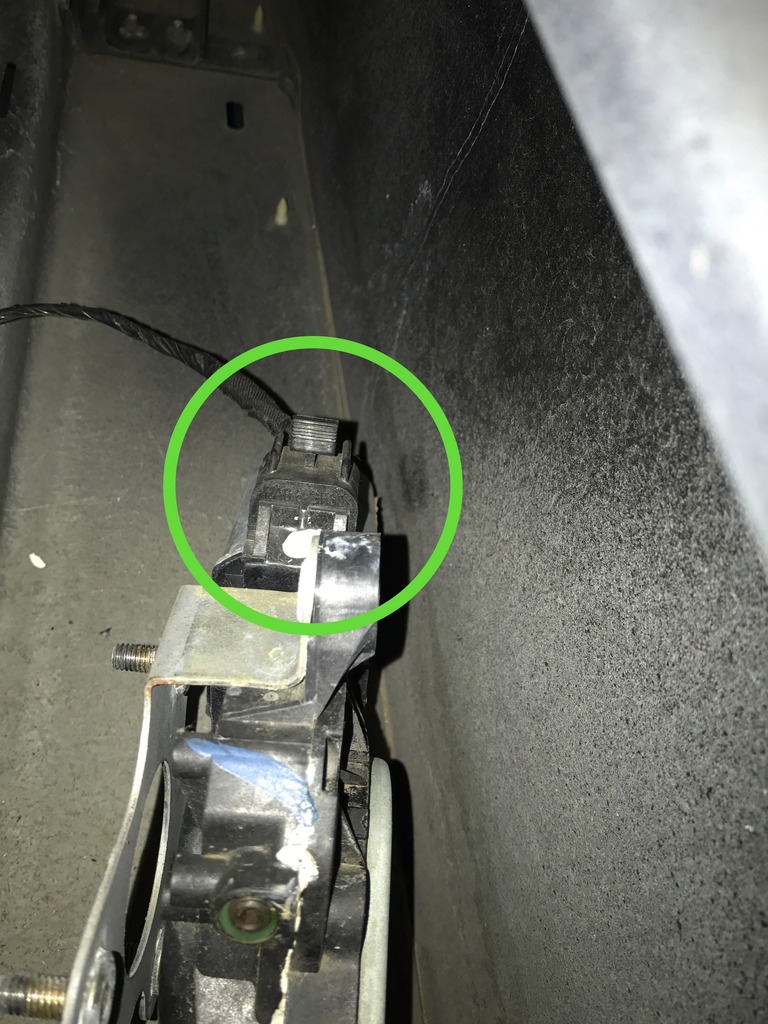
This will let you fully remove the window rail and motor. Unplug the motor wiring and lift the whole assembly from the door:

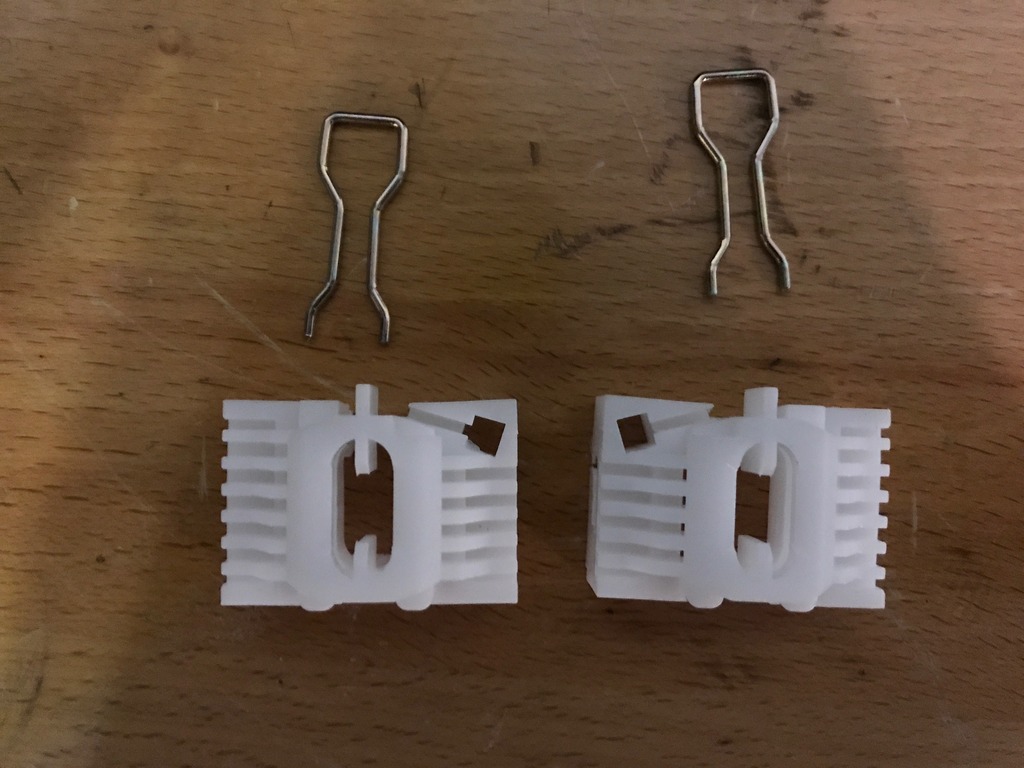
You will have a left and right regulator, with new clips. Choose the correct side:

Pry the cable adjuster away form the frame, but make note of which slot it goes into. When reinstalling it, the adjustable pliers were handy in pressing it back on. Also, straighten out the top metal tab, so the regulator can slide off. Some noted that this breaks off if you are not careful, but I did not have that issue. I just used my smaller vice grips to slowly adjust it:
Remove the cables from the regulator. A very small flathead comes in quite handy here. You could even just break the regulator if it is especially tough:

**Clean and re-grease the rail**. Slide the new regulator on from the top (never you mind the tab in the picture not being straightened out yet):

Press the cables into their right homes on the new regulator:

Press the adjuster back into the right position and put the tab back where it was originally bent to:
Viola! Now just install in the reverse and test out the window for operation. You can always adjust the rail via the 10mm nut on the underside of the door if the window is binding. I just put mine in the exact spot it was to begin with and didn't have any issues.
-
02-13-2018 #3Web Site Committee
Moderator
Tech Team

- Join Date
- Oct 2013
- Location
- Nu Yawk
- Posts
- 2,941
Thanks BIG TIME for this effort Mac!
2008 SRT10 Open Roof (1 of 2)
2022 BMW X5M Comp
Resident Misanthrope
-
02-13-2018 #4Enthusiast
- Join Date
- Feb 2016
- Posts
- 175
You're welcome! Originally Posted by City

-
06-01-2018 #5Enthusiast
- Join Date
- Jun 2018
- Posts
- 49
This Is How I Found This Forum...This Is The best Write up On The Internet On How To Do This! Thank You MacGyvers Mullet! Im Gonna Do The Job Tonight...
-
06-01-2018 #6Enthusiast
- Join Date
- Oct 2013
- Location
- South of London, Surrey
- Posts
- 7,579
Far more detailed than My How to, Great info

-
06-04-2018 #7Enthusiast
- Join Date
- Oct 2014
- Location
- CANADA
- Posts
- 389
Wow...just a top of the line DIY
Lots of details and photos...
Scary job for a noob but with patience, one can't go wrong following it.
Thanks
-
06-04-2018 #8Enthusiast
- Join Date
- Oct 2013
- Posts
- 472
Great job. Very well done!!
-
06-07-2018 #9Enthusiast
- Join Date
- Jun 2018
- Posts
- 49
So I Did the 1 Hour Job In 3 Hours Last Night...lol.. The Problem I Ran Into Was Popping The Window Into The Clip...I Finally Realized That My Window Bracket At Bottom Of Window Was Bent...Took Everything Apart Bent Piece To What I thought Was Correct Position And Was Able To Get The Clip In...If I Did The Job Again Im Sure I Could Do In 1/2 The Time...WTF With All The Different Sized Screws!

-
07-09-2018 #10Enthusiast
- Join Date
- Nov 2013
- Location
- Houston Texas
- Posts
- 12
THANK YOU for the detailed instructions as it was a great help this weekend.
My cables were all mangled up & no new regulators for sale so I sent mine to Florida to be rebuilt. 180.00.
-
07-16-2018 #11Enthusiast
- Join Date
- Nov 2013
- Location
- Houston Texas
- Posts
- 12
Anyone know what this part is? I had it left over after putting everything back together.
Viper Door Part 7-2018.jpg
-
09-29-2021 #12Enthusiast
- Join Date
- Jan 2018
- Location
- Motor City
- Posts
- 90
can I still do this if my window is stuck on the top? My motor burned out with the window closed.
-
10-20-2021 #13Enthusiast
- Join Date
- Jul 2019
- Location
- Northeast, Ohio
- Posts
- 50
Great tutorial. I was able to get this handled fairly quickly, and without meddling with the stanchion.
-
04-30-2023 #14Enthusiast
- Join Date
- May 2020
- Location
- Avon, IN
- Posts
- 13
The slide block broke on mine and now the two cables are too far away from each other to connect into the new slide block. Anyone know how to get them back together? Has anyone had any luck opening the cover over the cables on the motor?
Last edited by JForbing; 04-30-2023 at 01:29 PM.


 Reply With Quote


 Posting Permissions
All times are GMT -5. The time now is 06:59 PM.

Powered by vBulletin® Version 4.2.4 Beta 1
Copyright © 2024 vBulletin Solutions, Inc. All rights reserved. vBulletin Skin By: PurevB.com
Copyright © 2024 vBulletin Solutions, Inc. All rights reserved. vBulletin Skin By: PurevB.com
Shoutbox provided by
vBShout (Lite) -
vBulletin Mods & Addons Copyright © 2024 DragonByte Technologies Ltd. Runs best on HiVelocity Hosting.
Copyright © Viper Owners Association - All Rights Reserved
Bookmarks