Great thread! This is probably on my list as well since my A/C struggles to be cold now and also I need to change the seals on the whole system. Change the pulleys on everything to IPSCO, etc. it just means a bunch of stuff when you get in there. Ha! Ha!
However does anyone have a diagram of the specific o'ring areas on the A/C system and sizes of the o'rings? As well has anyone created a spreadsheet table of all the parts needed and the specific part numbers for each part of the A/C system? Sorry I am an engineer and can only seem to function in spreadsheets these days. Ha! Ha!
Results 26 to 50 of 55
-
06-17-2017 #26Enthusiast


- Join Date
- Nov 2013
- Location
- Rocky Mountains
- Posts
- 1,888
-
06-17-2017 #27Enthusiast


- Join Date
- Sep 2016
- Location
- OK Falls, British Columbia Canada
- Posts
- 80
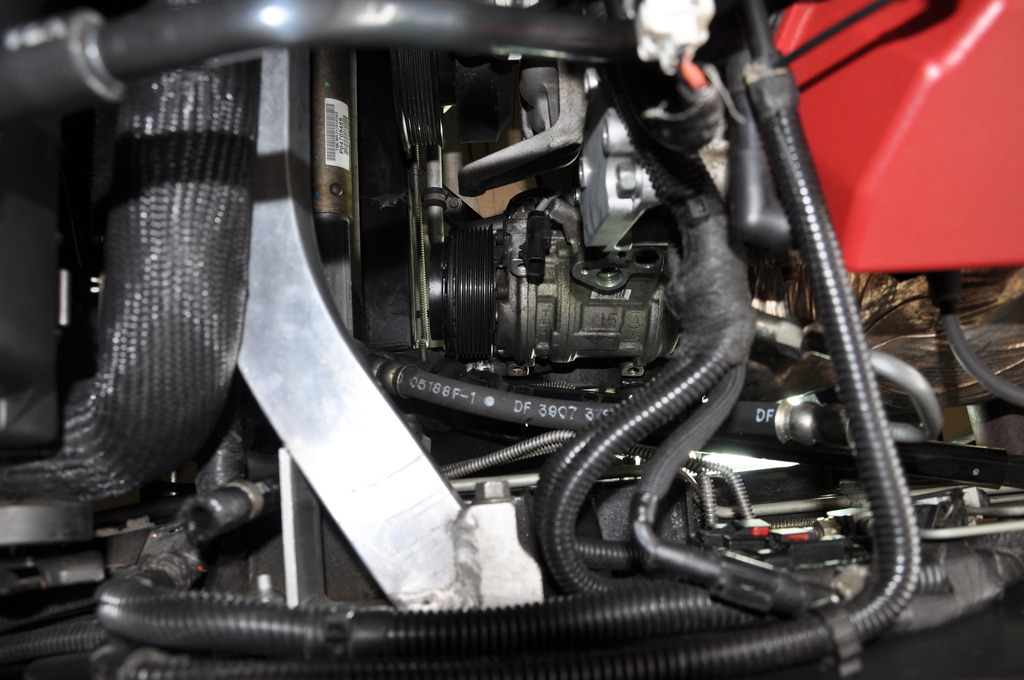
[QUOTE=My98RT10;303125]Yesterday, I removed the compressor. I tried to remove it from the top after unbolting the steering pump and moving it aside. No luck. I tried to remove it from the bottom, no luck either. Finally, I removed the steering pump from the vehicle and got the compressor out from the top. The shop manual does not provide any info as to what the "official" way of removal is... would be curious if anyone had been able to remove it from the bottom without removing other stuff first....?
Pump just unbolted, but not enough room to get the compressor out:
The pump comes out to through top but you have to turn it around with pulley facing upwards. Many exotics are this way, you got to find the right orientation to deal with.Did you remove the p/s pump pressure side hose connector and put the p/s pump past the aluminum cross member? I also remove the airbox and hoses attached to it. More room the better.
Pump removed, looks much better now:
-
06-17-2017 #28Enthusiast


- Join Date
- Nov 2013
- Location
- Germany
- Posts
- 992
I only unbolted the pump with the hoses attached. This way I could not move it enough to whatever side so that I could get the compressor out. Instead of trying for an hour or so I thought I would be quicker when just disconnecting the pump completely and remove it. Unbolting it took quite some time already.... I did not remove the air box, just the smooth tube. But thanks for the tips!
-
06-18-2017 #29Enthusiast


- Join Date
- Nov 2013
- Location
- Germany
- Posts
- 992
I will certainly post the o-ring sizes I have used, so stay tuned! In general, AFAIK, there are 2 o-rings for the compressor lines, 2 for the lines at the condensor and another 2 at the drier. In addition, there are the o-rings for the compressor itself, which you only need if you disassemble the compressor (like I did). For this you need to buy a seal kit, see one of the pictures in this thread.
-
06-18-2017 #30Enthusiast


- Join Date
- Nov 2013
- Location
- Germany
- Posts
- 992
-
06-18-2017 #31Enthusiast


- Join Date
- Jun 2016
- Location
- Murphy
- Posts
- 112
-
06-18-2017 #32Enthusiast


- Join Date
- Nov 2013
- Location
- Germany
- Posts
- 992
-
06-18-2017 #33Enthusiast


- Join Date
- Nov 2013
- Location
- Germany
- Posts
- 992
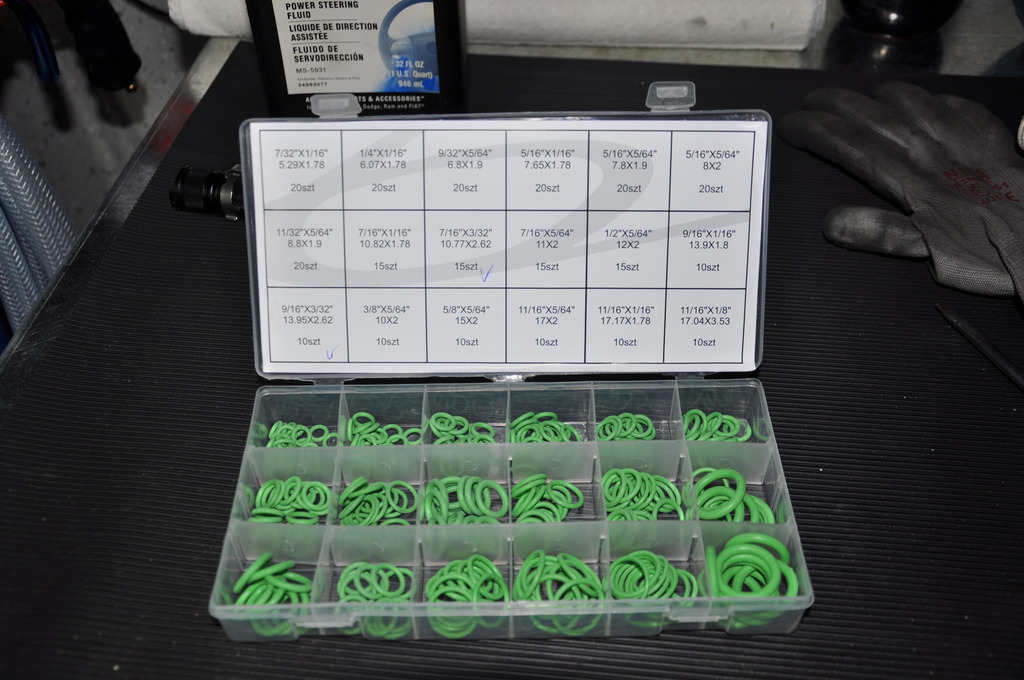
Here are now the dimensions of the o-rings I used so far:
Compressor (2 different sizes):
9/16" x 3/32"
7/16" x 3/32"
Condensator (both connections same size):
2 x 7/16" x 3/32"
Drier to follow...
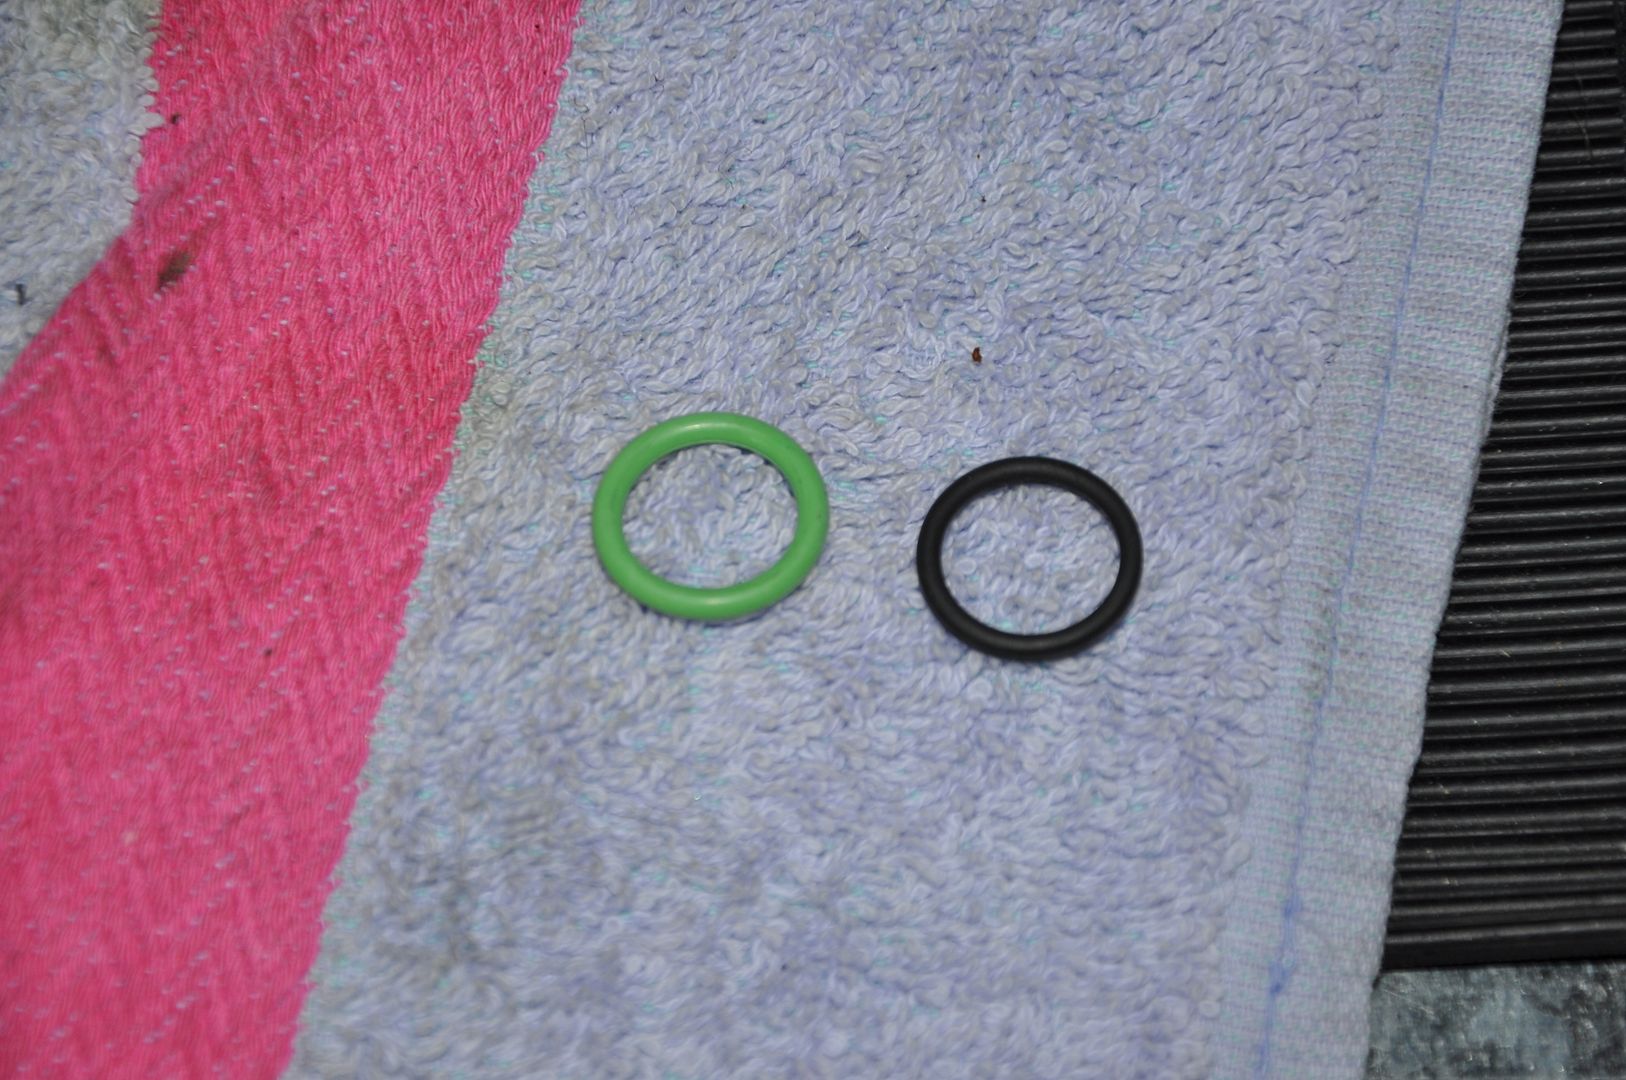
Black=old, green=new... the new ones are a little thicker but went in fine...
-
06-18-2017 #34Enthusiast


- Join Date
- Nov 2013
- Location
- Germany
- Posts
- 992
Today I replaced the o-rings at the condensator... what a PITA... had to remove the front fascia and some more parts to get finally access to the fittings... they are pretty well hidden! Sorry that I don't have pictures from every single step, I was very busy figuring out what to remove and how that I forgot about it...
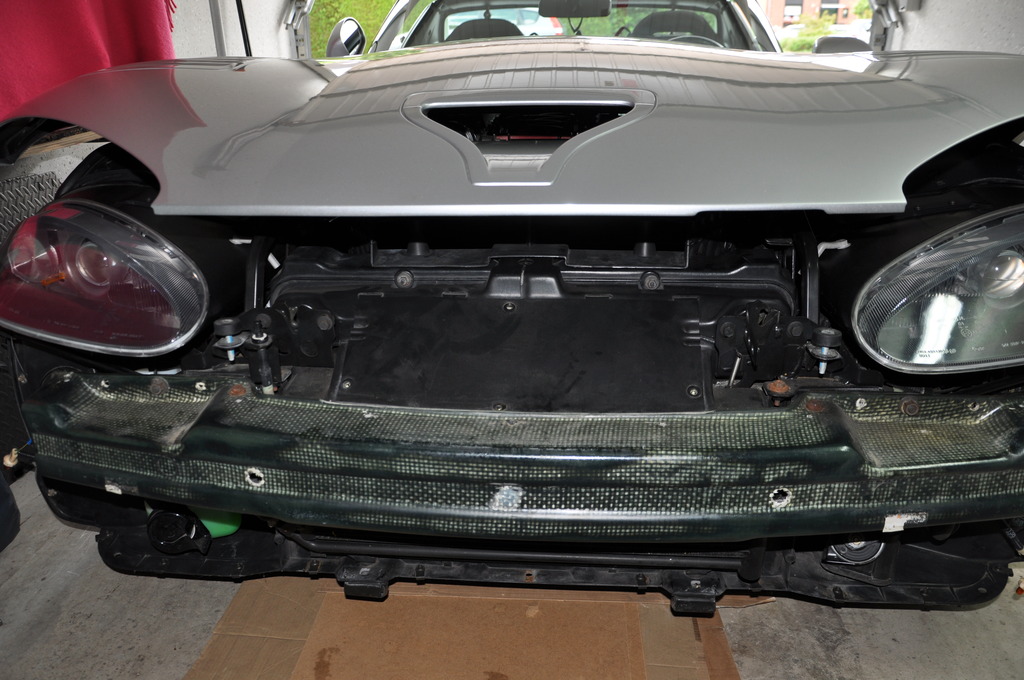
After removing that black plastic cover panel in the middle I had to unbold the next plastic covers, left and right (these are actually held in place by push pins) so I could move them out of the way. Now, I could get access to the bolt of the fitting(s).
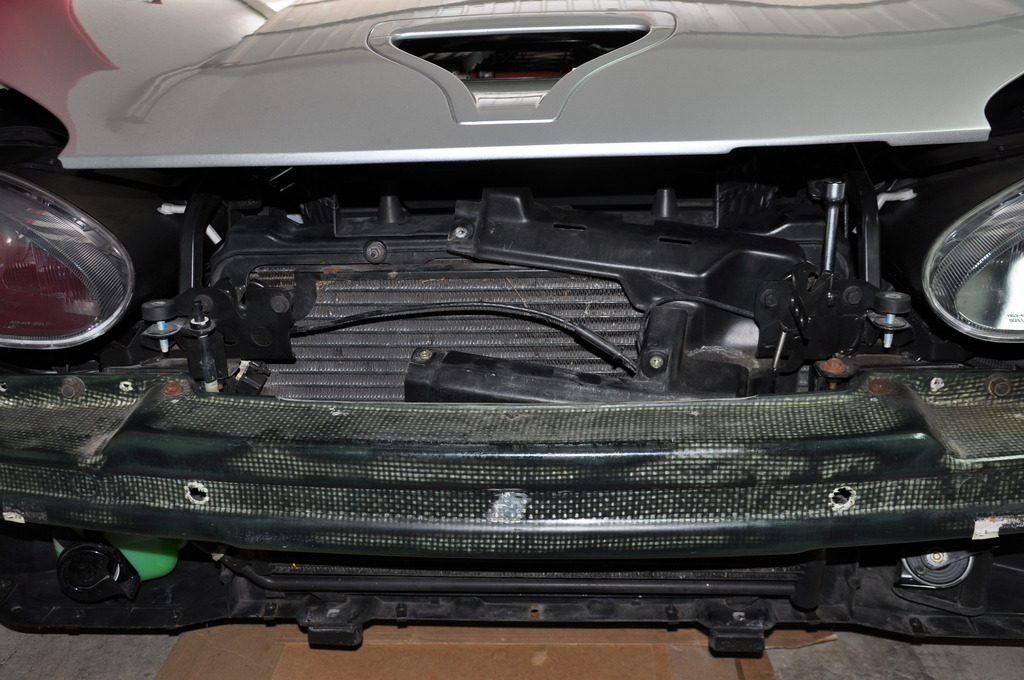
Fitting on driver's side

Fitting on passenger's side (under the hood latch)
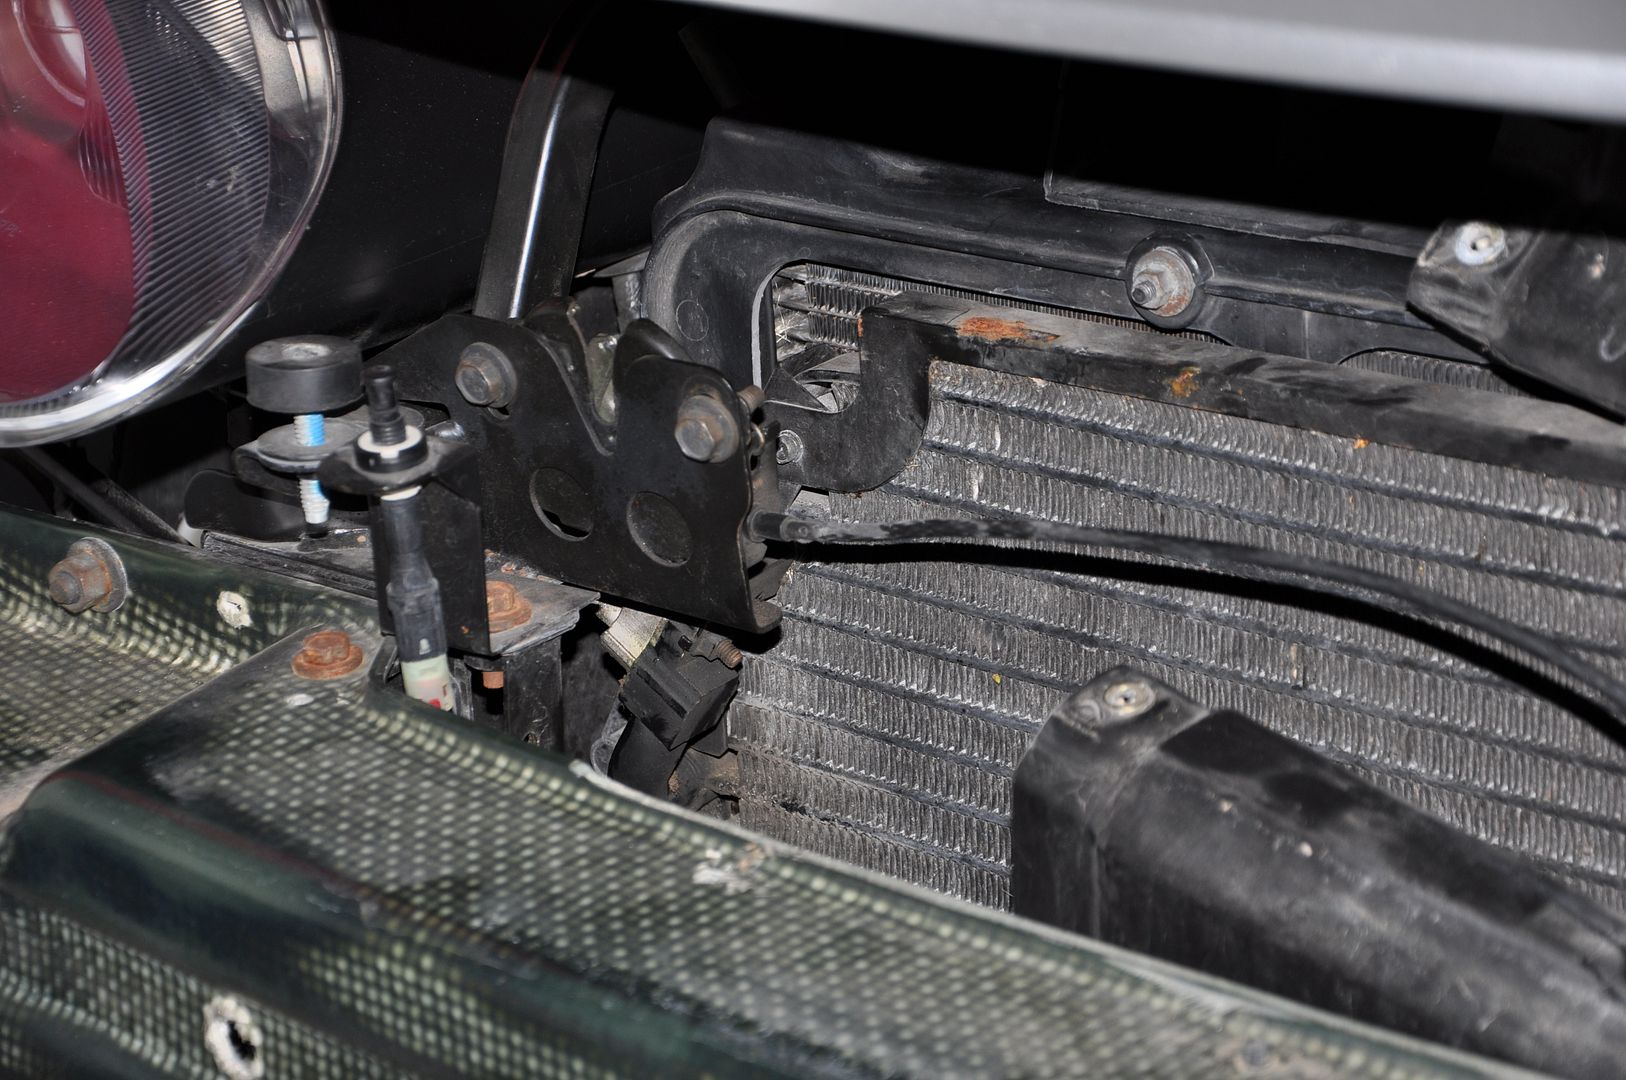
I replaced the o-rings and will pray now, that everything is leak free. Will see this week when I go the shop again and re-charge the system.
-
06-23-2017 #35Enthusiast


- Join Date
- Nov 2013
- Location
- Germany
- Posts
- 992
Update: I have everything together and went back to the shop that drained my refrigerant earlier. Apart from adding the factory fill of 822gr of R134a I calculated the amount of compressor oil that needed to be added.
It summed up to 83ml:
- 13ml were removed by draining the refrigerant
- 30ml due to replacing the drier (according to the shop manual)
- 40ml I drained from the compressor before disassembly
The DENSO oil installed from factory is ND-8 PAG, the equivalent aftermarket oil is a PAG 46 oil (you should make sure that you buy double end capped oil for better stability), of which I bought a small bottle (250ml).
Yesterday I went back to the shop and wanted to get my system filled again. I asked them what oil they have and it turned out that they only had PAG 100 oil, which is of higher viscosity than PAG 46. As I did not want to put in oil with different spec I left the shop again with an empty AC system.
Later I called another shop asking what kind of oil they would have available. Again, they had another type of oil, different spec... bummer.
I then decided to put in the needed oil myself, as I had the required amount available. So I poured the 83ml directly into the outgoing port of the drier. DENSO actually recommends NOT to add oil to the compressor directy, but to add it to the drier or condensator.
Today I went back to the shop and instructed them to pull a vacuum and only add refrigerant and not any oil, which they did. So, AC is working again (well, it worked before, I only tackled this because I detected some leaks). Will monitor the system now and hope for no more leaks.
BUT, what is really concerning me: obviously these 2 shops don't care what kind of oil is required by the specific make. They always use the one single oil they have available, regardless of what kind of compressor the customer has in its car. Most customers don't know and won't ask, but some oils should definitively not be mixed....
So, next time you go for a refill, ask the shop for the correct oil. Otherwise you run a risk of having different oils in your AC, which can cause problems with your compressor down the road.
-
06-23-2017 #36Enthusiast


- Join Date
- Sep 2016
- Location
- SoCal
- Posts
- 862
Damn that looks like a pain in the ass! Props to you sir I would have just bought a new compressor (probably still would if needed) lol
-
06-25-2017 #37Enthusiast


- Join Date
- Nov 2013
- Location
- Germany
- Posts
- 992
-
06-25-2017 #38Enthusiast


- Join Date
- Nov 2013
- Location
- Germany
- Posts
- 992
Yesterday I took it for a spin and measured the outgoing air at the center air duct with an oven thermometer. Ambient temp was 25°C (77°F). When idling the conditioned air temp was 9°C (48°F) and when driving, the temp went down to 4°C (39°F). Comparing it with the specs in the shop manual it seems to be in the ok range. I had never measured the temps in the past so I cannot compare it to what it was before I started the overhaul....there's probably not a big difference as I had still 766g of refrigerant in system when they drained it (total capacity is 822gr.).
Nevertheless, I'd be interested to hear, what kind of temperatures you guys achieve?
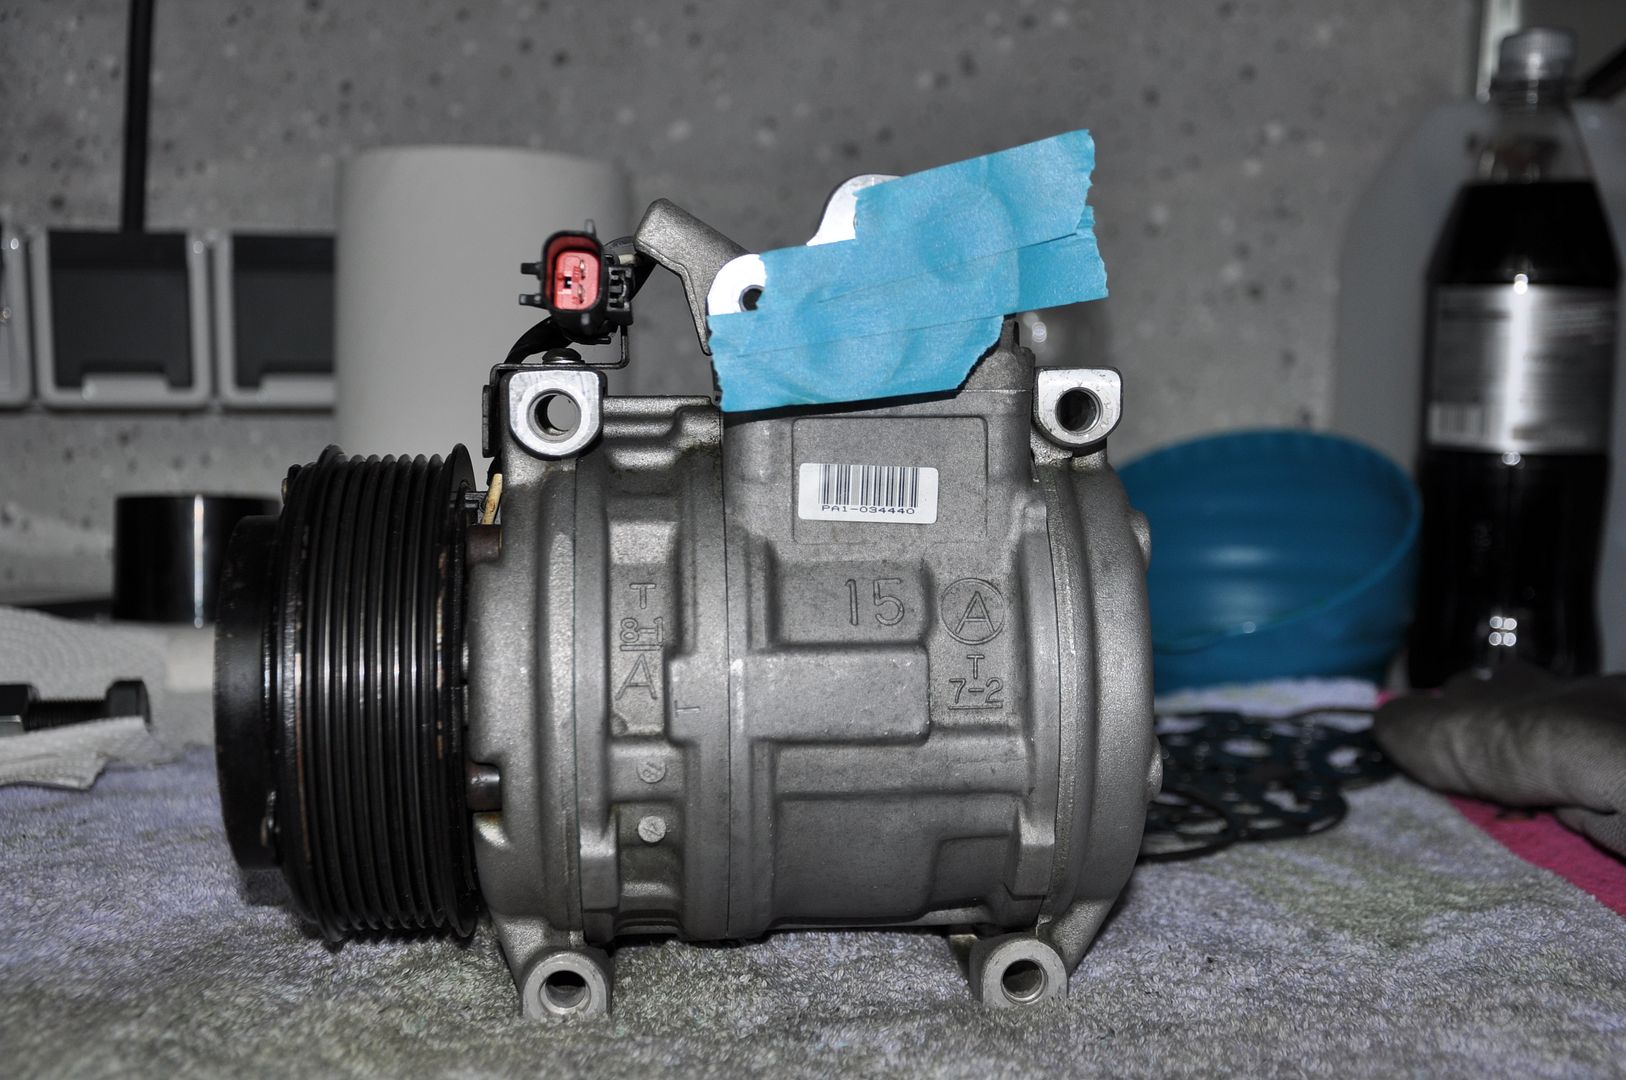
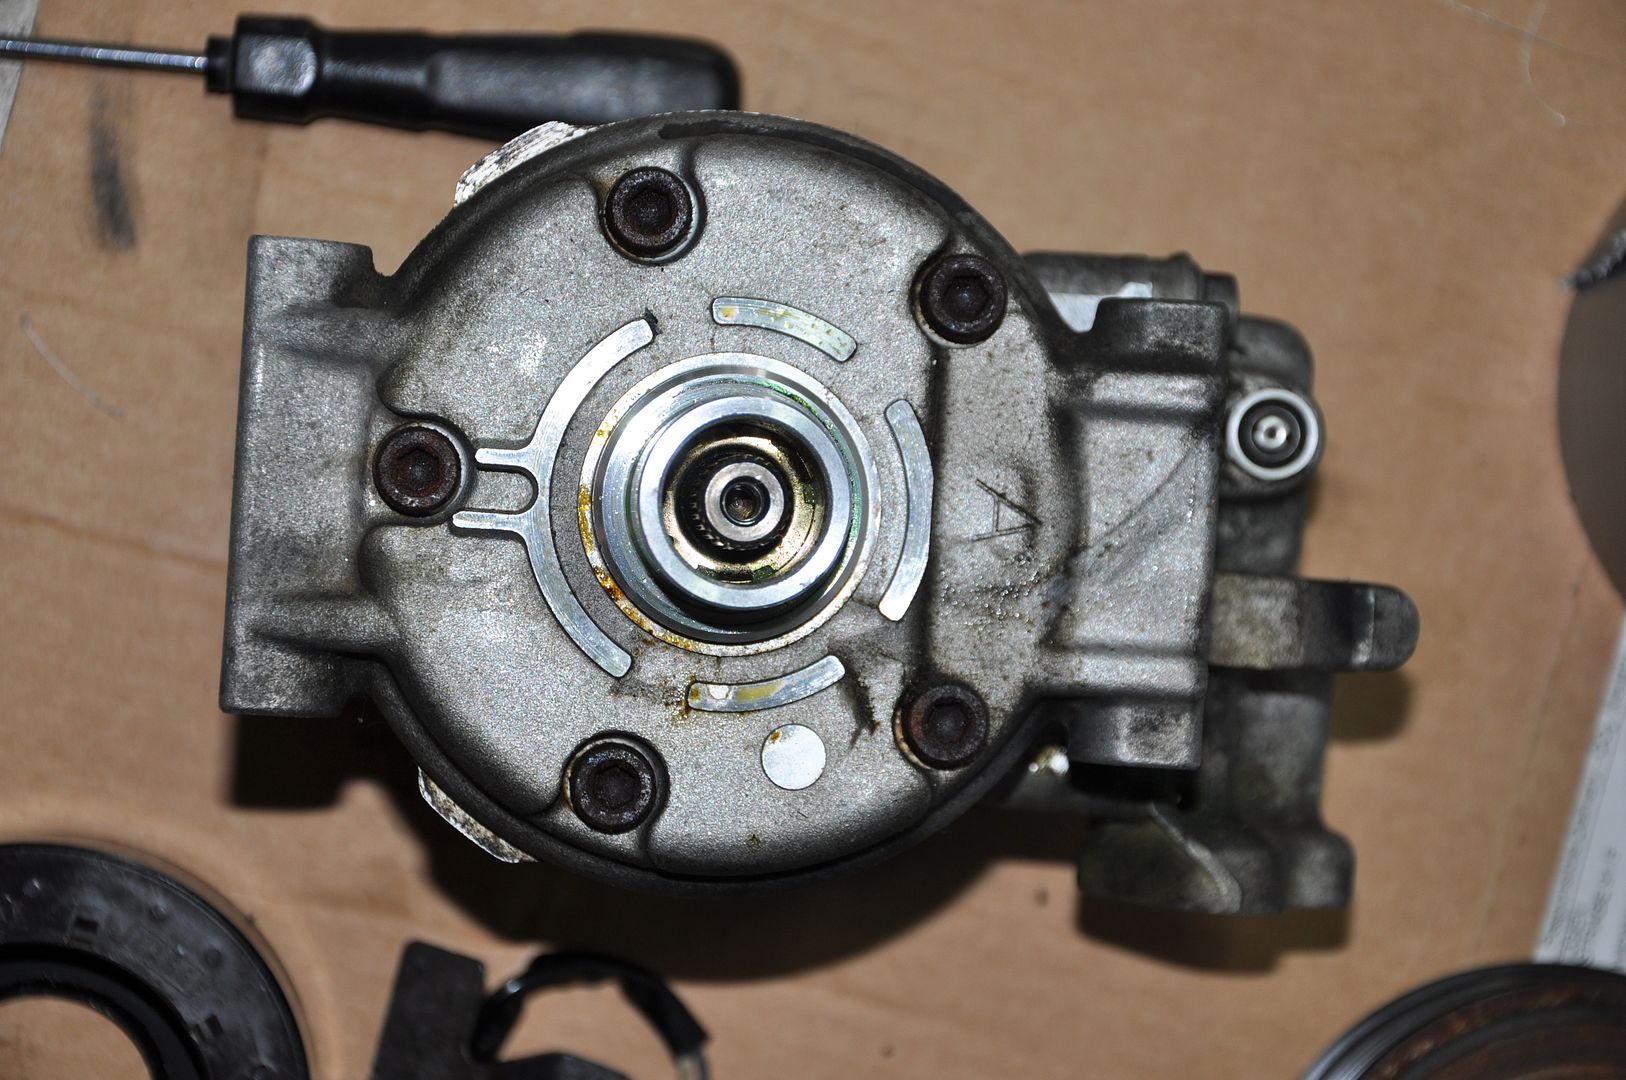
Here's the overhauled compressor before it went in again. Will share some more pics from the internals later....
-
06-26-2017 #39Enthusiast


- Join Date
- Oct 2013
- Location
- Viper Drive, AZ
- Posts
- 793
Thanks for all the info. I really appreciate this thread. I'll be replacing mine in the very near future.
-
06-26-2017 #40Enthusiast


- Join Date
- Oct 2013
- Location
- South of London, Surrey
- Posts
- 7,577
Nice Job
-
06-28-2017 #41Enthusiast


- Join Date
- Nov 2013
- Location
- Germany
- Posts
- 992
You are welcome!
Thanks!
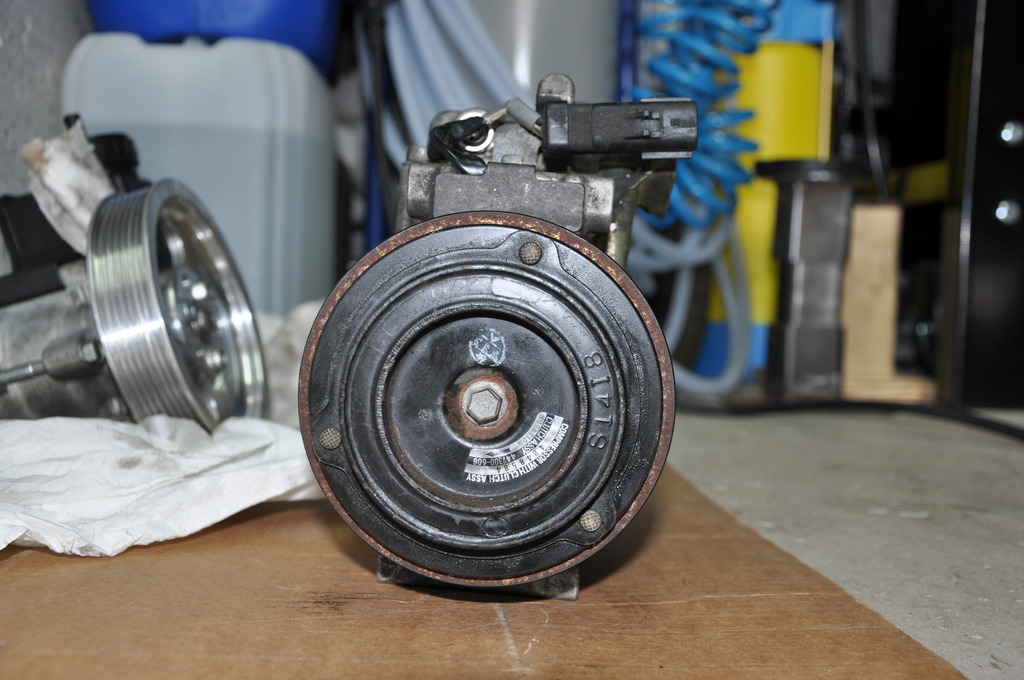
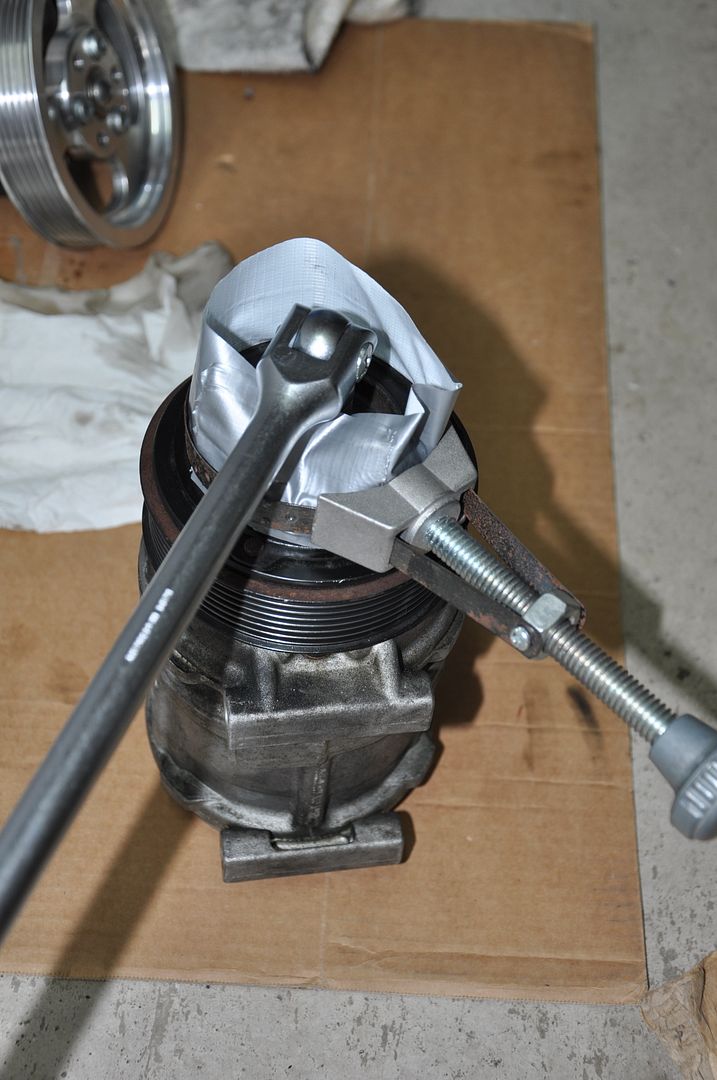
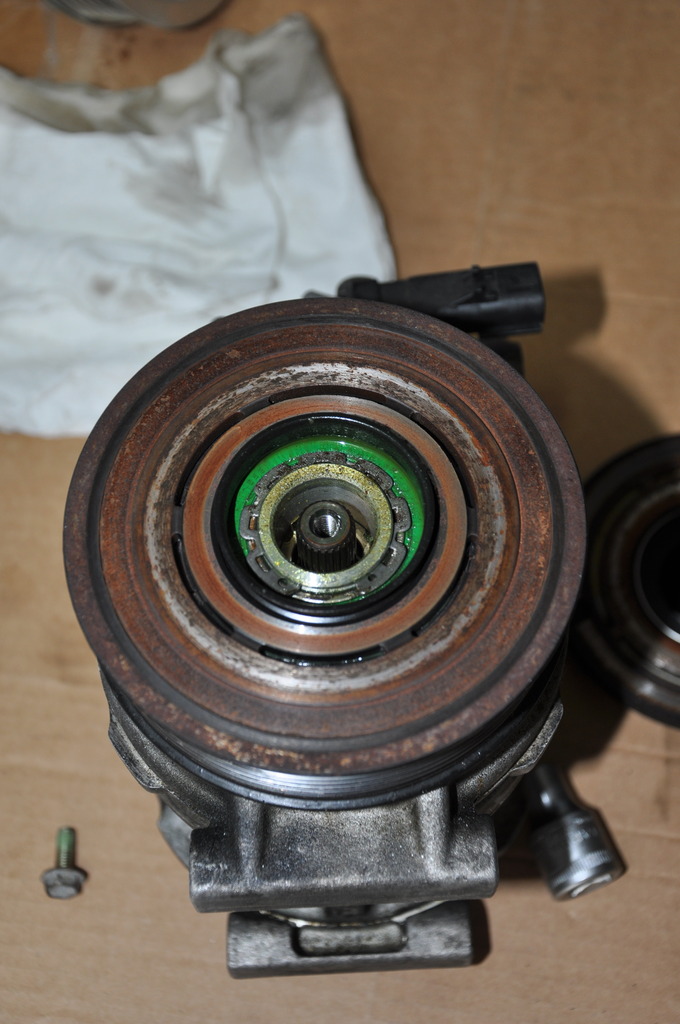
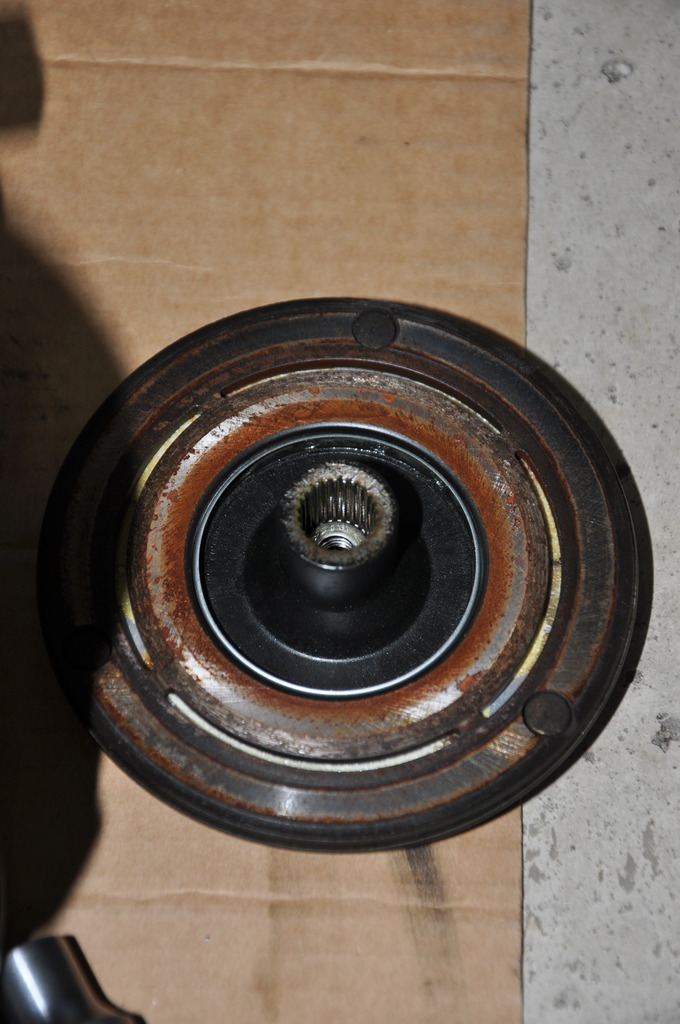
I still wanted to show the internals of the compressor, so here are some teasers
Front cover removed:
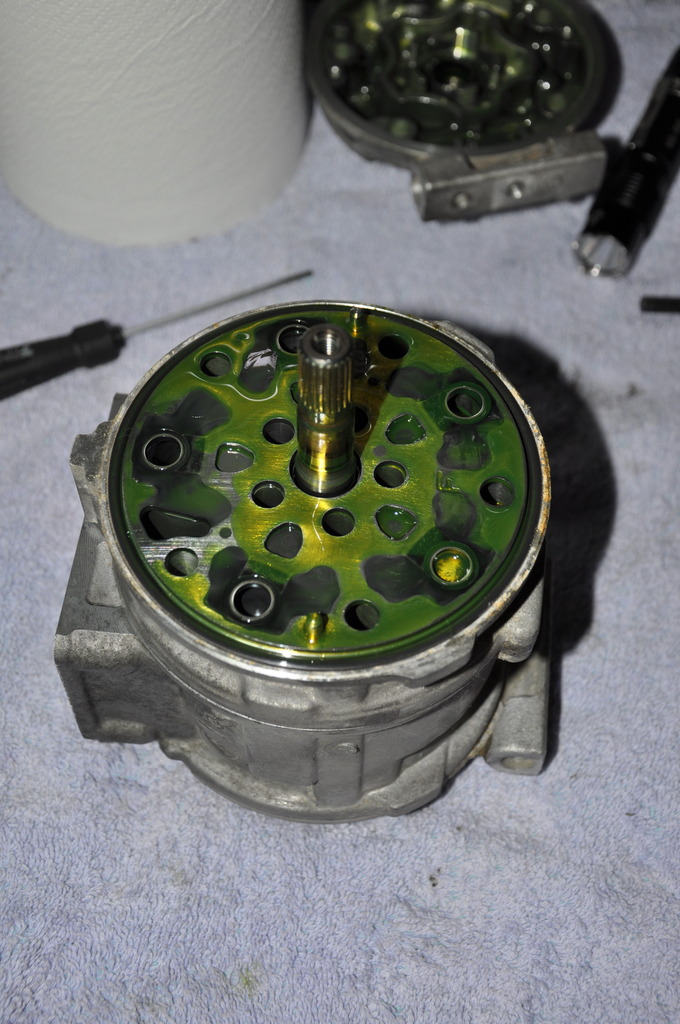
Valve steel plates and gasket removed, obviously it is a 10 piston compressor (5 in the front and 5 in the back), hence the model name 10PA15C!?
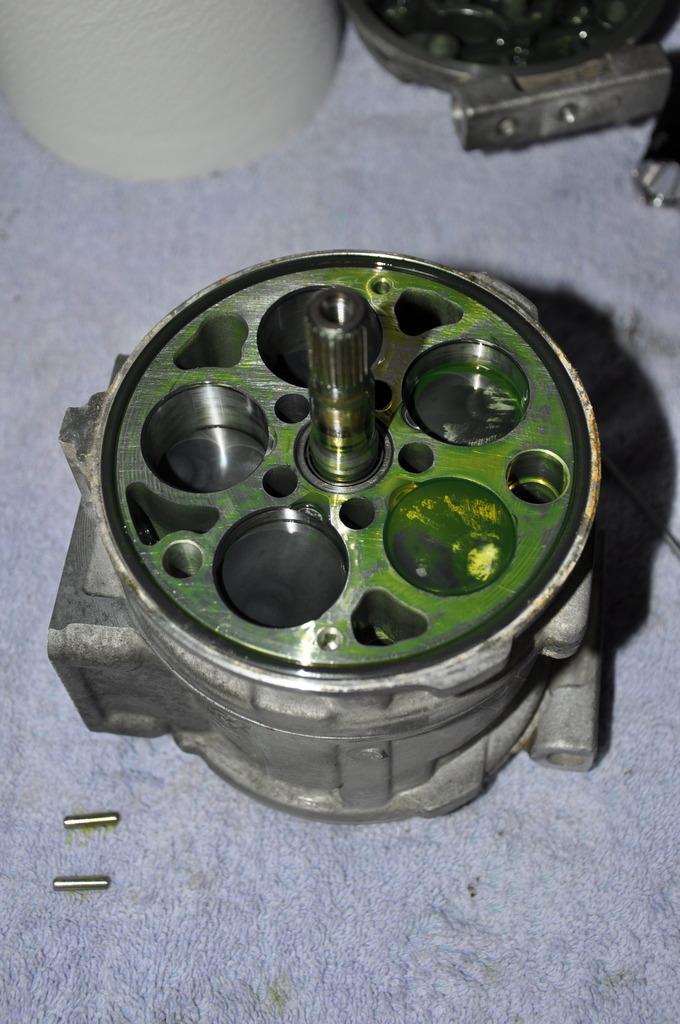
Center piece removed:
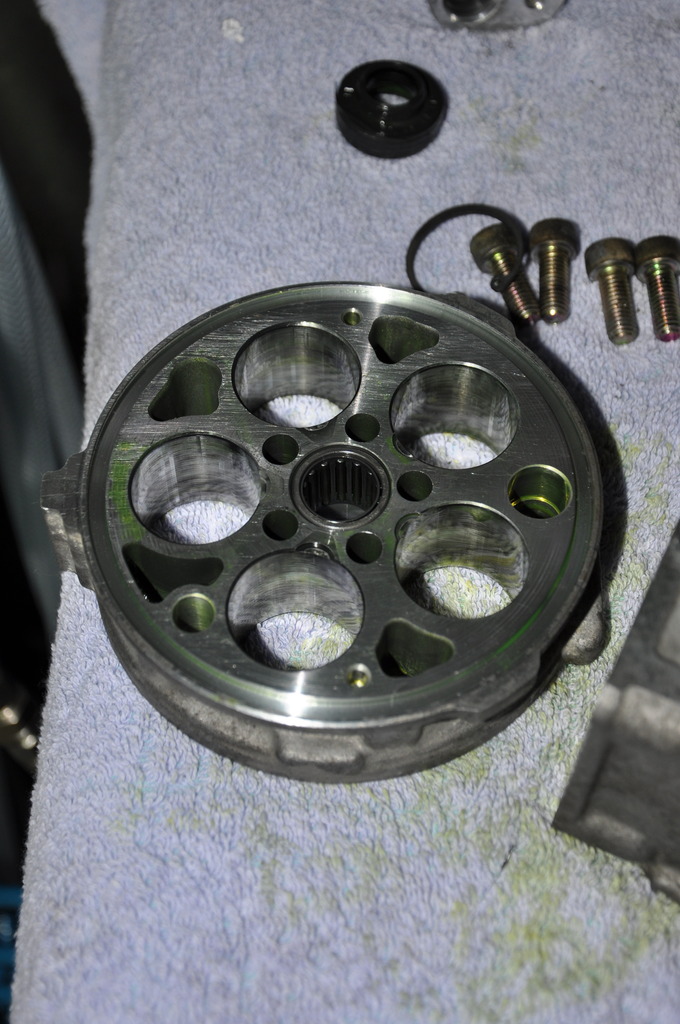
Compressor pistons:

New o-ring installed:
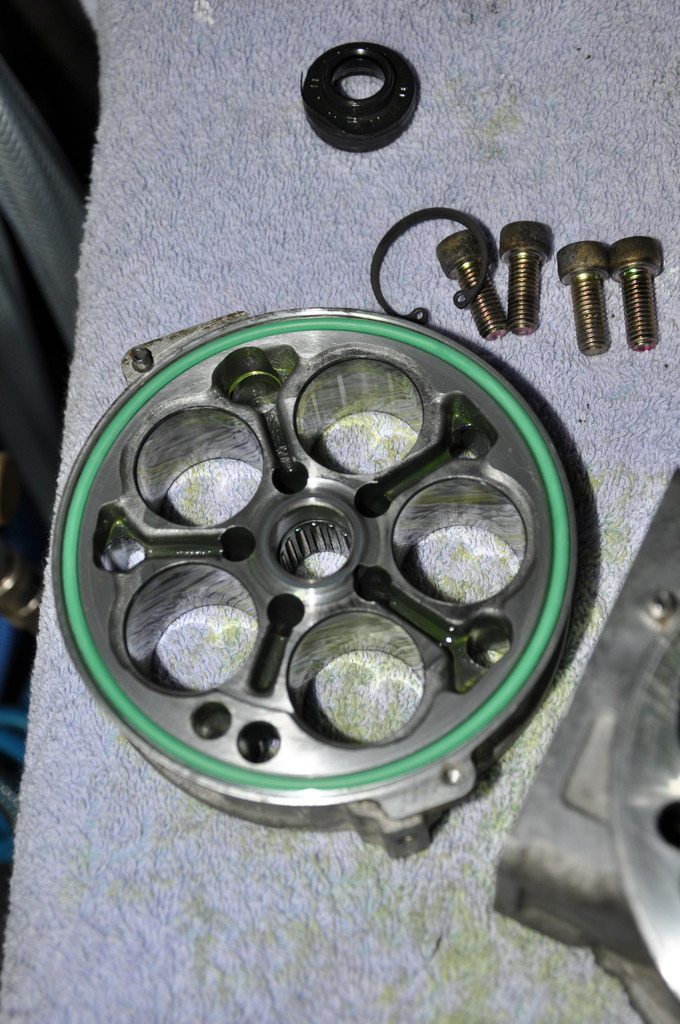
A little bit of wipe down...
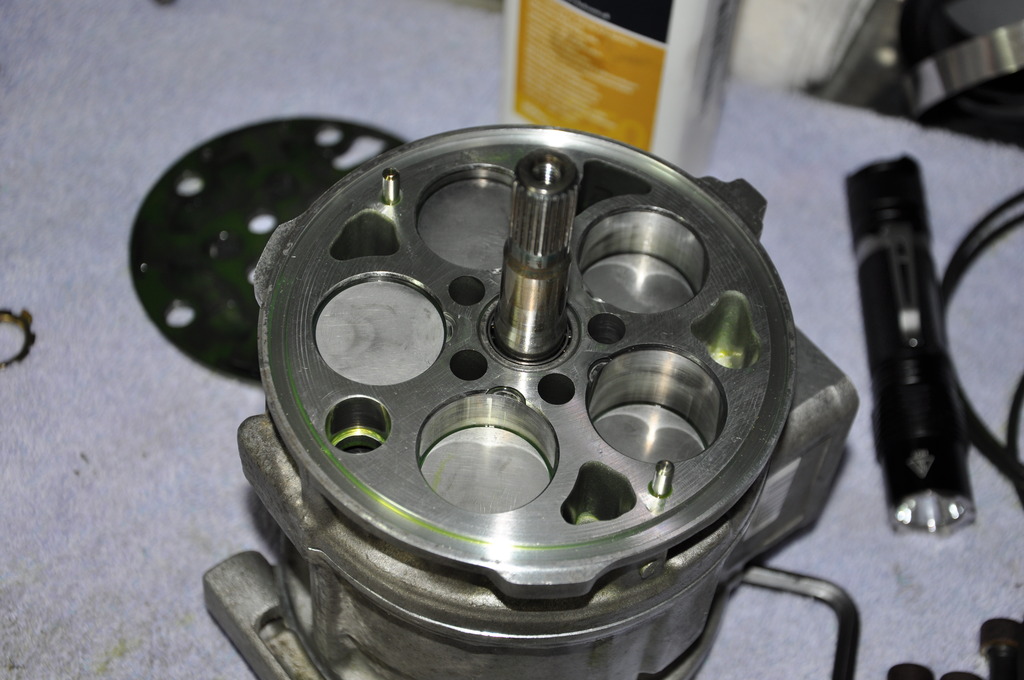
New o-ring and valve steel gasket, lip seal protector installed to prepare for installation of the front cover w/new shaft seal...
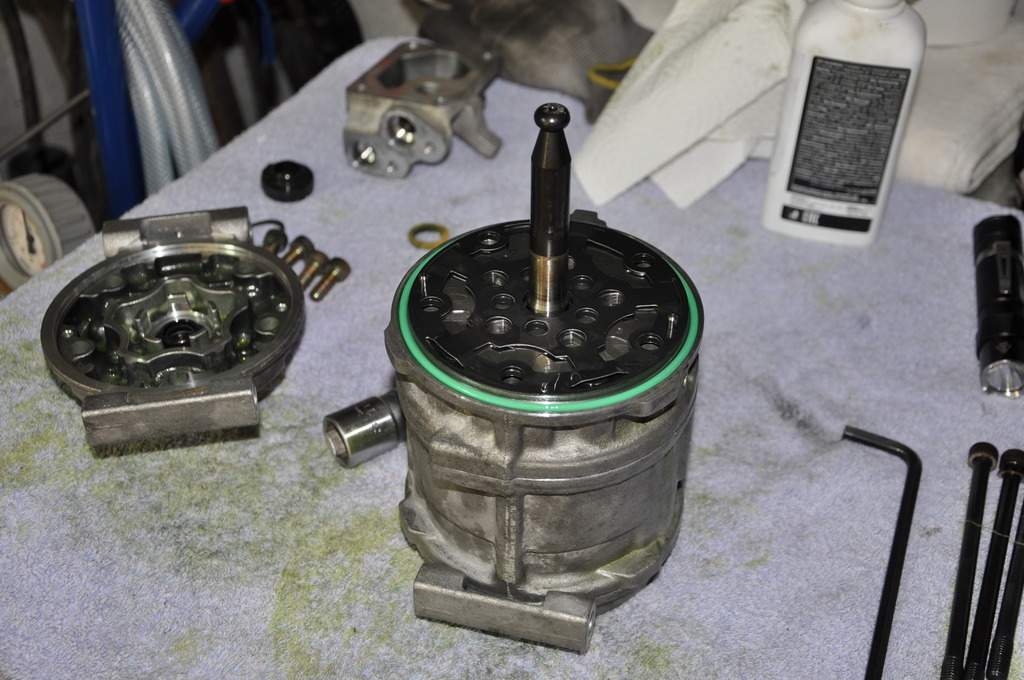
Front cover back on with new shaft seal...
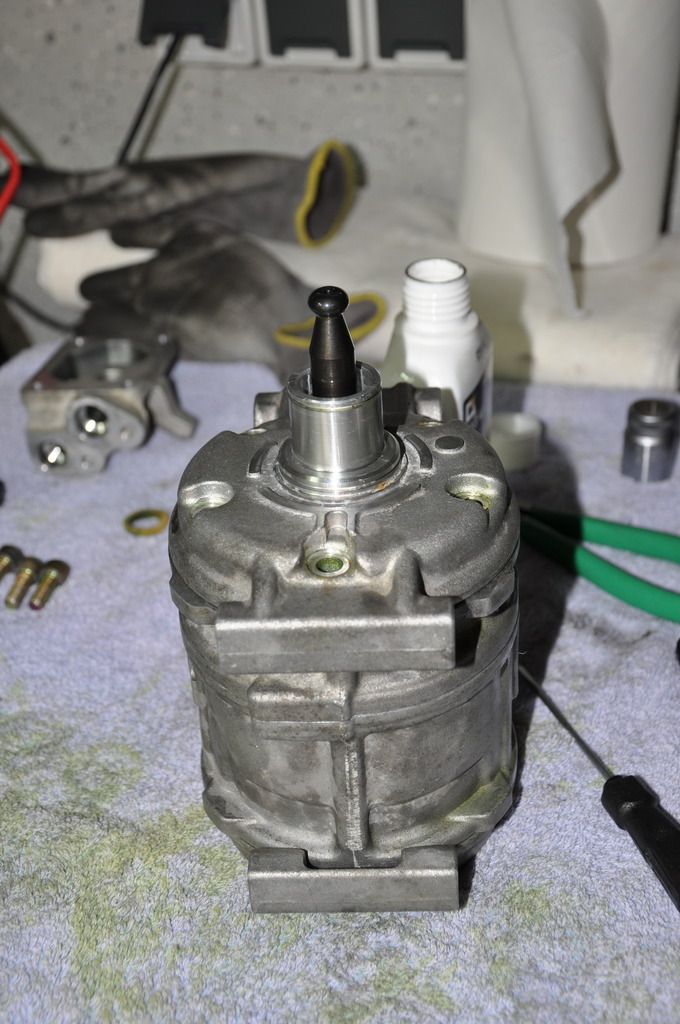
New o-ring also on connection plate...
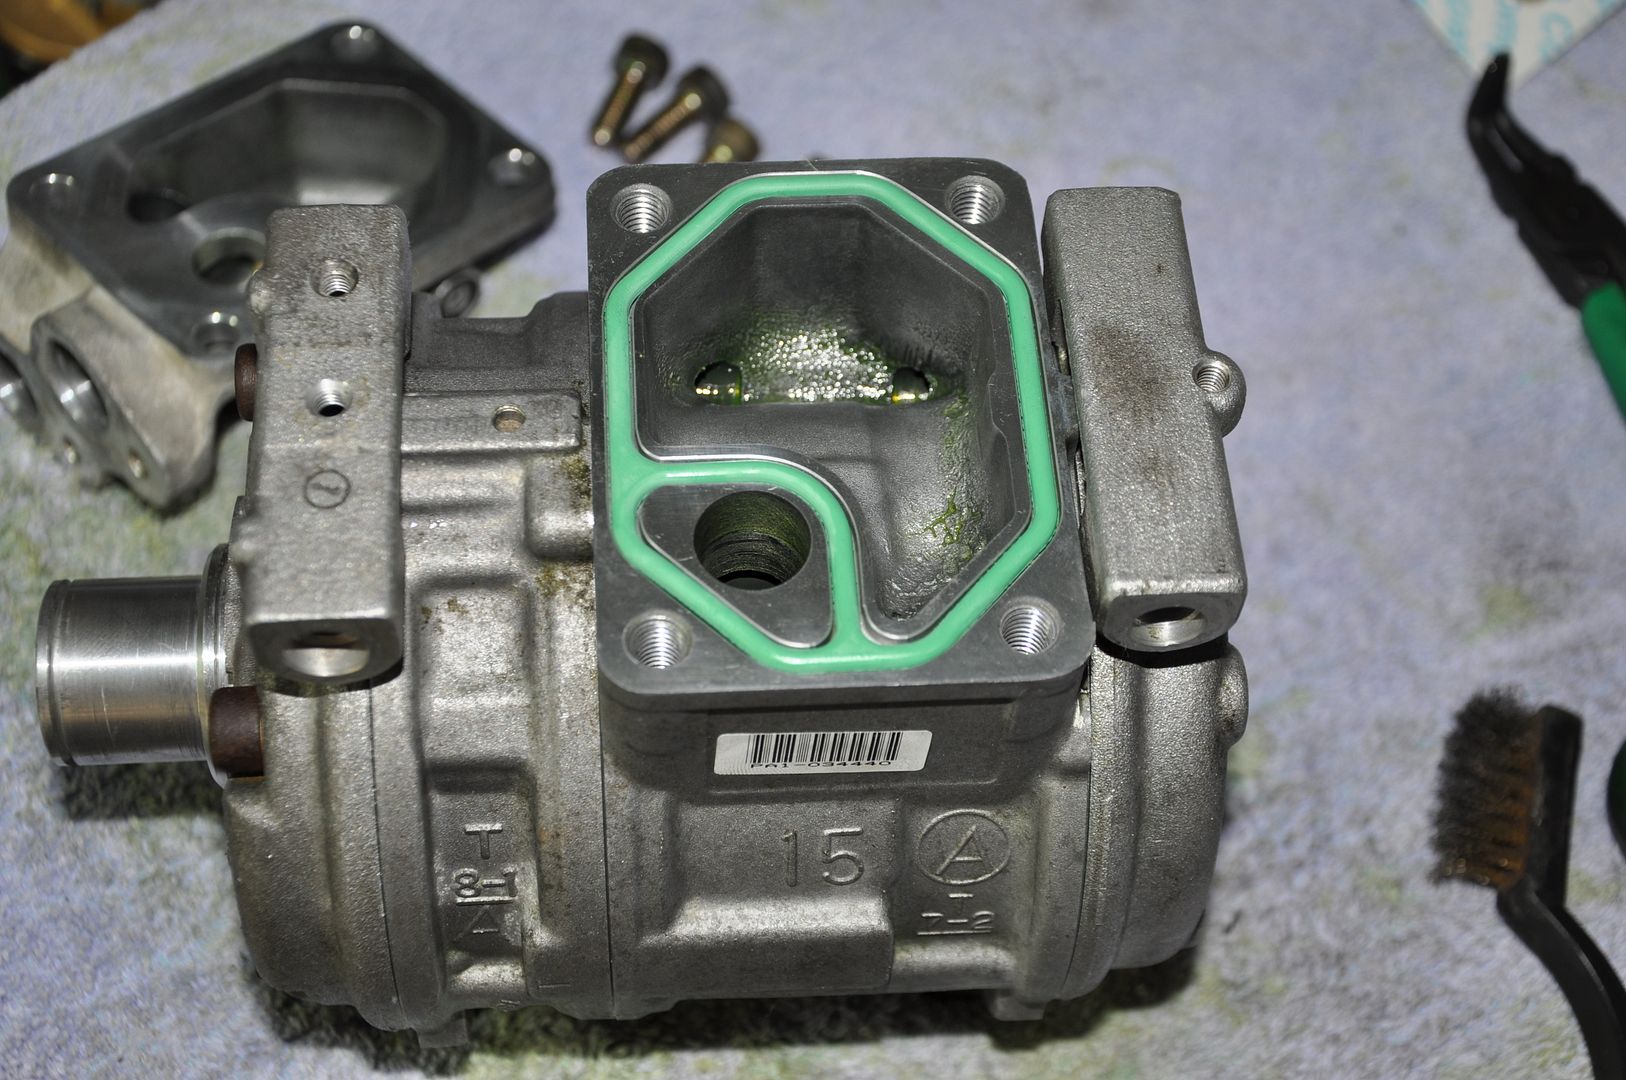
Re-sealed product, ready to put the clutch and pulley back on...

-
06-29-2017 #42Enthusiast


- Join Date
- Aug 2015
- Posts
- 232
Very cool! Thanks for the pics.
-
07-01-2017 #43Enthusiast


- Join Date
- Nov 2013
- Location
- Germany
- Posts
- 992
Here's again the overview of o-ring sizes I have used:
Compressor (2 different sizes):
9/16" x 3/32"
7/16" x 3/32"
Condenser (both connections same size):
2 x 7/16" x 3/32"
Drier (both connections same size):
2 x 9/32" x 5/64"
Tip: don't buy the Mopar drier (Viper/Mopar tax!!). Buy aftermarket part from Denso (DFD09001) or equivalent, should get it for around 15$ (or even less).
-
08-28-2017 #44Enthusiast


- Join Date
- Oct 2013
- Location
- Viper Drive, AZ
- Posts
- 793
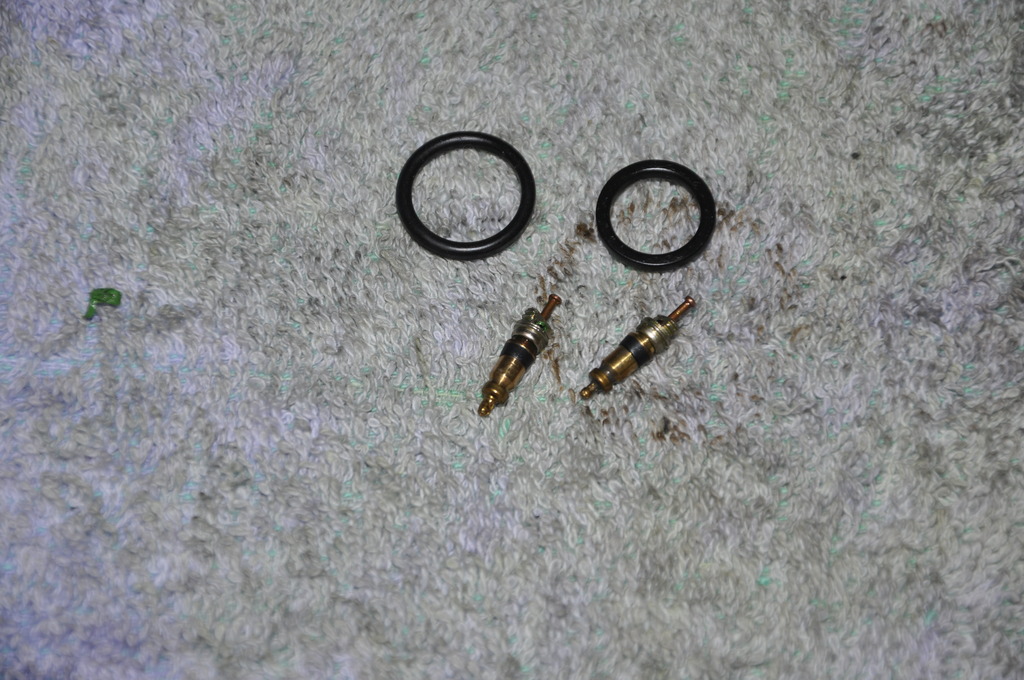
I just ordered a new compressor. Anybody know the valve core sizes? I'm looking at them on Amazon. I haven't pulled mine yet.
51VLsa6WKoL._SL1000_.jpg
-
08-29-2017 #45Enthusiast


- Join Date
- Nov 2013
- Location
- Germany
- Posts
- 992
I need to check later today, what size I used. I bought an assortment of valves as I didn't know either and the correct ones were included. Now I have a bunch of sizes I don't need LOL
-
08-29-2017 #46Enthusiast


- Join Date
- Nov 2013
- Location
- Germany
- Posts
- 992
At least found a picture of the correct ones...
-
08-29-2017 #47Enthusiast


- Join Date
- Dec 2016
- Location
- Denver, CO
- Posts
- 53
-
08-29-2017 #48Enthusiast


- Join Date
- Oct 2013
- Location
- Viper Drive, AZ
- Posts
- 793
RockAuto
DENSO (471-0355) A/C Compressor
Cost - $193.79
Discount 5% - $9.69
Shipping Ground - $6.99
Order Total - $191.09
I ordered it yesterday and got it today.
-
08-30-2017 #49Enthusiast


- Join Date
- Dec 2016
- Location
- Denver, CO
- Posts
- 53
^^^Thanks!!!
-
08-30-2017 #50Tech Team


- Join Date
- Oct 2013
- Location
- Santa Monica Ca
- Posts
- 819
We do quite a bit of AC work on the Gen 1-2 Vipers. Most common leakage problems are the o-rings at the compressor and condenser and the service port valves. Next would be the front compressor seal and hoses. 1999-2002 Vipers are known for a leaky high pressure hose at the compressor. Exhaust manifold heat damages the hose. The easy fix is to simply bend the factory exhaust manifold heat shield over the area where the heat is radiated.
Always install leak dye if it's a small leak, charge the system and drive it for a day. At that point the areas where the leaks are will be evident. The hoses can be sent out and repaired. Many are no longer available.
I always use the Factory red and black seals. The cheap green seals just get hard and leak after a year.
I have new compressors in stock for $200 each, so I always replace, not repair compressors.
Hope this helps.Last edited by Dan Cragin; 08-30-2017 at 05:45 PM.


 Reply With Quote



Bookmarks